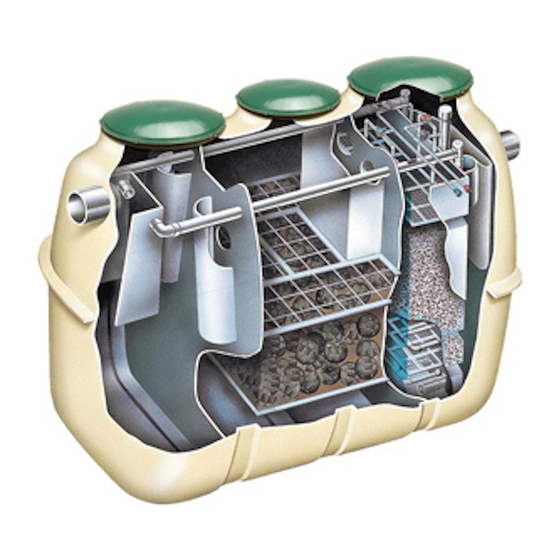
Clarus ZF-800 Benutzerhandbuch - Seite 12
Blättern Sie online oder laden Sie pdf Benutzerhandbuch für Water Filtration Systems Clarus ZF-800 herunter. Clarus ZF-800 20 Seiten. Treatment systems

FUSION
The following steps are to be completed during each
6-month inspection. All information collected during the
inspection is to be recorded on the Maintenance and Service
Report (CL0059). Begin the inspection by recording the date,
arrival time, weather conditions, purpose of the visit, water
use, model number, serial number, the presence or absence
of a septic tank, and the system owner and service provider
information in the space provided on the report.
GENERAL OBSERVATIONS
1. Are any odors present? There should be no odor
with the lids closed, if properly sealed. With lids
removed, a septic or sewer-like odor is indicative
of poor treatment and is common immediately after
startup due to hydrogen sulfide and other gases.
A well-operating system will have a musty, earthy
smell similar to wet peat moss.
2. Is there evidence of high water? Typically indicated
by a water level above the black wall markings
and above the "0" graduation on the partition
wall stickers. May also be indicated by debris on
partition walls.
3.
Is there excess foam formation? Foam may be
present during an inspection. Brown foam indicates
bacterial buildup following startup. White foam
is due to detergent use. Neither is a problem if
occurring intermittently. Detergent-based foam
will often be accompanied by low transparency
readings.
4. Is there residue build-up on piping? Typically
indicated by gray or black residue (dried foam)
on aeration chamber piping.
5. Is there even and vigorous bubbling? Bubbles
surfacing in the aeration chamber should be even
across the entire chamber. If uneven, cleaning steps
should resolve this issue.
REQUIRED WATER QUALITY ANALYSES
1. Transparency – Measures the ability of the water to
transmit light. Using the ladle, fill the transparency
tube with a water sample collected from the clean
water storage chamber. Looking down through the
water column, slowly drain the transparency tube
using the valve on the flexible hose until you can
first distinguish between the black and white colors
on the secchi disk in the bottom of the tube. When
the secchi disk is visible, close the valve and read
the transparency (in centimeters) on the side. Dirty
water samples transmit less light and result in a lower
transparency. A transparency reading > 20 cm is
preferred and 34 cm is average. Low transparency
may be due to a lack of biological activity as in a
young system, a recirculation rate that is too high,
or a system influent high in detergent concentration.
To correct low transparency readings not caused by
detergent, decrease the recirculation rate. Detergent
based problems may require consultation with owner.
OPERATION AND MAINTENANCE
®
2. Scum – Very small amounts of scum may accumulate
3. Sludge – Test the sludge depth using the sampling
PART B: Anaerobic Chamber - collect samples from the
outlet baffle of the anaerobic chamber to be used for
the following analyses:
1. Transparency – A transparency reading more than
2. Scum – Should not be present unless recirculation
3. Sludge – A range of 0" to 15" (0-38 cm) is preferred.
© Copyright 2020. All rights reserved.
12
in the corners on the outlet end of the system. This
is normal. Scum, should not be present elsewhere
in the clean water storage chamber unless the
recirculation rate is too high or daily flow exceeds
the design capacity. If present, use ladle to transfer
to sedimentation chamber.
device included in the maintenance kit. The bottom
section of the sampler includes a check valve, which
opens as the unit is lowered into the liquid. When
the sampler has reached the bottom of the chamber
and the liquid level equilibrated at surface level, lift
the sampler and this action will set the check valve
and retain the sample in the tubing. Withdraw the
sampler and note the depth of settled solids within
the sample. To release the material in the unit,
touch the stem extending from the bottom section
against a hard surface such as the partition wall in the
sedimentation chamber. This opens the check valve
to drain the sample. A range of 0" to 4" is preferred.
Typically solids are brown and well flocced. More than
4" (0-102 mm) is typically due to high recirculation
rates and sludge will appear black in color. To correct
sludge depths greater than 4" (0-102 mm), decrease
the recirculation rate and increase the backwash rate.
Sludge Descriptions:
Black – septic or sewer-like odor due to hydrogen
sulfide and other gases
Brown – undigested sludge is light brown, becomes
darker with digestion, lightly settled
Clear – may see a clear water layer beneath solids if
gas carries solids upwards
Flocced - settled with texture similar to a tuft of wool
Grainy - gritty or sandy texture
Gray - partially digested sludge
Milky – light in color, cloudy, not transparent
Muddy – typically well settled, often present just after
startup, may be due to infiltration
Mustard - an off-color, remnants of digestion are often
yellowish in color
White - sometimes present after new construction
often due
to drywall mud
20 cm is preferred.
and/or backwash rate is too high or daily flow exceeds
design capacity. To correct, reduce the recirculation
and or backwash rate.
Typically brown and settled, becomes gray to black
