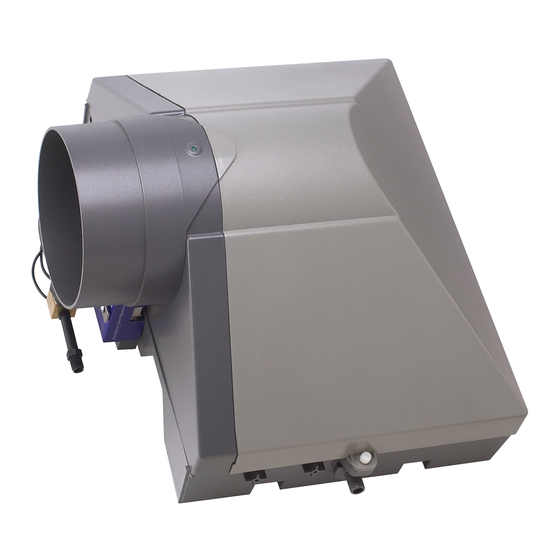
Air King 5000 Manual de instalación y funcionamiento - Página 9
Navegue en línea o descargue pdf Manual de instalación y funcionamiento para Humedezca Air King 5000. Air King 5000 12 páginas. Flow-through furnace humidifier
También para Air King 5000: Manual de garantía, mantenimiento y resolución de problemas (14 páginas), Manual de solución de problemas (13 páginas)

humidifier cabinet, behind the bypass tube. Connect the two
ends of the transformer leads to the humidifier terminals
marked "24 VAC IN"
4. At any point along the transformer leads (most convenient
location to connect the transformer low voltage wire to the
humidistat low voltage wire) carefully cut the insulation
between the two conductors and separate them approx 3" (fig
20).
5. Cut one of the conductors and strip (approx. 3/4") the
insulation from both ends ( fig 21).
6. Using wire nuts (not supplied), connect the two stripped ends
of the low voltage wire leads from the humidistat to the two
ends of the stripped transformer leads prepared in step 5.
7. Returning to the humidistat location, remove the cover plate
from the humidistat. Feed the 6" of low voltage wire through
the 3/8" hole in the humidistat base plate. Mount the
humidistat to the wall using four screws provided in the
humidistat kit (fig 22).
Humidistat
Cover
Label
8. Using the two 90-degree wire terminals (included in the
humidistat kit) connect the end of the low voltage wire to the
humidistat terminals.
9. Replace the cover. Remove the paper backing from the
humidistat label, and apply to the face of the cover. Install the
knob onto the humidistat control shaft.
CHECKING THE ELECTRICAL CONNECTION,
DUCT MOUNT OR WALL MOUNT HUMIDISTAT.
Once the wiring is complete you should have all the components
wired in series (a continuous loop) as shown in fig. 23. Use the
insulated staples included in you installation package to secure
any loose wiring.
120V
Electric
Source
24V
Transformer
Base
Figure 22
Humidifier
Humidistat
Model 5000 Flow Through Humidifier
STEP #6: TESTING THE INSTALLATION
If you have not already replace the front cover of the humidifier
and secure in place using the plastic thumb screw.
1. Make sure all water connections are secure and do not leak. Also,
ensure that all components are secure and installed correctly.
2. Plug in the 24-Volt transformer into a constant 120-Volt power
source (an outlet which cannot be shut off via a wall switch).
3. Turn up the humidistat to the maximum setting 50% +. This
ensures the humidistat is calling for humidity. If the humidistat
is not calling for humidity at the BEGINNING of the furnace
cycle the humidifier will not turn on, if you turn up the
humidistat in the middle of the furnace cycle the humidifier
will wait until the NEXT cycle to turn on.
4. Turn on the power to your furnace and turn up the thermostat
so that the furnace cycles on in heating mode.
• OPERATING TIP: Most furnaces will take a few
minutes to allow heat to build up before the furnace fan
will run. The "HUMIDISENSE" control contained in the
humidifier will wait until it senses your furnace fan
blowing hot air. If only your furnace fan is running the
unit should not turn on. The "HUMIDISENSE" will not
turn the humidifier on until is senses a temperature rise
of 4°C and the air temperature is over 30°C. This ensures
the efficient use of water.
5. Depending on your furnace type the unit should turn on
within approx 60 seconds of the furnace entering the
HEATING cycle. You will know because the green
"HUMIDISENSE" LED on the front of unit will turn on (fig 24.)
If the unit does not turn on refer to the trouble shooting
section in the Maintenance Guide.
Green
Humidisense
LED
6. Once the unit has been running for approx 3-4 minutes you
will see a small amount of water trickling out of the drain tube.
If the unit has turned on and the green light is on but no water
is trickling refer to the trouble shooting section in the
Maintenance Guide.
Figure 23
• OPERATING TIP: In order to ensure efficient water use,
ensure water will not blow off the evaporator, and to
protect the humidifier's solenoid valve there is an orifice
fitting installed on the inlet of the solenoid valve. This
fitting restricts the amount of water flowing to the unit,
which will vary depending on your house's water
pressure. On average this fitting will allow approx 300-
600 ml of water to flow in 5 minutes of humidifier
operation.
9
Figure 24
