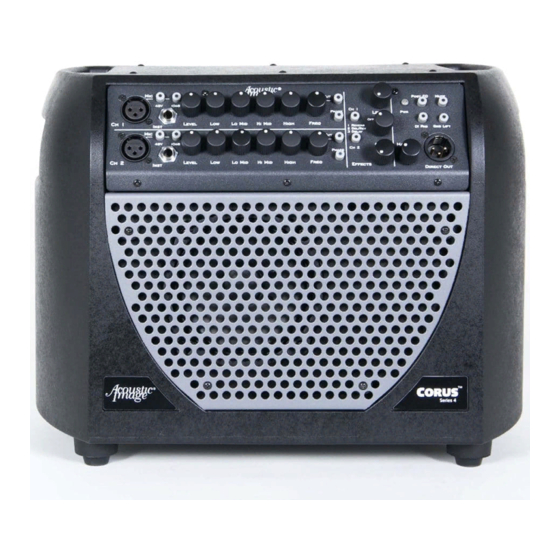
Acoustic Image Coda Corus Manuel du propriétaire - Page 4
Parcourez en ligne ou téléchargez le pdf Manuel du propriétaire pour {nom_de_la_catégorie} Acoustic Image Coda Corus. Acoustic Image Coda Corus 12 pages. S4plus

Note that all of the push button switches illuminate when they are in
the "on" position. So, a quick glance at the preamp will tell you which
functions have been engaged.
Also note that there are a few internal jumper options that can be
accessed when the front panel is removed. These options are
intended for the advanced user. They are available to add additional
functionality and are referenced in the description below. The jumper
locations are shown on page 11 and are noted on the signal flow
diagram.
Inputs
Separate 1/4 inch and XLR jacks are used for the inputs to each
channel of the preamp. The 1/4 inch input has a 1 megohm input
impedance that is optimized to get the best sound from piezo pickups.
It will also work well with magnetic pickups. The XLR input is a low
impedance balanced input with sufficient gain to allow microphones to
be plugged into it. There is a switchable 10 dB gain to accomodate
mics that need more gain. Phantom power is available through the
connector for powering a mic or outboard preamp and can be
activated using the push button switch located next to the connector.
To avoid an audible "pop", set the input level control all the way
off when switching on the phantom power.
separately buffered so both can be used at the same time. Each
channel is identical and can be blended to mix two instruments, 2
microphones or a mic and an instrument thereby performing much like
a small PA system.
Controls
The Clarus preamp has the following controls in each channel: input
level, Low, Lo Mid, Hi Mid and High tone controls. In addition, there is a
variable frequency low cut filter and a phase reverse switch in each
channel and a master level control that affects both channels.
Level
The input level controls the level of the signal at the input stage of the
preamp. The master volume controls the level of the signal at the
output of the preamp (at the input of the power amp). Set the master
control at "12 o'clock" and the input level at zero. The input level
should then be used to control the overall output of the unit. The two
controls are provided to allow independent control of "house" volume
and "stage" volume when the unit is used as a stage monitor with a
connection to a house PA. See the discussion under "Direct Out"
below.
If you have an instrument with a particularly "hot" output such as an
active bass guitar and you find that the front end of the preamp is
clipping or being overdriven, a 6 dB gain reduction option is available
4
The input jacks are
via a jumper on the preamp control printed circuit board. How do
access and utilize this option is described in "Jumper Options" section
found on page 11.
Tone
Each tone control has a center detent at the flat position. Experiment
with settings to achieve the frequency balance that sounds best to
you. In general, small values of boost and cut are best. The Clarus
preamp is designed with flat frequency response so only minor
corrections should be required to compensate for room effects or
"peaky" pickups in order to maintain the balanced response desired
for acoustic instrument amplification. To minimize electronic noise,
avoid operating all controls simultaneously at their maximum settings.
The Low control is a shelving-type that affects frequencies below 150
Hz and with a maximum boost/cut of 12 dB. The Lo Mid control affects
frequencies between 70 Hz and 700 Hz (peak at 250 Hz) and has a
maximum boost/cut of 12 dB. The Hi Mid control affects frequencies
between 700 Hz and 3000 Hz (peak at 1200 Hz) with a maximum
boost/cut of 12 dB. The Hi control is also a shelving-type that affects
frequencies above 3500 Hz with a maximum boost/cut of 12 dB.
Low Cut Filter/Phase Reverse/Speaker Emulation Filter
The Clarus preamp has a sweepable low cut filter and phase reverse
switch in each channel. The low cut filter is a variable frequency type
that inserts a 12 dB per octave rolloff at frequencies between 30 and
150 Hz, depending on the position of the control. The low cut filter is
used to reduce the bass output in cases where room location or
instrument/pickup combination results in "boomy" sound. Press the
on/off switch to turn on the filter circuit. Start with the frequency control
fully counterclockwise and gradually turn it clockwise until the desired
effect is achieved. The frequency range of the control is limited in
order to give you more control in the critical low frequency range. As a
result, the effect you hear in normal circumstances may be subtle, but,
you will hear the effect in a boomy bass situation. Experiment with the
position of the control to give you the sound you like best.
The phase reverse switch is used to reduce feedback and to control
phase interactions between the two channels. If you are using two
pickups or a mic and a pickup, you will find the phase reverse switch to
come in handy. Phase related interactions between a mic and a
pickup or two pickups can be cleared up by reversing the phase of one
of the channels. Mic feedback can be reduced by reversing the phase
of the signal. You should experiment with the phase reverse switch to
see if the effect is one that you like.
If desired, the phase switch can be converted to a speaker emulation
filter by moving a jumper on the rear of the preamp circuit board. How
this is done is described in the section entitled "Jumper Options." This
can be done on either or both channels.
5
