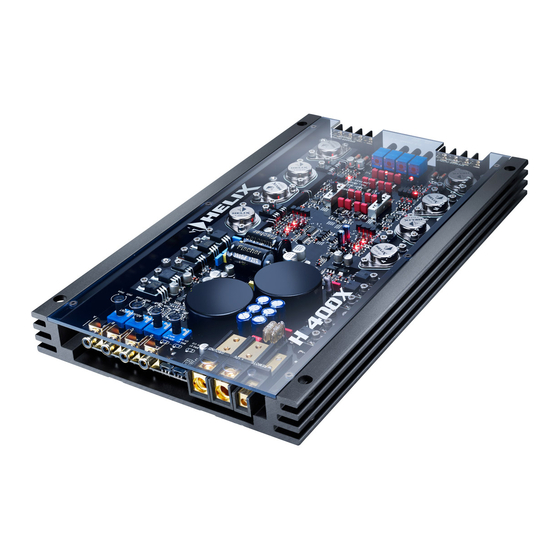
Audiotec Fischer Helix H 400X Buku Petunjuk - Halaman 6
Jelajahi secara online atau unduh pdf Buku Petunjuk untuk Penguat Audiotec Fischer Helix H 400X. Audiotec Fischer Helix H 400X 8 halaman. High end amplifier

EQUIPMENT FEATURES AND CONTROL ELEMENTS H 400X
9
5
6
10
24
7
11
8
12
13
16
17
3
4
2
1
1
Connecting the remote lead
2
Connecting the battery cable
3
Connecting the ground cable
4
Fuses 2 x 25 Ampere
5-8
Signal inputs
9-12
Level controls for input sensitivity
13
Signal input selector
14
Selector switch for channels A and B
15
Selector switch for channels C and D
6
14
20
21
22
23
15
16-17
Mono/Stereo selector
18
Speaker terminals for CH A and B
19
Speaker terminals for CH C and D
20
Frequency control highpass A and B
21
Frequency control lowpass A and B
22
Frequency control highpass C and D
23
Frequency control lowpass C and D
24
Colour protection system
1 Connecting the remote lead
The remote lead is connected to the automatic antenna (aerial
positive) output of the head unit (radio). This is only activated if
the head unit is switched ON. Thus the amplifier is switched on
and off with the head unit.
2 Connecting the battery cable
Connect the +12 V power cable to the positive terminal of the
battery. Recommended cross section: min. 16mm
A
3 Connecting the ground cable
The ground cable should be connected to a central ground refe-
18
rence point (this is located where the negative terminal of the bat-
B
tery is grounded at the metal body of the vehicle), or to a bright
bare-metal location on the vehicle chassis, i.e. an area which has
been cleaned of all paint residues.
4 Fuses
The input fuses are connected in parallel and provide protection
against an internal equipment fault, i.e. the system must be addi-
tionally protected by a further line fuse located in the vicinity of
C
the battery (max. distance from battery: 30 cm). The fuse rating
19
is 2 x 25 ampere for both amplifiers.
D
5 - 8 Signal inputs
The H 400X amplifier has RCA connectors for RCA cables that can
be connected with the pre-amplifier output of the line-outputs of
the headunit or with a pre-amplifier. This connectors are gold-pla-
ted to ensure a better signal transmission.
9 - 12 Level controls for input sensitivity
These controls can be used to match the input sensitivity of the
individual channels to the output voltage of the connected head
unit. These controls are not volume controls and are solely inten-
ded for the purpose of sensitivity trimming. The control range
extends from 700 mV to 8 V.
13 Signal input selector
If only one stereo signal is available (i. e. 2 cinch leads connec-
ted), the inputs can be connected from A to C and from B to D by
setting the selector switch to position 2. When selector is set to
position 1, all the inputs are separate.
14 Selector switch for channels A and B
To switch the internal active crossover to highpass/full range
(linear) or lowpass/bandpass.
If this switch is set on Highpass the exactly frequency can be set
with control No. 20.
At switch position lowpass/bandpass the highpass is always
active. That means a Bandpass is built in any case. With control
20 adjust the highpass and with control 21 adjust the lowpass.
Thus every desired bandpass between 15 Hz and 4000 Hz can be
adjusted.
2
.
15 Selector switch for channels C and D
To switch the internal active crossover to highpass/full range
(linear) or lowpass.
If this switch is set on Highpass the exactly frequency can be set
with control No. 22.
At switch position lowpass/bandpass the highpass is always
active. That means a bandpass is built in any case. With control
22 adjust the highpass and with control 23 adjust the lowpass.
Thus every desired Bandpass between 15 Hz and 4000 Hz can be
adjusted.
Caution! To avoid a lost of sound pressure make sure that
the crossover frequencies of high- and lopass are separa-
ted of 2 octaves when building a bandpass.
That means: If the lowpass signal is adjusted to 320 Hz the high-
pass should be adjusted 2 octaves lower on approx. 80 Hz
(1 octave=double frequency or half frequency).
If a subwoofer is connected we recommend to use high-
pass controls 20 and 22 as variable subsonic filter or to
turn them counter-clockwise to 15 Hz to get a subsonic
filter.
