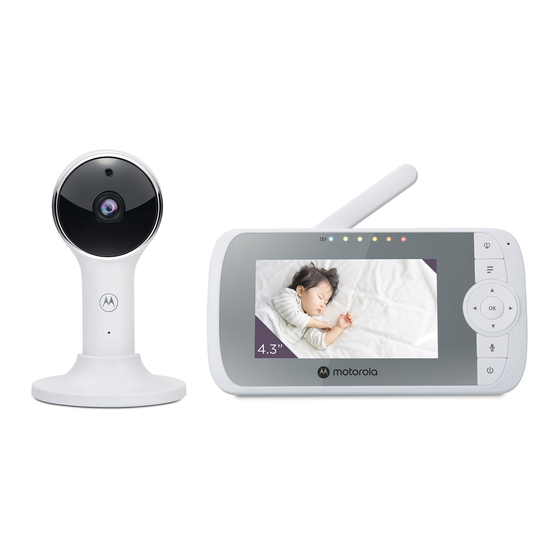
Motorola VM64-2 CONNECT Panduan Memulai Cepat
Jelajahi secara online atau unduh pdf Panduan Memulai Cepat untuk Monitor Bayi Motorola VM64-2 CONNECT. Motorola VM64-2 CONNECT 2 halaman. Digital video baby monitor
Juga untuk Motorola VM64-2 CONNECT: Panduan Memulai Cepat (2 halaman), Panduan Memulai Cepat (2 halaman)

QUICK START GUIDE
For a full explanation of all features and instructions, please refer to the User's Guide.
(available for download from motorolanursery.com).
1. Setting up your Digital Video Baby Monitor
A. Connecting the Power Supply for the Baby Unit
MODELS:
VM64 CONNECT
VM64-2 CONNECT
VM64-3 CONNECT
VM64-4 CONNECT
WARNING:
B. Fixing magnetic mount on the wall
Strangulation
• Mark the position of the screw holes on
hazard. Children
have STRANGLED
• Install wall anchors (Not provided)
in cords. Keep this
cord out of the
reach of children
(more than 3 feet
• Fasten the mounting screws (Not
away). Do not
remove the tag
• Position the cable behind the base as
from the AC
Adapters. Only use
the AC Adapters
provided.
C. Connecting the Power Supply of the Parent Unit.
D. Desktop Stand of the Parent Unit
• Flip out the stand on the back of the Parent Unit
• Recommend to rotate it by 90 degree to set up the desktop stand.
2. Basic operation of the keys
Parent unit
+-
<>
O
V
Baby Unit
3. Setting up the Baby Unit for Wi-Fi® internet viewing
A. Install Motorola Nursery App.
B. View on Compatible Smartphones and Tablets.
1. Open the Motorola Nursery App on your compatible smartphone or tablet.
2. Follow the in-app instructions to create your account and connect to your device.
Please take note of the following minimum system requirements:
Smartphones/Tablets: iOS 10.0, Android™ 7.0
Wi-Fi ® requirements:
At least 0.6 Mbps upload bandwidth per Smart Montitoring Companion, test your Internet
speed at: http://www.speedtest.net/
the wall.
suitable for the wall type and mounting
screws if needed.
provided) on the wall.
the picture shown before hooking the
base on the wall.
Step 1
ON/OFF button
0
UP/DOWN buttons
LEFT/RIGHT
buttons
M
MENU button
OK button
VIDEO button
T
TALK button
Volume button
RESET button
PAIR button
Caméra Wi-Fi®
• Insert the DC plug of the power adapter
• Connect the other end of the power
• The baby unit turns on and the power
Note
Only use the supplied power adapter
(DC5V/1000mA).
• Connect the small plug of the power adapter
to the parent unit and the other end to the
electrical outlet. Only use the enclosed adapter
(5VDC/1000mA).
• A rechargeable battery (Lithium ion battery
2000mAh) inside the Parent Unit allows you to
move it without losing the link and picture from
the Baby Unit. The battery provides up to 5 hours
operation of the Parent Unit. We recommend
charging the for at least 16 hours before first use,
and when the Parent Unit indicates the battery is
low.
• Press and hold the POWER button 0 on the top of
the Parent Unit to turn it ON.
Step 2
Press and hold to switch the Parent Unit ON/OFF.
Press to tilt the camera upward or downward.
Press to adjust menu setting when menu is active.
Press to pan the camera left or right.
Press to access menu options when menu is active.
Press to open menu options or exit the menu.
Press to confirm a selection.
Press to turn the LCD screen ON/OFF.
Press and hold to talk to your baby.
Press -/+ to select volume level of the Parent Unit.
Press and hold with a small pin to reset the unit.
Press and hold to pair with the parent unit or
Motorola Nursery Wi-Fi® Setup.
• Scan the QR code with your smart device and download
Motorola Nursery App from the App Store for iOS devices
or from the Google Play™ Store for Android™ devices.
• Install Motorola Nursery App on your device.
Connect to Internet
via Wi-Fi ®
into the DC socket on the back of the
Baby Unit.
adapter to a suitable electrical outlet.
indicator lights in Blue colour.
Pair button
Reset button
Compatible
Viewing Devices
UK EN
