DJ-Tech uSolo Pro Manuale d'uso - Pagina 5
Sfoglia online o scarica il pdf Manuale d'uso per Lettore MP3 DJ-Tech uSolo Pro. DJ-Tech uSolo Pro 12. Professional usb

CONTROLS AND FUNCTIONS
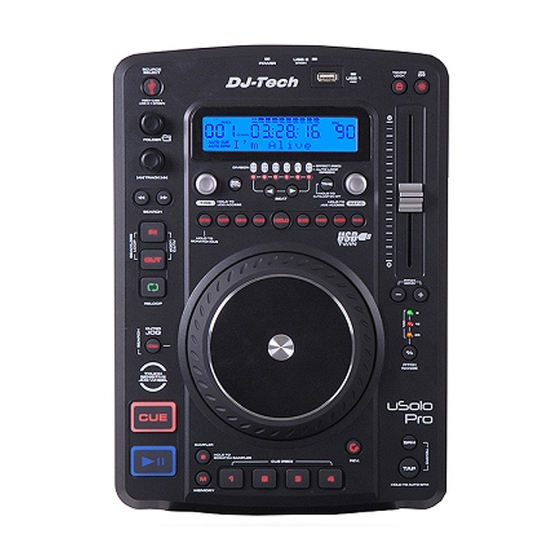
14. CUE BUTTON - Pressing the CUE button during playback immediately pauses playback and returns the
track to the last set cue point. In pause mode and the music is at the cue point, press the CUE button to
provide cue monitor. The CUE LED will glow when the music is at the cue point.
15. PLAY/PAUSE BUTTON - Press this button to change from play to pause or from pause to play. When
Skid effect is on, press this button to break or slow start.
16. MEMORY BUTTON - Press this button to set the memory mode (MEMORY LED will be on), then press
the desired BANK button to set the current playing position as the cue point. You can also store the BANKs
by pressing the memory for 1 sec. It will store the cue points onto the USB drive. To recall the pre-stored
BANKs, just make the memory mode set before inserting the USB device.
17. USB 1 PORT – This is the USB port where you insert your USB mass storage device for playing MP3 files.
When using external USB harddisk, please be sure the file system is FAT 12/16/32. Other file system is not
supported in this unit.
18. PITCH ON/OFF BUTTON – This button is used to turn the PITCH SLIDER function on and off.
19. TEMPO LOCK BUTTON -Enables the TEMPO lock function, which allows the tempo of the music to be
altered without affecting the key. This button is illuminated when enabled.
20. TIME BUTTON - The TIME button will switch the time value described in the LCD time meter between
elapsed play time and track remaining time.
21. PITCH SLIDER -This slider is used to adjust the playback pitch percentage. The slider is a set adjustment
and will remain set until the pitch slider is move or the pitch function has been turned off. For example, if you
set the pitch to be +10% in current track, it will be kept at +10% when you go to next track.
22. RATIO BUTTON (Parameter) - Turn the RATIO knob or hold the RATIO knob and turn the jog wheel to
adjust the parameter ratio value.
23. PITCH BEND BUTTONS - The desired pitch of music decrease or increase when button is pressing and
returns to the original pitch when the button is released.
24. PITCH RANGE BUTTON - Press the button in order to change pitch percentage of 6%, 12%, 25%, 100%.
25. REVERSE BUTTON - This button activates reverse play mode. This function will play your track or
sampler in reverse.
26. BPM BUTTON -To change the BPM/ PITCH display by pressing the BPM button.
27. TAP BUTTON
The TAP button is used for manual BPM. Press the TAP button according to the beat of the music to set
your desired BPM value.
Press and hold the TAP button then turn the TIME or RATIO knob will allow you to adjust BPM value.
Hold down the TAP button for 1 second to switch to Auto BPM.
28. 4 HOT CUE (BANK) BUTTONS
Press the desired BANK button to play the music from the stored cue point.
When the MEMORY LED is lit, press the desired BANK button to set the cue point.
When SAMPLER LED is lit, press the desired BANK button to play the sample. Press the desired BANK
button will return to the start point instantly. The LED of the activated BANK button will be flashing.
29. BEAT-SYNC SELECT BUTTONS
BPM SYNC effect: These 2 buttons can be used to set the time parameter of the effect in order to
synchronize the BPM of the playing music. There are six effect-sync parameters: 1/4, 1/2, 3/4, 1/1, 2/1,
4/1 BPM. Press
Auto loop length: In Autoloop Mode, hold TIME button and press these 2 buttons to select the auto loop
length among 1/16, 1/8, 1/4, 1/2, 1, 2/1.
30. SCRATCH BUTTON — This button is used to activate and deactivate the SCRATCH effect. When
SCRATCH effect is activated and LED lights red, the TIME PARAMETER is to adjust the start time and the
RATIO PARAMETER is to adjust the stop time. Hold the button to active scratch cue function and
SCRATCH LED is lighted green.
button at the same time to off beat sync.
4
TOP PANEL
