- ページ 5
浄水器 AmeriFlow Water Systems Inc. ET6500GROのPDF オーナーズマニュアルをオンラインで閲覧またはダウンロードできます。AmeriFlow Water Systems Inc. ET6500GRO 15 ページ。 Reverse osmosis systems

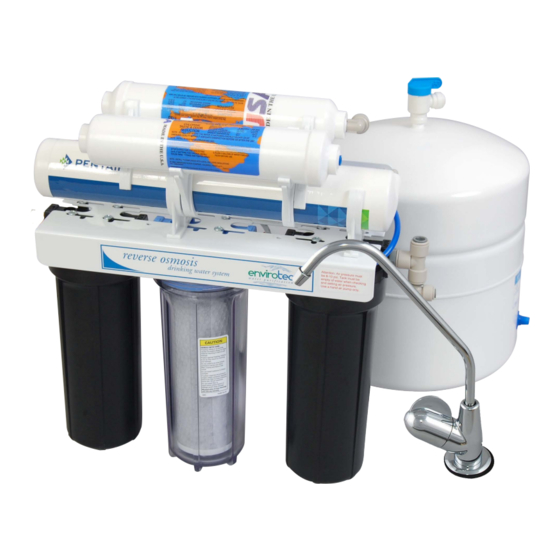
PHOTOS OF RO AND CONTENTS LIST
1
1. Faucet and tubing
2. Drain clamp
3. Easy Tap Adapter
4. Screws
INSTALLATION PROCEDURES
STEP 1 SYSTEM POSITION
The RO system needs both a water supply and access to a drain. The RO system is designed
to fit under most sinks. The kitchen sink is the most common location for the RO install. Re-
move all system components from boxes and determine the location for placement of the Filter
Pac/RO module, tank, and faucet.
If you desire to hang the Filter Pac/RO module, use mounting screws, placing them to align
with holes in the bracket (make sure the cabinet wall is thick enough to support the Filter
Pac/RO module and that the mounting screws will not pierce through the wall). Hang
Filter Pac/RO module to assure sufficient space is allowed. Remove Filter Pac/RO module
from the wall for now and continue with install.
STEP 2 FAUCET INSTALLATION
1. Check for an extra hole in the sink You must drill a 1 ¼" hole for the faucet if the sink
does not have one. Determine Location of Faucet Hole Check underneath sink before
drilling. Make sure there are no obstructions. Drilling a Stainless Steel Sink Drill a 1 ¼"
hole with a hole-saw or hole punch for an air-gap faucet. Smooth out rough edges with a
file if necessary. A Porcelain/ Enamel-Coated Stainless or Cast Iron Sink
facturer recommends having this type of sink professionally drilled
chipping or cracking. If you are attempting to drill, use extreme caution. Obtain the proper
tools necessary to drill through the sink material. Follow the drill manufacturers instructions
5
2
4
10
3
5. Union Coupling
6. R/O tubing
7. Storage tank with ball
valve
8
7
6
8. FilterPac Unit
9. Re-Min module attached
to top of FilterPac
10. Water quality monitor
because of possibility of
9
The manu-
07\15 RO Manual
4
