- ページ 4
スイッチ HighSecLabs Mini-Matrix SX42PU-3のPDF クイック・セットアップ・マニュアルをオンラインで閲覧またはダウンロードできます。HighSecLabs Mini-Matrix SX42PU-3 20 ページ。 2/4/8 ports high security mini-matrix kvm switches
HighSecLabs Mini-Matrix SX42PU-3 にも: クイック・インストール・マニュアル (2 ページ), クイック・インストール・マニュアル (2 ページ)
SEC TIONS
Table of Contents
INSTAllATIoN
Installing the Mini-Matrix
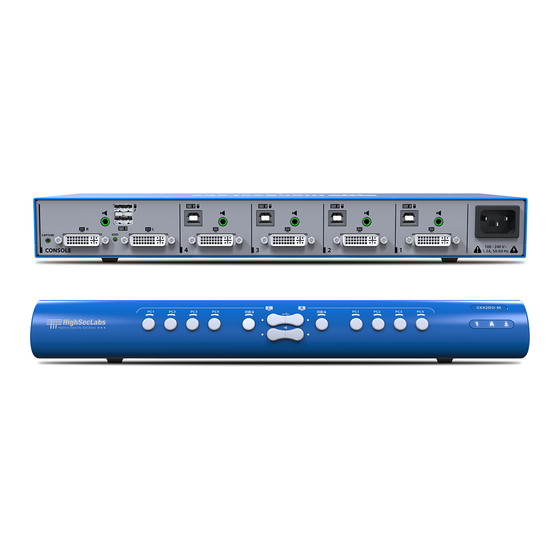
Step 1 – Cable Installation
1. Connect console port peripherals:
• Connect video displays to the Mini-Matrix primary and secondary
display ports.
Note: it is highly recommended to use identical primary and secondary
display models. EDID information is taken from the primary console display
port (#1) and sent to all connected computers. In case of using non-identical
displays, connect the smaller display to the primary console display port.
• Connect keyboard, mouse and audio peripherals
to the Mini-Matrix console ports. These will be
shared securely between all sources.
• Connect a smartcard/biometric reader to the
Mini-Matrix's console fUSB secure port to
support user authentication across multiple
isolated sources.
2. Computer/Source channel ports:
• for each source, connect the video, keyboard,
mouse, fUSB and audio cables to the Mini-Matrix
source ports.
HSL Mini-Matrix Quick Setup Guide
1
2
3. Dual screen support:
• Download and install HSl's Multi Display Driver on source
computers that have multiple screens (currently available only for
Windows)( http://highseclabs.com/dl.php?fid=446).
Primary Display
Secondary Display
Smart-Card
Reader
Audio
Keyboard
1
2
3
4
3
Computers
Mouse
CONSOLE PORTS
COMPUTER/SOURCE PORTS
fUSB Cable
Audio Cable
Mouse Cable
Display Cable
Keyboard Cable
3