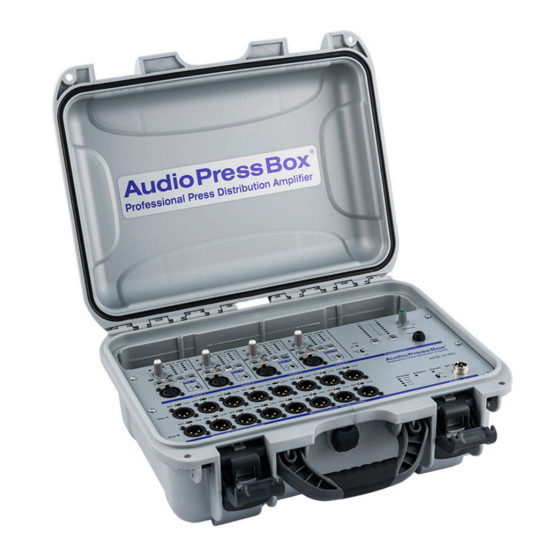
AudioPressBox APB-416 C Owner's Manual - Page 7
Browse online or download pdf Owner's Manual for Amplifier AudioPressBox APB-416 C. AudioPressBox APB-416 C 10 pages. Press conference audio distribution amplifier

5) Input gain level knob
You can set the input signal level depending on the
connected audio source to reach the optimal output level.
You can check the output level on the Output level meter
(5). If Dante input is selected you can adjust the level of
Dante signal.
6) High Pass Filter switch
You can turn ON the HPF to eliminate low frequency
disturbances like pops or microphone handling noise. The
cut-off frequency of the HPF is 160Hz. It is very handy for
speech. If you need to distribute the music or full-range
signals it is handy to have the HPF switched off.
7) Compressor/Limiter switch
If you need to reduce the dynamics of the input signal
and/or be sure that the output signal will not be higher
than the nominal output level please switch this button
ON. Function of the compressor and limiter you can see
on the Gain reduction level meter (6). It is very good for
speech.
8) PFL button
To check your levels only for one input, push this button
and you can see the level of output for corresponding
input. You can easily see if all microphones have the good
output levels and identify, if some of the microphones are
too loud or too silent in the output.
9) Microphone level indicator bar
You can visually monitor the level of each microphone
output signal in 5-segment output indicator bar with signal
clip LED. If this red light is flashing you should reduce the
gain of the microphone.
10) Gain Reduction indicator bar
If Comp switch is set to ON, you can visually monitor the
level of Gain reduction on this 4-segment indicator bar.
11) Routing switch
Each microphone could be routed to 2 separated groups
or to both groups at the same time. This is useful, if you
have two (or four) lecterns and you want to route signal
from each microphone (or group of 2 microphones) to
separated tracks. Reporters can edit the recording easily,
if they have both lecterns on separated tracks. You can
label the outputs in the output extender with names of
the lecterns or groups and reporters easily decide which
group output they want to use.
12) Test signal oscillator operation switch
To test signal level, which is coming to the outputs, you
can switch this Test 1,6 kHz sine signal oscillator on.
After recipients set the levels in their recording devices,
you should switch this function OFF. When compressor
switch is set to ON, output signal level won't exceed this
maximum output level.
13) Global group output level indicators
You can check output levels of each group individually
here in 7-segment level indication bar.
14) AFL button
You can check output levels of each group individually
7
here in 7-segment level indication bar.
15) Headphones output connector
If you want to monitor the output by your headphones,
you can plug them to this connector (6.3 TRS/Jack stereo
connector).
16) Headphones output level knob
If you have your headphones plugged in, you can adjust
the level of monitoring the output by turning this knob to
set your comfort hearing level. Please be careful when
setting the levels, too high monitoring volumes can
damage your hearing ability!
17) Power ON indicator
When AudioPressBox® is turned on, this indicator lights up.
18) Power switch
With the power switch, you can turn your AudioPressBox®
ON or OFF.
19) Group A Mic/Line Outputs 1-24 + Group B Mic/
Line Outputs 1-24
Mic level output XLR connectors – every output is
individually transformer isolated.
20) Mic/Line level select switch
You can set if you want to get Mic (-20dBu) or Line (+6dBu)
level from individual output
21) Power supply connector
Plug the mains cable to AudioPressBox® here.
