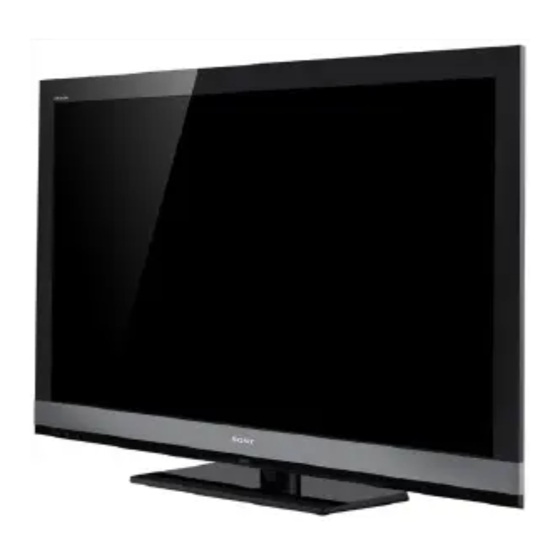
Sony AZ1-L CHASSIS Instrukcja serwisowa - Strona 24
Przeglądaj online lub pobierz pdf Instrukcja serwisowa dla TV Sony AZ1-L CHASSIS. Sony AZ1-L CHASSIS 42 stron.
Również dla Sony AZ1-L CHASSIS: Instrukcja serwisowa (33 strony)

1-4-4. KDL-60EX700/60EX701/60EX703
181
183
182
187
1-5. CLEANING THE LCD PANEL
CAUTION: When cleaning the TV, be sure to unplug the power cord to avoid any chance of electric shock.
Clean the cabinet of the TV with a dry soft cloth.
Wipe the LCD screen gently with a soft cloth.
Stubborn stains may be removed with a cloth slightly moistened with a solution of mild soap and warm
water.
If using a chemically pretreated cloth, please follow the instruction provided on the package.
Never use strong solvents such as a thinner, alcohol or benzine for cleaning.
Periodic vacuuming of the ventilation openings is recommended to ensure the proper ventilation.
KDL-32EX700/40EX700/40EX703/46EX700/46EX701/46EX703/
52EX700/52EX701/52EX703/60EX700/60EX701/60EX703
REF. NO.
PART NO.
DESCRIPTION
181
X-2541-870-1
BEZEL(60) ASSY
(KDL-60EX700 ONLY)
181
X-2547-167-1
BEZEL(60) ASSY
(KDL-60EX701 ONLY)
181
X-2547-172-1
BEZEL(60) ASSY
(KDL-60EX703 ONLY)
182
A-1736-860-A
HMS2 BOARD, MOUNTED
183
1-856-068-11
LENS
184
N/A
LCD PANEL
FOR ALL LCD PANEL PART NUMBER INFORMATION
184
REFER TO THE LCD PANELS SERVICE MANUAL
185
4-171-117-01
BRACKET, SIDE JACK M
186
A-1763-462-A
BAL BOARD, COMPLETE
NOTE: For BAL Board replacement, please refer to section
185
2-2. Setting the Destination after Replacing the BAL Board or LCD Panel.
NOTE: Final software is not installed on this BAL Board. Install the update
after replacing this board using the instructions provided with the software.
187
1-474-211-11
GE2-A (POWER) BOARD, COMPLETE
186
DISASSEMBLY/PART NUMBER INFORMATION
NOTE: The components identifi ed by shading
and
!
mark are critical for safety. Replace only
with part number specifi ed.
(Check the
Sony Electronics Service Information
[ASSEMBLY INCLUDES]
1-6. SCREW LEGEND
1-6-1. KDL-32EX700
P/N
DESCRIPTION
2-580-639-01
SCREW, +BVTP 4X12 TYPE2 IT-3
2-580-611-01
SCREW, +PSW M6X16
2-580-600-01
SCREW, +PSW M4X8
2-580-608-01
SCREW, +PSW M5X16
2-580-592-01
SCREW, +PSW M3X8
4-159-298-01
SCREW, +PSW M4X10
2-580-591-01
SCREW, +PSW M3X5
SCREW, +BVTP 3X8 TYPE2 IT-3
7-685-646-79
2-580-603-01
SCREW, +PSW M4X16
1-6-2. KDL-40EX700/40EX703
P/N
DESCRIPTION
2-580-639-01
SCREW, +BVTP 4X12 TYPE2 IT-3
2-580-611-01
SCREW, +PSW M6X16
2-580-600-01
SCREW, +PSW M4X8
2-580-608-01
SCREW, +PSW M5X16
2-580-592-01
SCREW, +PSW M3X8
4-159-298-01
SCREW, +PSW M4X10
2-580-591-01
SCREW, +PSW M3X5
7-685-646-79
SCREW, +BVTP 3X8 TYPE2 IT-3
2-580-603-01
SCREW, +PSW M4X16
1-6-3. KDL-46EX700/46EX701/46EX703
P/N
DESCRIPTION
2-580-639-01
SCREW, +BVTP 4X12 TYPE2 IT-3
2-580-611-01
SCREW, +PSW M6X16
2-580-600-01
SCREW, +PSW M4X8
2-580-608-01
SCREW, +PSW M5X16
2-580-592-01
SCREW, +PSW M3X8
4-159-298-01
SCREW, +PSW M4X10
2-580-591-01
SCREW, +PSW M3X5
7-685-646-79
SCREW, +BVTP 3X8 TYPE2 IT-3
2-580-603-01
SCREW, +PSW M4X16
1-6-4. KDL-52EX700/52EX701/52EX703
P/N
DESCRIPTION
2-580-639-01
SCREW, +BVTP 4X12 TYPE2 IT-3
2-580-611-01
SCREW, +PSW M6X16
2-580-600-01
SCREW, +PSW M4X8
2-580-608-01
SCREW, +PSW M5X16
2-580-592-01
SCREW, +PSW M3X8
4-159-298-01
SCREW, +PSW M4X10
2-580-591-01
SCREW, +PSW M3X5
7-685-646-79
SCREW, +BVTP 3X8 TYPE2 IT-3
2-580-603-01
SCREW, +PSW M4X16
1-6-5. KDL-60EX700/60EX701/60EX703
P/N
DESCRIPTION
2-580-639-01
SCREW, +BVTP 4X12 TYPE2 IT-3
2-580-611-01
SCREW, +PSW M6X16
2-580-600-01
SCREW, +PSW M4X8
2-580-608-01
SCREW, +PSW M5X16
2-580-592-01
SCREW, +PSW M3X8
4-159-298-01
SCREW, +PSW M4X10
2-580-591-01
SCREW, +PSW M3X5
SCREW, +BVTP 3X8 TYPE2 IT-3
7-685-646-79
2-580-603-01
SCREW, +PSW M4X16
NOTE: Les composants identifi es per un trame et
NOTE: The components identifi ed by a red outline and a
une marque
sont critiques pour la securite.
confi dential information. Specifi c instructions must be adhered to whenever
!
Ne les remplacer que par une piece portant le
these components are repaired and/or replaced.
numero specifi e.
See Appendix A: Encryption Key Components in the back of this manual.
website for any additional service related issues for this model.)
REMARKS
RC(10), BTM FRM to BEZ(2), SPKR to SPKR BRKT-L(4), SPKR to SPKR BRKT-R(4)
RC to VESA BRKT(4)
RC to PNL to PNL BRKT(2)
TABLE-TOP STAND(4)
BAL(4), GE3-A(4)
BTM FRM to PNL(2), VESA BRKT to PNL(2)
RC to PNL(3)
RC to TRMNL AREA(1)
NOT IN THIS MODEL
REMARKS
RC(10), BTM FRM to BEZ(2), SPKR to SPKR BRKT-L(2), SPKR to SPKR BRKT-R(2)
RC to VESA BRKT(4)
NOT IN THIS MODEL
TABLE-TOP STAND(4)
BAL(4), GE3-A(4)
BTM FRM to PNL(1), UC to BTM FRM(5), VESA BRKT to PNL(2)
RC to PNL(3)
RC to TRMNL AREA(1)
RC to PNL to PNL BRKT(2)
REMARKS
RC(10), BTM FRM to BEZ(2), SPKR to SPKR BRKT-L(2), SPKR to SPKR BRKT-R(2)
RC to VESA BRKT(4)
NOT IN THIS MODEL
TABLE-TOP STAND(4)
BAL(4), GE2-B(4)
BTM FRM to PNL(1), UC to BTM FRM(5), VESA BRKT to PNL(2)
RC to PNL(3)
RC to TRMNL AREA(1)
RC to PNL to PNL BRKT(4)
REMARKS
RC(12), BTM FRM to BEZ(2), SPKR to SPKR BRKT-L(2), SPKR to SPKR BRKT-R(2)
RC to VESA BRKT(4)
NOT IN THIS MODEL
TABLE-TOP STAND(4)
BAL(4), GE2-B(4)
BTM FRM to PNL(1), UC to BTM FRM(5), VESA BRKT to PNL(2)
RC to PNL(4)
RC to TRMNL AREA(1)
RC to PNL to PNL BRKT(4)
REMARKS
RC(12), BTM FRM to BEZ(2), SPKR to SPKR BRKT-L(2), SPKR to SPKR BRKT-R(2), SPKR BRKT to BEZ(4)
RC to VESA BRKT(4)
NOT IN THIS MODEL
TABLE-TOP STAND(4)
BAL(4), GE2-A(5), AC INLET to BTM FRM(1)
BTM FRM to PNL(2), UC to BTM FRM(4), VESA BRKT to PNL(2)
RC to PNL(4)
RC to TRMNL AREA(1)
RC to PNL to PNL BRKT(6)
mark contain
TOTAL
20
4
2
4
8
4
3
1
0
TOTAL
16
4
0
4
8
8
3
1
2
TOTAL
16
4
0
4
8
8
3
1
4
TOTAL
18
4
0
4
8
8
4
1
4
TOTAL
22
4
0
4
10
8
4
1
6
18
