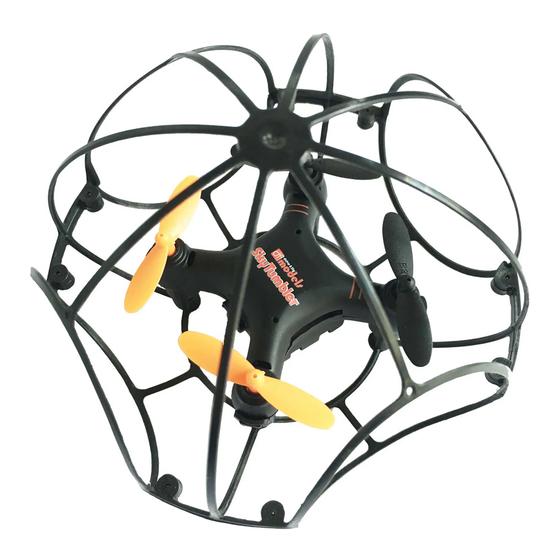
DF-models drive&fly H4803R Инструкция - Страница 19
Просмотреть онлайн или скачать pdf Инструкция для Квадрокоптеры DF-models drive&fly H4803R. DF-models drive&fly H4803R 20 страниц.

weitere Steuerfunktionen | additional control functions | autres fonctions de contrôle
ulteriori funzioni di controllo | otras funciones de control
2 - Headless
Nach drücken der Taste „2" beginnt die Fernsteuerung zu piepen.
Das Modell fliegt nun immer in die Richtung, in die Sie steuern,
egal in welcher Lage sich das Modell gerade befindet.
2 - Headless
After pressing the key "2" the remote control starts beeping.
The model will now always fly in the direction you are steering, no matter
what position the model is currently in.
2 - Sans tête
Après avoir appuyé sur la touche "2", la télécommande commence à
émettre un bip. Le modèle volera désormais toujours dans la direction où
vous le dirigez, quelle que soit sa position actuelle.
2 - Senza testa
Dopo aver premuto il tasto "2" il telecomando inizia a emettere un segnale
acustico. Il modello ora volerà sempre nella direzione in cui si sta
sterzando, indipendentemente dalla posizione in cui si trova attualmente.
2 - Sin cabeza
Después de pulsar la tecla "2" el mando a distancia empieza a emitir un pitido. El modelo ahora siempre volará en la dirección
que usted está dirigiendo, sin importar la posición en la que el modelo se encuentre actualmente.
Reset | reset | Réinitialiser
Resetta | Reiniciar
Sollte sich die Drohne nicht mehr ordnungsgemäß steuern oder trimmen lassen
und/ oder nicht mehr richtig auf die Steuerbefehle des Senders reagieren,
können Sie das Modell wie folgt resetten:
1. Schalten Sie die Drohne ein und binden diese mit dem Sender (siehe
Startvorbereitungen). Stellen Sie das Modell waagrecht auf den Boden.
2. Drücken Sie beide Steuerhebel nach links-unten (7 Uhr-Stellung) und halten
diese in der Position. Die LEDs des Copter beginnen zu blinken. Leuchten die
LEDs wieder konstant, ist der Reset abgeschlossen.
If the drone can no longer be controlled or trimmed properly and/or does not
respond correctly to the transmitter commands, you can reset the model as follows
1. switch on the drone and tie it to the transmitter (see start preparations).
Place the model horizontally on the ground.
2. Push both control levers down to the left (7 o'clock position) and hold them in the these in position. The Copter's LEDs
start flashing. If the LEDs are constant again, the reset is completed.
Si le drone ne peut plus être contrôlé ou réglé correctement et/ou ne répond pas correctement aux commandes de l'émetteur,
vous pouvez réinitialiser le modèle comme suit
1. allumez le drone et attachez-le à l'émetteur (voir les préparatifs de lancement). Placez le modèle horizontalement sur le sol.
2. pousser les deux leviers de commande vers le bas à gauche (position 7 heures) et les maintenir en position. Les LED de
l'coptère se mettent à clignoter. Si les LEDs s'allument à nouveau en permanence, la réinitialisation est terminée.
Se il drone non può più essere controllato o trimmato correttamente e/o non risponde correttamente ai comandi del
trasmettitore, è possibile resettare il modello come segue
1. accendere il drone e collegarlo al trasmettitore (vedi preparativi per il lancio). Posizionare il modello orizzontalmente a terra.
2. spingere entrambe le leve di comando verso il basso a sinistra (posizione a ore 7) e mantenerle in posizione. I LED
dell'elicottero inizieranno a lampeggiare. Se i LED si riaccendono costantemente, il reset è completo.
Si el avión teledirigido ya no puede ser controlado o ajustado correctamente y/o no responde correctamente a los comandos del
transmisor, puede reajustar el modelo de la siguiente manera
1. Encienda el dron y átelo al transmisor (vea los preparativos de lanzamiento). Coloque el modelo horizontalmente en el suelo.
2. Empuje ambas palancas de control hacia la izquierda (posición de las 7) y manténgalas en posición. Los LED del Copter
comenzarán a parpadear. Si los LEDs se encienden constantemente de nuevo, el restablecimiento es completo.
7
5
3
1
2
8
9
10
11
