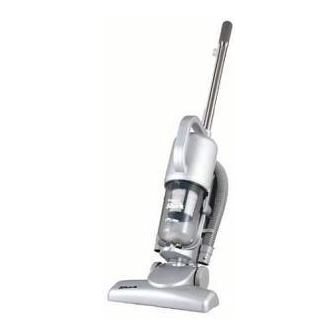
Euro-Pro Shark EP600C Benutzerhandbuch - Seite 7
Blättern Sie online oder laden Sie pdf Benutzerhandbuch für Staubsauger Euro-Pro Shark EP600C herunter. Euro-Pro Shark EP600C 10 Seiten. Turbo stick vac

DIRECTIVES D'USAGE
AVERTISSEMENT:
Toujours
débrancher l'aspirateur avant l'assemblage
ou l'enlèvement d'accessoires.
INSERTION DE LA POIGNÉE EN
MÉTAL EN DEUX PIÈCES DANS
LE BOÎTIER PRINCIPAL
•
Appuyez sur la tige à l'extrémité de la
pièce inférieure de la poignée en métal
(voir l'illustration).
• Insérez la poignée en métal dans
l'orifice à côté de la poignée. Assurez-
vous que la fente dans la poignée
s'ajuste correctement dans l'ouverture
(voir l'illustration).
• Si vous l'insérez bien, la
tige ressortira
de l'orifice.
Tige
Orifice
• Pour insérer la pièce supérieure de la
poignée en métal, appuyez sur la tige
qui se trouve sur la pièce supérieure et
insérez la pièce supérieure dans la
pièce inférieure en vous assurant que
la tige ressorte de l'orifice de la pièce
inférieure.
FIXATION DE LA BROSSE À
PLANCHERS AU BOÎTIER
PRINCIPAL
• Appuyez sur la tige de l'accessoire à
planchers tel qu'illustré ci-dessous.
• Insérez la brosse en place, dans la
direction de la flèche.
• Si vous l'insérez bien, la tige ressortira
de l'orifice.
Orifice
FIXATION DU BOYAU AU
BOÎTIER PRINCIPAL
Appuyez sur la tige à l'extrémité du
•
boyau (voir l'illustration ci-dessous).
• Insérez le boyau (voir la flèche dans
l'illustration).
• Si vous l'insérez bien, la tige
ressortira de l'orifice.
Orifice
COMMUTATEUR MARCHE/ARRÊT
Le commutateur marche/arrêt est doté
•
de deux positions.
• Appuyez sur le côté « I » pour mettre
l'aspirateur en marche.
• Appuyez sur le côté « O » pour
éteindre l'aspirateur.
= ARRÊT
= MARCHE
13
OPERATING INSTRUCTIONS
NOTE:
Always turn off the power switch
and unplug the electrical cord before
emptying the Dust Cup.
Cleaning & Changing the HEPA-
TYPE Dust Cup Filter
1. After you have emptied the dust from
the Dust Cup (container), separate
the debris screen from the HEPA-
Type filter cartridge by grasping the
debris screen with one hand and the
filter frame with the other and pull
apart.
Debris Screen
HEPA-TYPE
Filter
2. Rinse the debris screen under the
faucet until clean. Allow to air dry or
dry with a clean dish towel. Do NOT
wash in dishwasher.
3. To clean the HEPA filter cartridge,
hold filter by frame flange and tap
filter on the inside wall of a dust
container (garbage can).
Ensure that you do not damage the
pleated filter material during cleaning.
Also note that discoloration occurs
during use. This does NOT affect the
filter's performance.
Warning:
Always empty the dust cup and clean the HEPA-Type dust cup
filter before each use and during prolonged usage. Never over fill the dust cup -
remove dirt and clean the HEPA-Type dust cup filter during prolonged usage or risk
motor damage. Make sure that the debris screen and the HEPA-TYPE filter
have completely air dried before replacing into the vacuum.
4. Reassemble the debris screen to the
HEPA-Type filter cartridge and
replace into dust cup (container).
Ensure that the filter assembly is
completely seated inside the dust cup
(container).
5. Attach the dust cup (container) to the
vacuum.
Important:
Do NOT use the HEPA-
Type filter cartridge without the debris
screen in place.
PLEASE NOTE: The white pleated
filter material in the HEPA-TYPE Filter
will discolor over time -This is
NORMAL and will NOT affect the
performance of the filter. If the HEPA-
TYPE Filter
Fig. A
is properly
cleaned
Wash
after each use
once a
and suction
month or
when
does not return
suction
to 100%, then
appears
we suggest that
reduced
the HEPA-TYPE
Filter be cleaned
Warning:
Allow 24
vigorously until
hours for drying before
no more dust
replacing in unit.
can be removed,
then rinsed under the faucet and
allowed to air dry for 24 hours before
replacing into the vacuum. (Fig. A)
This should be done once a month
or when suction appears to be
reduced .
NOTE: If you wash the HEPA-TYPE
filter, make sure that it has
completely air dried for 24 hours
before inserting back in the
vacuum.
6
