Flycam GLXY-AV Montageanleitung - Seite 2
Blättern Sie online oder laden Sie pdf Montageanleitung für Kamera-Zubehör Flycam GLXY-AV herunter. Flycam GLXY-AV 4 Seiten. Steadycam arm & vest
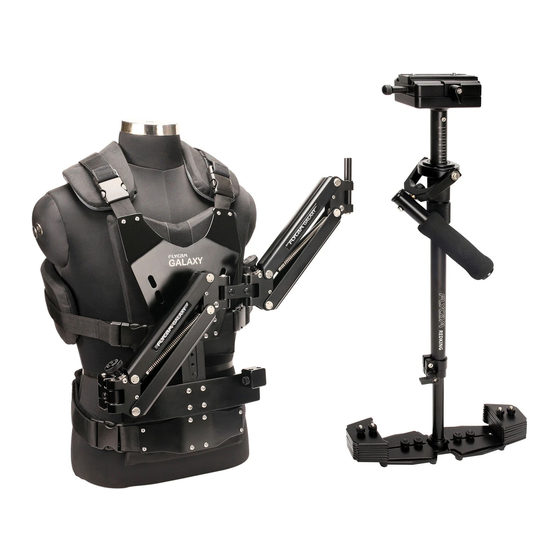
Steadycam Arm & Vest Setup
Having put your vest on, insert the hooks of
the 26'' long straps into the appropriate
buckle. Then tighten both straps with Velcro
for a comfortable fit and lock both with the
buckles.
The length of the chest plate can be adjusted
according to the height of the person by using
this adjusting screw.
NOTE: Properly set up and custom fit, your vest should look like the provided picture. Straps are made
of through nylon and industrial strength Velcro and can be easily replaced or adjusted to suit individual
needs.
Loosen the knobs & insert Arm's male socket
into female socket of vest as shown in image.
Now, your Galaxy Steadycam Arm & Vest
assembly is ready to use.
Arm Adjustment
The arm tension is adjusted for the heaviest camcorder, so when you apply the camcorder and sled on the
arm for the first time it does not stay down. Now adjust the arm for the weight of your camcorder:
Move the arm to the middle of its booming (up and down range) and let go. (If it stays where it is, you
are probably close to the right adjustment).
Keep making small adjustments until the camcorder does not rise or fall when you let go of it in the
middle of its booming range.
Position arm
Move the camcorder to your left so the arm crosses your body.
Adjust the arc of your arm so the rig feels comfortable to you.
Keep the camcorder close to your body.
2