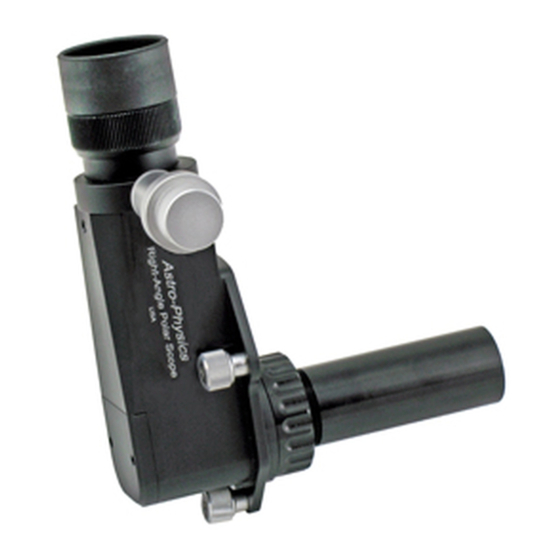
ASTRO-PHYSICS RAPAS Anleitung Handbuch
Blättern Sie online oder laden Sie pdf Anleitung Handbuch für Adapter ASTRO-PHYSICS RAPAS herunter. ASTRO-PHYSICS RAPAS 6 Seiten. Right-angle polar alignment scope

RIGHT-ANGLE POLAR ALIGNMENT SCOPE (RAPAS)
Congratulations on your receipt of our new polar alignment scope and your new-found freedom from neck strain. The
Astro-Physics Right-Angle Polar Scope has been machined to a very high level of accuracy. The optics and reticle are
also very precisely centered and collimated and require no further adjustment.
The RAPAS operation is simplicity itself. Utilizing the App on your smart device or
computer, you will simply move the real Polaris (or Sigma Octans in the southern
hemisphere) to the position on the reticle that is shown in the App by adjusting the
altitude and azimuth knobs of the mount. That is it...You are now polar aligned.
In order to achieve the greatest degree of accuracy, it will be necessary to level
your mount in the east-west direction. The north-south leveling is not important,
as you will make corrections with the altitude adjuster.
As with all polar alignment techniques, it is important to note that you may
experience slight changes in the accuracy of alignment when equipment
configurations are changed or if the alignment is done prior to loading the
counterweights and mounting your scopes. This is due to flexures of the mount,
of the pier and of the ground on which it sits. The highest precision is obtained if
the RAPAS is used with the same equipment configuration each time.
Important Note: The use of secondary alignment routines following a RAPAS alignment may decrease
your polar alignment accuracy! DO NOT do Polaris or 2-Star alignments following the RAPAS
alignment!
Attaching the RAPAS Adapter to Your Mount:
With the exception of the Mach1GTO (serial # M10670 and later), 1100GTO and 1600GTO, it will be necessary to replace
your mount's polar axis rear plate with the new RAPAS Adapter (except the 900 mounts which simply add the adapter to
the existing rear plate). Each mount type has an adapter designed specifically for it. Please note that the new adapter will
add some dimension to the rear of your mount. This may require a slight modification to the foam lining of carry cases.
Mach1GTO (serial # M10670 and later), 1100GTO and 1600GTO
The Mach1GTO (serial # M10670 and later), 1100GTO and 1600GTO mounts have been designed to receive the Right-
Angle Polar Scope with no modification needed. Simply remove the Cap and the three place-holder screws and insert
the scope. Then lock it in place with the three thumbscrews. Be sure the RAPAS is fitting flush to the mount's rear plate
(snugging with a Phillips #2 screwdriver may help). Follow "The Basics for Aligning the RAPAS Adapter" below in order to
precision adjust the rear plate of these two mount types to gain greater accuracy.
1200 mounts
(Illustration page 2) – Use RAP1200
Adapter
Attachment
Push Screw (3)
Hole (3)
Alignment
Holes
RAPAS
Attachment Holes
not be re-used). Use the same screws to attach the RAP1200, being careful
to orient the adapter so that the two RAPAS alignment holes (these are not
through-holes) are towards the top. Secure the adapter in place and you are finished. This adapter must always remain
attached to the mount. Only the RAPAS itself will be removed. Reference the above photos left and right.
INSTRUCTIONS
Start by removing the 1200 mount's
threaded Polar Axis Rear
Cap (M12660 or M12666)
and the Polar Alignment
M4037
Scope Plug (M4037), if
it has one. (Neither of
these two parts will be
used with the new configuration.) When
unscrewing the Polar Alignment Scope
Plug (M4037) be sure to ONLY remove
the M4037. Do not allow the bearing
thrust plate behind it to turn! Next,
remove the three Allen screws that attach
the existing rear plate (this plate will
1
Eyepiece - focusable
with reticle
Illuminator - adjustable
brightness
Attachment Thumb
Screws (3)
Optical Tube with
25 mm f/8 lens
Attachment Screws (3)
Push Screws (3)
Thumbscrews (3)
