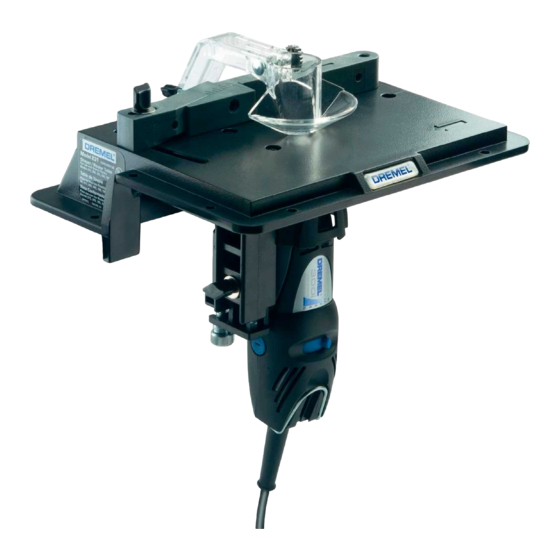
Dremel 231 Original-Bedienungsanleitung - Seite 6
Blättern Sie online oder laden Sie pdf Original-Bedienungsanleitung für Elektrowerkzeug Dremel 231 herunter. Dremel 231 6 Seiten. Shaper/router table
Auch für Dremel 231: Anleitung Handbuch (8 seiten), Handbuch (16 seiten)

ROUTER FEED DIRECTION
The router spindle turns in an anticlockwise direction when viewed
from above the table. For best control and quality of cut, feed the work
intoņtheņbitņinņtheņdirectionņthatņtheņbitņwillņtendņtoņpullņtheņworkņtoņtheņ
fence. Feed the workpiece from right to left as shown.
See Figure 6
Feed direction is extremely important when using a pilot bit freehand
onņtheņedgeņofņaņworkpieceņasņwellņasņwhenņusingņtheņfenceņwithņallņ
bits.
See Figure 7a: Feed Direction without Fence
See Figure 7b: Feed Direction with Fence
Feed Direction Arrow
A
Tips Table:
1.ņ
WrongņDirectionņĶņHardņtoņcontrol
Feeding too fast - Overloads motor
2.ņ
3.ņ
DullņbitņĶņOverloadsņmotor
4.ņ
CuttingņtooņlargeņorņdeepņinņoneņpassņĶņOverloadsņmotor
Feeding too slow - Leaves friction burns on work.
5.ņ
ROUTING USING THE FENCE
1.ņ
Unplugņtheņrotaryņtoolņbeforeņmakingņanyņfenceņadjustmentsņorņbitņ
changes. Feed the work against the rotation of the bit as shown.
Mostņfenceņcuttingņisņdoneņwithņtheņsupportņwedgeņadjustedņtoņ
theņrightņwhereņitņisņinņlineņwithņtheņfence.
See Figure 8: Fence
A
ClampņScrewņNut
B
Feed Direction
C
SupportņWedge
2.ņ
Centerņcylinderņofņtheņguardņcanņbeņadjustedņupņwhenņmakingņ
cutsņusingņtheņfence.ņLoosenņthumbņnut,ņliftņtheņcylinderņupņandņ
secureņbyņtighteningņthumbņnut.
3.ņ
Whenņshapingņsmallņpiecesņorņwhenņfinishingņtheņcutņonņnarrow,ņ
longņpieces,ņuseņaņpushņstick.ņUseņ5ņxņ50ņxņ200ņmmņ(metrics)ņ
pieceņofņlumberņnotchedņasņshownņtoņmakeņthisņpushņstick.ņItņwillņ
D
enableņyouņtoņkeepņyourņhandsņawayņfromņtheņcuttingņarea.
See Figure 9: Feed Direction for Straight Cuts with Fence
A
LargeņKnob
B
CenterņCylinder
Thumb Nut
C
D
PushņStick
To cut a straight groove, install the bit and set the depth of cut
4.ņ
using the depth adjustment knob as shown in Fig. 4. Loosen large
knobņonņleftņendņofņfenceņassemblyņtoņproperņdistanceņfromņbitņtoņ
give desired groove location. Retighten large knob. Take a trial cut
onņscrapņlumberņtoņcheckņdepthņandņlocationņofņgroove.
5.ņ
Whenņtrimmingņtheņentireņedgeņofņaņworkpiece,ņadjustņtheņsupportņ
wedge for support of the workpiece on the left side of the cutter. First,
adjust the fence to control the amount of cut. Take a trial cut of about
50 mm long and check the amount of cut. Turn rotary tool off. Loosen
wedgeņclampņnutņandņslideņwedgeņtoņleftņuntilņwedgeņcontactsņ
workpiece.ņRetightenņclampņnutņtoņsecureņwedgeņtoņfence.ņWorkpieceņ
will not have support on both sides of the cutter. (See Fig. 8)
Place material between router bit or
WARNING
!
accessory and fence while routing or
sanding edge.
ROUTING USING PILOT BITS
1.ņ
Whenņbitsņwithņpilotsņareņtoņbeņused,ņmoveņtheņfenceņbackņonlyņ
enoughņtoņallowņtheņamountņofņcutņtoņbeņmade.ņKeepingņtheņfenceņ
closeņtoņtheņbitsņallowsņtheņfenceņtoņserveņasņaņrearņguard.ņInņ
specialņcasesņwhenņtheņfenceņmustņbeņremovedņfromņtheņtable,ņ
adjustņtheņcentreņcylinderņofņtheņguardņdownņtoņprovideņprotectionņ
fromņrevolvingņcutter.
Only piloted bits can be used without the fence. The workpiece
2.ņ
shouldņbeņkeptņbetweenņtheņcutterņandņtheņoperator,ņandņfedņfromņ
rightņtoņleft.ņ
Feed the workpiece past the cutter without stopping and with
3.ņ
aņconsistentņspeed,ņAņchangeņinņfeedņorņaņdwellņwillņcauseņanņ
irregularņcut.
EXPANDED TABLE WORK SURFACE
The Shaper/Router table is designed to make it easy to expand the
sizeņofņtheņworkingņsurface.ņUseņ10ņmmņthickņsolidņcoreņplywood.ņ
Cutņaņrectangularņholeņinņtheņplywoodņtoņfitņoverņtheņtableņandņsecureņ
usingņ(8)ņ#10ņwoodņscrews,ņ12ņmmņinņlength.ņSupportņtheņtableņatņ
bothņendsņbyņsecuringņ40ņmmņhighņlumberņsupportsņtoņtheņplywoodņ
base.ņ(SeeņFig. 10)ņ(Hardwareņnotņincluded)
See Figure 10:
A
40ņmmņ
SlotņtoņClearņGuard
Rectangular Hole to fit over Table
B
C
40ņmmņHighņSupportsņonņBothņEndsņwillņrestņonņBench
D
10ņmmņPlywood
SERVICE AND WARRANTY
This DREMEL product is guaranteed in accordance with statutory/
countryĶspecificņregulations;ņdamageņdueņtoņnormalņwearņandņtear,ņ
overloadņorņimproperņhandlingņwillņbeņexcludedņfromņtheņguarantee.
Inņcaseņofņaņcomplaint,ņsendņtheņtoolņundismantledņtogetherņwithņproofņ
ofņpurchaseņtoņyourņdealer.
CONTACT DREMEL
For more information on the Dremel assortment, support and hotline,
goņtoņwww.dremel.com
Dremel Europe, P.O. Box 3267, 4800 DG Breda, The Netherlands
ALLGEMEINE SICHERHEITSHINWEISE
WARNUNG
!
Fehler bei der Einhaltung der nachstehend aufgeführten Anweisungen
können elektrischen Schlag, Brand und/ oder schwere Verletzungen
verursachen. Der nachfolgend verwendete Begriff "Elektrowerkzeug"
bezieht sich auf netzbetriebene Elektrowerkzeuge (mit Netzkabel).
BEWAHREN SIE DIESE ANWEISUNGEN GUT
ARBEITSPLATZ
a.ņ ņ H altenņSieņIhrenņArbeitsbereichņsauberņundņaufgeräumt.ņUnordnung
und unbeleuchtete Arbeitsbereiche können zu Unfällen führen.
b.ņ ņ A rbeitenņSieņmitņdemņGerätņnichtņinņexplosionsgefährdeterņ
Umgebung, in der sich brennbare Flüssigkeiten, Gase oder Stäube
befinden.ņElektrowerkzeuge erzeugen Funken, die den Staub oder
die Dämpfe entzünden können.
c.ņ ņ H altenņSieņKinderņundņandereņPersonenņwährendņderņBenutzungņ
desņElektrowerkzeugsņfern.ņBei Ablenkung können Sie die Kontrolle
über das Gerät verlieren.
6
SÄMTLICHE ANWEISUNGEN SIND
ZU LESEN.
AUF
