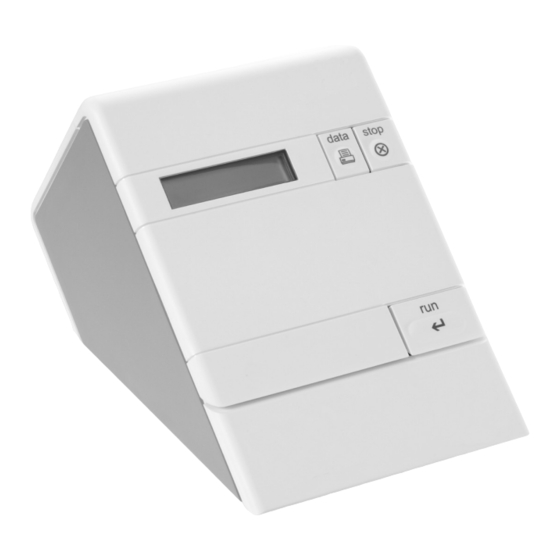
Alere Cholestech LDX Kurzreferenz-Handbuch - Seite 2
Blättern Sie online oder laden Sie pdf Kurzreferenz-Handbuch für Messgeräte Alere Cholestech LDX herunter. Alere Cholestech LDX 2 Seiten.

Setup
Take the time to examine and familiarize yourself with the contents of the Alere Cholestech LDX
Connecting the Alere
Cholestech LDX
Analyzer
®
to the Printer
C
D
B
A
Before starting to test, press and hold
STOP to enter the Configuration Menu
and select options for language, units,
sample type, printer, risk assessment,
date and time.
Plug the printer power
Plug the power supply
C
supply
A
into the printer
into the Alere Cholestech
The DATA button allows you to
and the wall or power
LDX
®
Analyzer and the wall
select choices for each of the menu
strip. Connect the end
or power strip. Insert the
items in the Configuration Menu. The
end of the white printer
RUN button enters your choices and
of the printer cable B,
advances you to the next menu item.
labeled 'To Printer' to the
cable D, labeled 'To
printer.
Cholestech LDX
®
," into
the analyzer. Loop through
the cable support.
Optics Check
Running Controls
Run the Optics Check Cassette
Alere™ Level 1 and 2 Controls
Press the RUN button.
Controls must be run
The drawer will open.
following manufacturer's
Place the Optics Check
recommendations. Controls
Cassette into the cassette
must be at room temperature
before testing. Verify that the
drawer. Press the RUN
lot number on the control vial
button again to close the
and the assay sheet are the
drawer.
same. Mix each vial by gently
inverting at least 7 times immediately before
Record Results
use. Store controls in the refrigerator when
not in use.
Check to see that the
four numbers are within
the acceptable range
Testing QC Material
printed on the Optics
Check Cassette. Record
Use the MiniPet
the results on the
tips to measure and dispense
Optics Check Log. If the
the control sample into the
numbers are outside the
cassette. Place the cassette
in the drawer immediately
range, the analyzer will
be temporarily disabled until another optics
and press RUN. Record
check is run that falls within range.
results on a Quality Control
The Optics Check Cassette is used to check
Log. Results must be within
the optical system of the analyzer. Run the
established ranges before patient samples
Optics Check Casette: once each day before
can be tested.
patient samples are tested and after the
Alere Cholestech LDX
Analyzer has been
®
moved or serviced.
Test Procedure
®
System.
Open the Drawer
Configuration Menu
Press the RUN button on the analyzer. The
cassette drawer will open, and the screen
will display:
Load cassette
and press RUN
Insert the Cassette
Immediately place the cassette into the
analyzer drawer with the black reaction
bar toward the analyzer and the brown
magnetic stripe on the right.
FAQ
®
Pipette and
Frequently asked questions about the use of the Alere Cholestech LDX
How do I get a CLIA Certificate of Waiver?
Even though the Alere Cholestech LDX
site using the Alere Cholestech LDX
To obtain a Certificate of Waiver, call your state department of health or Alere (1.877.441.7440) for an
application (form CMS-116). Alere can give you the phone number of your state department of health and
assist you in filling out the application.
Remember:
The Alere Cholestech LDX
Perform a Fingerstick
After cleaning the selected site with alcohol
and drying it thoroughly, firmly prick the site
with a lancet. Gently squeeze the finger to
obtain a large drop of blood. Wipe off the
first large drop of blood.
Begin the Test
Press RUN. The drawer will close. When the test
is finished, the analyzer will beep and the drawer
will open. Put everything that touched the
blood sample into a biohazardous waste
container.
®
System.
System is a "CLIA-waived" test system, each laboratory or testing
®
System must have a CLIA Certificate of Waiver before starting testing.
®
System is only waived for fingerstick or venous whole blood.
®
Collect the Sample
Dispense the Sample
Squeeze the finger gently again until a large
Place the end of the capillary tube into the
drop of blood forms. Hold the capillary tube
sample well and dispense the sample by pushing
horizontally by the end with the plunger. Touch
down on the plunger. Keep the cassette level
it to the drop of blood without touching the skin.
after the sample has been applied.
Fill the capillary tube within 10 seconds.
Do not allow any bubbles to enter the
capillary tube.
View the Results
Print the Results
Press the DATA button on the analyzer once or
The results will print when the test is finished.
twice (depending on the test cassette) to view
remaining results.
This reference guide provides a brief summary of the testing procedure. For more information, see the
test cassette and control package insert or the Alere Cholestech LDX
How often do I have to run the controls?
Controls should be tested:
•
With each new lot of cassettes;
•
With every new shipment of cassettes, even if the lot has been received previously;
•
When reagents may have been stored or handled in a way that can degrade their performance;
•
As otherwise required by your laboratory's standard quality control procedures;
•
As otherwise required by federal, state and local guidelines.
How should I store my cassettes?
When stored refrigerated at 36–46°F (2–8°C), the cassettes are stable until the expiration date printed
on the cassette pouch and box. Cassettes can be stored at room temperature for 30 days. Do not use a
cassette past the expiration date. Do not return cassettes to the refrigerator once they have been stored
at room temperature.
System User Manual.
®
