3M Peltor LiteCom MT53H7P3E4600-NA Benutzerhandbuch - Seite 6
Blättern Sie online oder laden Sie pdf Benutzerhandbuch für Kopfhörer 3M Peltor LiteCom MT53H7P3E4600-NA herunter. 3M Peltor LiteCom MT53H7P3E4600-NA 15 Seiten. The sound solution
Auch für 3M Peltor LiteCom MT53H7P3E4600-NA: Handbuch (18 seiten)
EN
3M™ Peltor™ LiteCom
Hearing protector with built-in two-way radio.
Read these instructions carefully before use and save them for future reference.
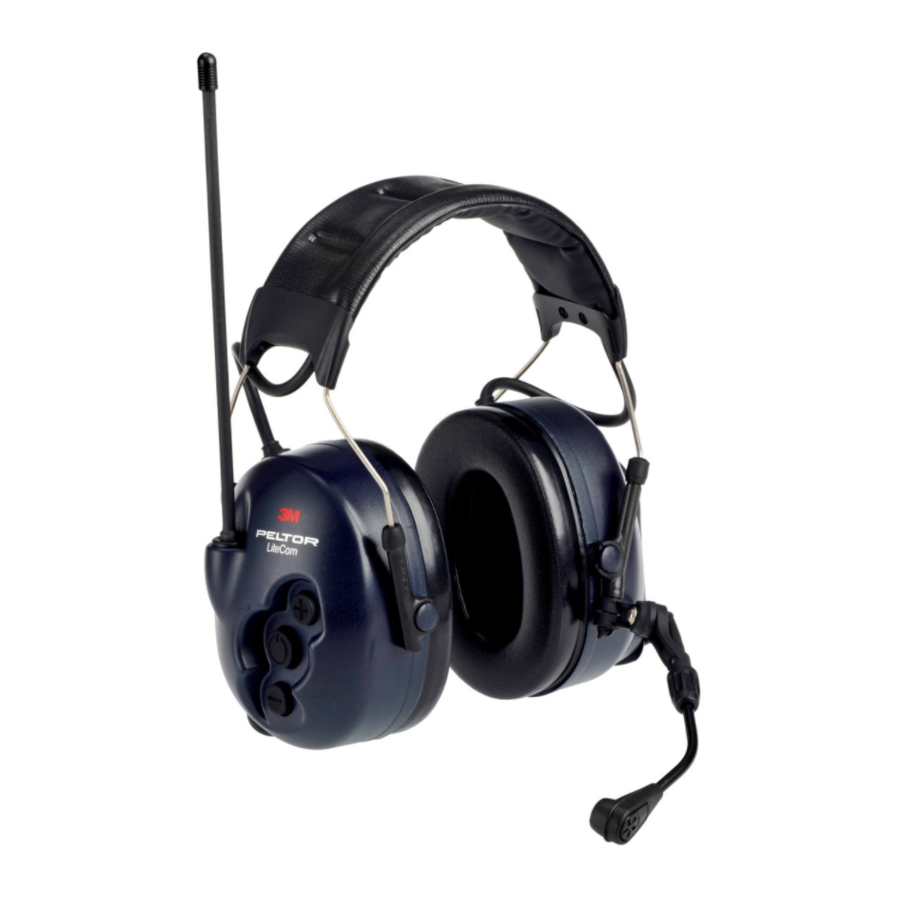
1. COMPONENTS
1.1 Headband (figure A)
(A:1) Headband
(A:2) Headband padding (PVC foil)
(A:3) Headband wire (stainless steel)
(A:4) Two-point fastener (POM)
(A:5) Ear cushion (PVC foil and PUR foam)
(A:6) Attenuation cushion (PUR foam)
(A:7) Cup
(A:8) Speech microphone (electret microphone)
(A:9) On/Off/Mode
(A:10) +
(A:11) –
(A:12) Antenna
(A:13) Speech microphone input (J22)
(A:14) PTT (Push To Talk button)
(A:15) Battery cover
1.2 Helmet attachment (figure B)
(B:1) Cup supporting arm (stainless steel)
1.3 Neckband (figure C)
(C:1) Neckband wire (stainless steel)
(C:2) Neckband cover (POX)
2. FITTING AND ADJUSTMENT
2.1 Over the head position (figure D)
(D:1) Slide out the earcups and tilt the upper part of the cups outward so that the wires are positioned away from the headband.
(D:2) Position the earcups over your ears so that the cushions fully enclose the ears and seal tightly against the head. Adjust
the height of each earcup while holding the headband down until you have a tight and comfortable fit that exerts even
pressure around the ears.
(D:3) The headband should sit straight on the head.
2.2 Behind the head position (figure E)
For independent use with or without hard hats or caps.
(E:1) Slide out the earcups and tilt the upper part of the cups outward so that the wires are positioned away from the headband.
(E:2) Position the earcups over your ears so that the cushions fully enclose the ears and seal tightly against the head.
(E:3) Adjust the height of each earcup until you have a tight and comfortable fit that exerts even pressure around the ears.
2.3 Helmet attachment (figure F)
(F:1) Insert the helmet slot adapters into the slots on each side of the helmet until they snap into place.
When in use, the attachment arms must be pushed inward until you hear a click on both sides, indicating a shift from "stand-by"
to "usage" position. Position the earcups over your ears so that the cushions fully enclose the ears and seal tightly against the
head. Adjust the position of each earcup while holding the helmet in place until you have a tight and comfortable fit that exerts
even pressure around the ears. Make sure the cups and attachment arms are not in contact with the inner lining or the edge of
the hard hat when in the "usage" position, otherwise this may lead to leakage.
(F:2) Note that the cups can be placed in usage position and stand-by position (F:3)
Note: In Canada, users of hard hats combined with earmuffs must refer to CSA Standard Z94.1 on industrial protective head-
wear.
6