3monkeez P-3MSS-FVTF Einbauanleitung
Blättern Sie online oder laden Sie pdf Einbauanleitung für Kontrolleinheit 3monkeez P-3MSS-FVTF herunter. 3monkeez P-3MSS-FVTF 2 Seiten. Stainless steel knee/foot valve
Auch für 3monkeez P-3MSS-FVTF: Einbauanleitung (2 seiten), Einbauanleitung (2 seiten)
Congratulations! You have just purchased one of the premium products from 3monkeez commercial tapware range which has been
IMPORTANT INFORMATION
• Valve must be installed by a qualified plumber in accordance with the Plumbing Code of Australia (PCA), AS/NZS3500 and the
Manufacturer's instructions
• All pipework must be thoroughly flushed to remove any debris prior to installation as foreign materials may cause damage to internal parts
and affect performance
• If the unit is replacing an existing unit please ensure the water supply is turned off. It is recommended that isolating stop taps are fitted to
the inlet connection
Step 1
Unpack the foot valve, make sure all parts are included and no damage is present.
Step 2
Flush the water supply line to clear any debris.
Step 3
This valve requires 2 mounting holes. If the holes do not exist, mark out and drill as shown in Figure 1.
Step 4
Secure the valve in place using chosen fixings through the mounting holes.
Step 5
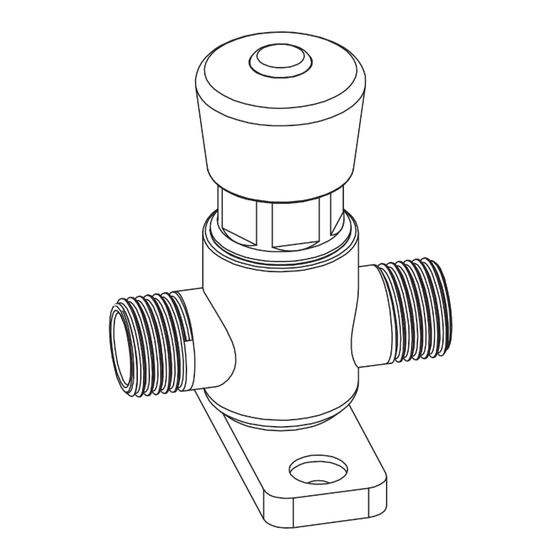
Apply thread sealant or thread tape to the inlet side of the valve, ensuring it does not obscure the opening. Connect your cold or tempered
water flexible hose to the inlet side of the valve. Water must travel in the direction of the arrow as shown in Figure 2.
Step 6
Apply thread sealant or thread tape to the outlet side of the valve, ensuring it does not obscure the opening. Connect your flexible hose to the
outlet side of the valve. Place the coloured indicator in the top of the valve head.
Step 7
Once the flexible hoses are connected to your water source and spout, turn on water supply and test the functionality of the valve by pushing
the top assembly in. Check for any leaks.
Step 8
To adjust the timed flow, carefully remove the indicator from the top assembly. The cartridge has 315 degrees of adjustment. Adjust the position
of the timing adjuster using a 3mm allen key. Test timed flow. Adjust and test again until the desired timed flow is achieved. Place the appropriate
coloured indicator back in place.
Figure 1
60
TIMED FLOW MAY VARY ACCORDING TO WATER PRESSURE, FLOW RATE AND TEMPERATURE
Connections
Working Pressure Range
Recommended Operating Temperature
Finish
CARTON CONTENTS - 1x Adjustable Timed Flow Knee Operated/Foot Operated Knee Valve,
TIMED FLOW STAINLESS STEEL KNEE/FOOT VALVE
manufactured to Australian Standard AS/NZS3718.
SCOPE OF APPLICATION
P-3MSS-FVTF
Note: Please follow the below procedures. If the below procedures are not followed it
may impact the life of some components and void warranties.
INSTALLATION INSTRUCTIONS
TECHNICAL INFORMATION
1/2" MI BSP Thread
50kPa - 500kPa (Maximum Pressure - 500kPa)
5-70 Degrees Celcius
Satin Stainless Steel
1x Installation Instructions
INSTALLATION INSTRUCTIONS
Figure 2
Inlet Side
Outlet Side