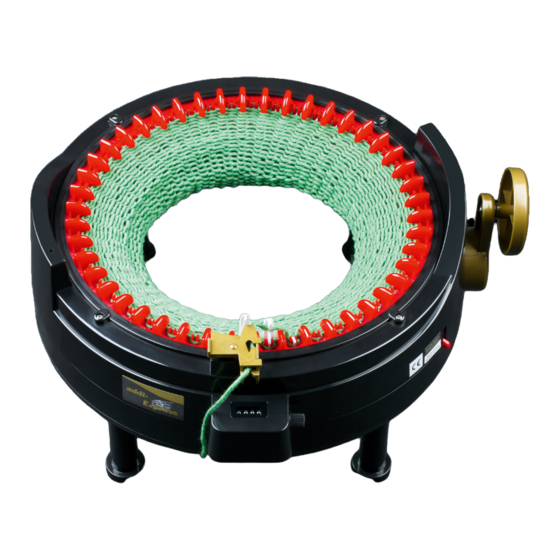
addi Express Kingsize Anleitung Handbuch - Seite 15
Blättern Sie online oder laden Sie pdf Anleitung Handbuch für Nähmaschine addi Express Kingsize herunter. addi Express Kingsize 16 Seiten.
Auch für addi Express Kingsize: Handbuch (20 seiten)

- 1. Table of Contents
- 2. Troubleshooting
- 3. Hooded Scarf
- 4. Cardigan #2
- 5. Product View and Parts Identification
- 6. Setting up
- 7. Introduction to Circular Knitting
- 8. Introduction to Plain Knitting
- 9. Multi-Coloured Knitting/Version
- 10. Addistopper
- 11. Troubleshooting
- 12. Abbreviations
- 13. Tips and Tricks
Tips +
Tricks
CASTING OFF
After casting off - which is more accurately unthreading
- it is advisable to put the penultimate row onto double
pointed needles or a circular needle and to carefully
pull out the cast off
stitches. Then loosely
cast off the last row as
in conventional hand
knitting. This results
in an elastic finish
which is not too loose.
The cast on edge can
also be cast off like
this afterwards.
RIBBON YARN
Ribbon yarn must be held at an angle, so that the needles
pick up the entire ribbon. Always let the yarn run loosely
through your hand.
DECORATIVE SEAMS
For visible, decorative seams, crochet the two edges
together using single stitches. Sew through both edges
with each stitch.
YARNS
You can use any yarn, even "flamed" ones, in cluding yarn
grades of different thicknesses.
PLAIN KNITTING
With plain knitting, ensure that no stitches catch on
the needles at the edge (particularly with thicker wool).
To avoid this, be careful to keep the wool under tension
when turning.
TOTAL ROW COUNT
Always knit an odd number of rows, because knit stitches
are better for casting off (1st row = immediately after
stopping).
SIZE CONVERSION
For smaller sizes simply make the pieces narrower. For
larger sizes use a correspondingly larger width.
REVERSE SINGLE CROCHET STITCH
Around almost all edges, finish with a round of reverse
single crochet stitches. Reverse single crochet stitches are
single stitches which are crocheted from left to right.
10
MATTRESS STITCH
Lay the edges that you want to join with the front facing
upwards parallel to each other. With a wool needle or
a blunt embroidery needle catch the the cross stitch
between the edge stitch and the first stitch. Pull the
thread through. On the opposite side, also catch the cross
stitch between the edge stitch and the first stitch and
pull the thread through.
Repeat this alternately on
one side and then the oth-
er. Once you have joined
approximately 2 cm like
this, tighten the thread
you are working with. The
knitted pieces will join
together seamlessly.
MULTI-COLOURED KNITTING
When knitting with more than one colour, simply tie
the two yarns together. Be careful to make a proper, tight
knot.
Trouble -
shooting
IF THE CRANK STOPS TURNING,
IT MAY BE BECAUSE...
... the operating switch is set to "Plain
knitting"
... the thread is not inserted correctly. In which case sim-
ply start again, following the instructions.
... remnants of yarn are stuck between the needle and
the shank. These can be plucked out out using the plastic
needle or a pair of tweezers.
IF STITCHES ARE DROPPED ...
... the crank was turned too fast.
... the thread was held too loosely.
... the thread was not properly caught on the needle. So
always watch the run of the yarn when knitting. In this
case, simply pick up the stitches again with the plastic
needle (as you would in normal knitting) and pull it over
the needle.
THE CRANK IS DIFFICULT TO TURN, BECAUSE ...
... the knitting yarn is set up too tightly. Remove the yarn
and thread it back again. Hold it loosely as you do so and
unwind the first few centimetres from the ball before you
knit the first row.
... the needles are damaged. Replace them following the
manufacturer's instructions.
... the yarn has slipped over the needle heads and must be
properly repositioned.
TO CHANGE NEEDLES ...
... loosen the 4 ring holder screws with a Phillips precision
screwdriver, carefully lift the black ring holder, hold the
red insert from the inside and lift it up, unscrew the 2
inner screws and remove the high black cylinder. Now
gently lift out the damaged needles, replace them with
the needles supplied and put the pieces back together in
reverse order.
Abbreviations
col
colour
cont
continuous
ch
chain stitch
p
purl
st
stitch(es)
r
row(s)
rd
round(s)
ri
right
k
knit
sl1.k1.psso
slip 1, knit 1, pass slip stitch over
rep
repeat
k2tog
knit 2 together
p2tog
purl 2 together
tog
together
11
