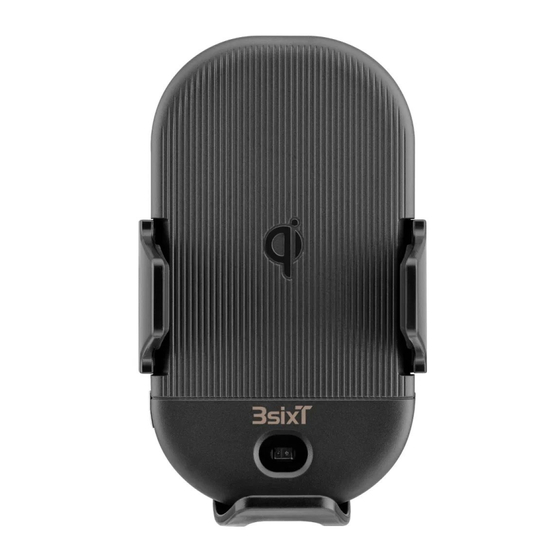
3SIXT 3S-1802 Betriebsanleitung - Seite 3
Blättern Sie online oder laden Sie pdf Betriebsanleitung für Zubehör für Kraftfahrzeuge 3SIXT 3S-1802 herunter. 3SIXT 3S-1802 4 Seiten. Prime motorised mount – 15w

OPERATION
Attaching the mount - Suction Mount
1. Locate a suitable clear, clean and dry area on your dashboard/window screen.
2. Loop the nut through the Suction mount ball, making sure it is the correct way around (larger opening
facing toward the Prime mount).
3. Together, push the ball end onto the female joint housing of the Prime mount and push until it clicks
into place.
4. Once in position thread the nut on the female joint housing by screwing it in a clockwise direction.
5. Make sure the nut is screwed in hand tight, to a point where the ball joint/window mount is difficult to
move.
6. Place the mount into position and firmly push the suction mounting cup against the
dashboard/window.
3. Activate the locking lever by pushing it down into the second position to secure it in place and create
a stable hold.
Removing the mount
1. Push the locking lever upwards to release.
2. Lift the tab at the edge of the suction mounting cup.
3. Remove the mount. (Residual marks can be easily cleaned off with a slightly wet cloth).
Attaching the mount – Crocodile/Standard Vent Mounts
1. Locate a suitable vent location within your car.
2. Loop the nut through the vent mount ball, making sure it is the correct way around (larger opening
facing toward the Prime mount).
3. Together, push the ball end onto the female joint housing of the Prime mount and push until it clicks
into place.
4. Once in position thread the nut on the female joint housing by screwing it in a clockwise direction.
5. Make sure the nut is screwed in hand tight, to a point where the ball joint/vent mount is difficult to
move.
Connecting the Prime mount to a power source
The mount requires a Qualcomm® Quick Charge™ 3.0 charge port to be able to work at optimum fast
charging speeds. If an incorrect charger is used, the wireless charging function may not charge at its
intended speed and/or may not work correctly or at all. See the 3SIXT website for compatible products
here:
https://www.3sixtgear.com/product/power/car-chargers/quick-charge-car-chargers/dualusb-qc3-
carcharger-54a-black/
1. Connect the USB-C connector to the device mount USB-C input (6).
2. Plug the Qualcomm 3.0 car charger into the car's cigarette lighter socket.
3. Connect the included cable USB-A end into the Quick Charge 3.0 port on the car charger.
Wireless Charging a device
Charging takes place upon full contact of the smartphone on the face of the mount itself (8).
1. Press the open/close button (7) to activate the arm clamps (1) into the open position.
2. Quickly place your Qi enabled smartphone onto the face of the mount (8). Once within range (between
6-8mm) the wireless charger will automatically activate via Qi wireless technology.
3. Depending on the size of your device you will need to adjust the feet up or down to get a centrally
position of your device on the mounting system (5 & 9).
5. By covering the centrally positioned IR sensor (4), the clamp arms (1) will automatically close to the
size of the device for a firm and secure hold.
www.3sixtgear.com
or visit www.3sixtgear.com/support
3
