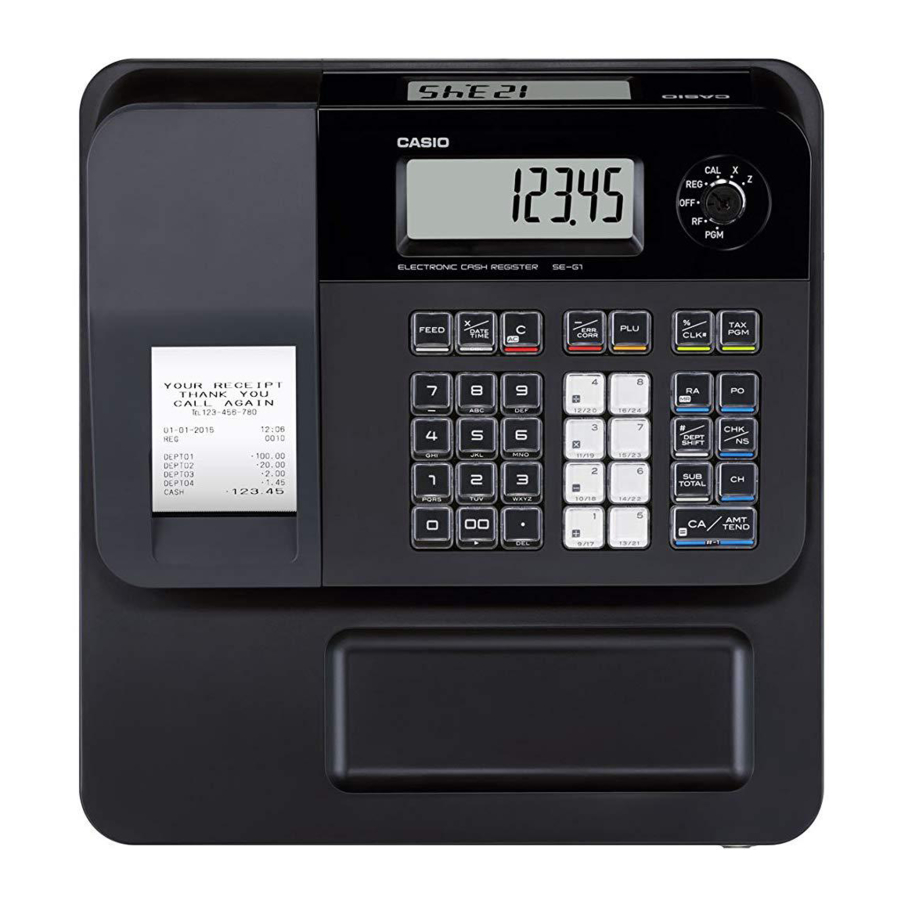
Casio SE-G1 Schnellstart-Handbuch - Seite 2
Blättern Sie online oder laden Sie pdf Schnellstart-Handbuch für Registrierkasse Casio SE-G1 herunter. Casio SE-G1 2 Seiten. Australian
Auch für Casio SE-G1: Handbuch zur Schnellprogrammierung (2 seiten)

Getting to know your cash register
1. Mode switch
Mode switch
OP
PGM
Operator key
Program key
The Program key marked PGM can select any posi-
tion of the Mode switch while Operator key marked
OP can select only OFF, REG, or CAL positions.
PGM RF OFF REG CAL
X
Z
OP key
-
-
-
-
¡
¡
¡
PGM key
¡
¡
¡
¡
¡
¡
¡
1
PGM (Programming)
This position is for setting your cash register to suit
the needs of your store.
2
RF (Refund)
Use this position to correct registered items.
3
OFF
The cash register turns off in this position.
4
REG (Register)
This position is for normal transactions.
5
CAL (Calculator)
Select this position when you use the cash register
as a calculator.
6
X (Read)
This is the position used for issuing daily sales totals
report without clearing the data.
7
Z (Reset)
This position is for issuing reports of daily totals with
clearing the accumulated totals.
MA1407-E
2. Display
4
*1234%67
5
1
3
2
1
Department number display
Anytime you press a department key to register an
item, corresponding department number appears
here.
2
PLU number display
When you perform a PLU registration, corresponding
PLU number appears here.
3
Number of repetition
When you register an item repeatedly in a depart-
ment, the number of repetition appears here.
4
Numeral display
Entered values (unit prices or quantities) and calcu-
lated values (subtotals, totals, or change amount due)
are displayed here. Up to eight digits numbers are
shown in this area.
5
Character display
This digit shows the last character set in the char-
acter program mode (P2). Total (T) or change (C)
appears when a total, subtotal, or change amount is
displayed on part 4.
3. Keyboard
1
2
3
4
8
9
l
1
Press to feed the receipt or
journal paper.
h
2
Press to register multiple
quantity of an item. Also this
key is used for displaying date
and time.
y
3
Press to correct the last
operation if it is not registered in
the memory (before pressing a
department key)
g
4
Press to discount items in price.
Also this key is used to correct
wrong entry after pressing a
department key.
i
5
PLU (Price Look Up) key is
used to preset unit prices of
items.
:
6
Press to discount items in rate.
Also this key is used to assign
cashiers by ID numbers.
~
7
This key is used to program a
tax rate.
? >
'
8
,
Numeral entry keys
"
9
Decimal point key
a 8
10
These keys are used to register
items in corresponding depart-
ment.
to
keys are used
a
f
for four arithmetic calculations
in the calculator mode.
5
6
7
11
12
13
14
15
16
10
17
c
11
Received on Account key.
Use this key when you receive
money and put in the drawer
without any transaction.
v
12
Paid Out key Use this key when
you withdraw money from the
drawer.
j
13
Press this key before you input
any number for your reference.
Also, by combinations with
department keys, items can be
registered in up to 24 depart-
ments.
m
14
Check/No sale key. Use this
key when the payment is made
by checks. Also pressing this
key opens the drawer without
any registration.
k
15
Use this key to calculate the
subtotal.
u
16
Use this key for charge sales.
p
17
Cash Amount Tendered key.
Use this key when the payment
is made in cash. Also this key
functions as the equal (=) key in
the calculator mode.
Daily job flow
Before opening your store
• Plugged in?
• Enough paper roll?
• Date and time are correct?
(pages E-63 and E-64 of the
User's Manual)
• Enough small change in the
drawer?
While the store is open
• Registrations (page E-15 of
the User's Manual)
• Issuing latest total sales
report if needed. (page E-26
of the User's Manual)
After closing the store
• Issuing day's total sales
report. (page E-26 of the
User's Manual)
• Withdraw the money from
the drawer.
After you withdraw all the
money from the drawer, we
recommend that you leave
the drawer open when you
leave your store.
• Turn the Mode switch to
OFF.
