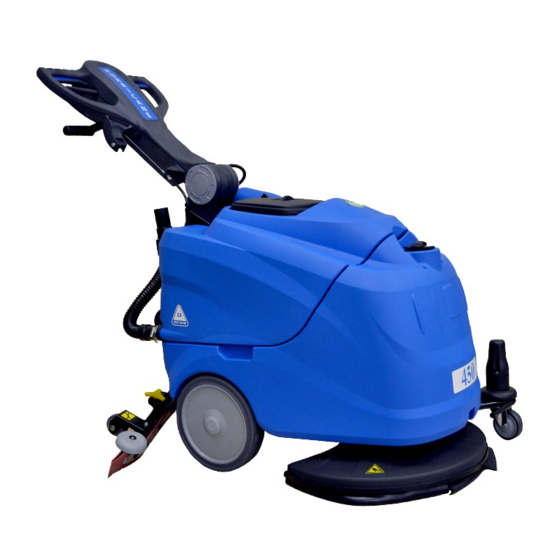
Dustbane Hurricane 450 XTT Handbuch Rapide - Seite 2
Blättern Sie online oder laden Sie pdf Handbuch Rapide für Schrubber Dustbane Hurricane 450 XTT herunter. Dustbane Hurricane 450 XTT 2 Seiten.
Auch für Dustbane Hurricane 450 XTT: Kurzanleitung (2 seiten)
ENTRETIEN QUOTIDIEN
Nettoyez le réservoir d'eau sale.
Clean the dirty
Clean the dirty
Clean the dirty
Clean the dirty
Clean the dirty
Check that the
water tank.
water tank.
water tank.
water tank.
water tank.
detergent outlet filter
is clean.
Check that the
brush is clean.
Check that the
Check that the
Check that the
squeegee is clean
Assurez-vous que la raclette est
Check that the
squeegee is clean
squeegee is clean
and the blades are not
propre et que les lames ne sont pas
Check that the
and the blades are not
squeegee is clean
and the blades are not
worn.
squeegee is clean
usées.
and the blades are not
worn.
worn.
and the blades are not
worn.
worn.
REMPLACEMENT DES LAMES DE LA RACLETTE
Open the clip (Ref. 1).
Remove the two blade retainers (Ref. 2) by pushing them outwards then extracting them.
Open the clip (Ref. 1).
Open the clip (Ref. 1).
Remove the blade.
Remove the two blade retainers (Ref. 2) by pushing them outwards then extracting them.
Remove the two blade retainers (Ref. 2) by pushing them outwards then extracting them.
Ref. 1
Open the clip (Ref. 1).
Reuse the same blade by reversing the edge in contact with the floor until all four edges are worn out, or replace with a new blade, fitting it onto the
Remove the blade.
Remove the blade.
Remove the two blade retainers (Ref. 2) by pushing them outwards then extracting them.
screws on the body of the squeegee.
Open the clip (Ref. 1).
Reuse the same blade by reversing the edge in contact with the floor until all four edges are worn out, or replace with a new blade, fitting it onto the
Reuse the same blade by reversing the edge in contact with the floor until all four edges are worn out, or replace with a new blade, fitting it onto the
Remove the blade.
Reposition the two blade pressing devices by centering the wider part of the slots on the squeegee body fastening pins, then push the blade pressing
screws on the body of the squeegee.
Remove the two blade retainers (Ref. 2) by pushing them outwards then extracting them.
screws on the body of the squeegee.
Reuse the same blade by reversing the edge in contact with the floor until all four edges are worn out, or replace with a new blade, fitting it onto the
devices inwards.
Reposition the two blade pressing devices by centering the wider part of the slots on the squeegee body fastening pins, then push the blade pressing
Remove the blade.
Reposition the two blade pressing devices by centering the wider part of the slots on the squeegee body fastening pins, then push the blade pressing
Close the hook again.
screws on the body of the squeegee.
devices inwards.
Reuse the same blade by reversing the edge in contact with the floor until all four edges are worn out, or replace with a new blade, fitting it onto the
devices inwards.
Replace the squeegee on its support, following the instructions described previously.
Reposition the two blade pressing devices by centering the wider part of the slots on the squeegee body fastening pins, then push the blade pressing
Close the hook again.
screws on the body of the squeegee.
Close the hook again.
devices inwards.
Replace the squeegee on its support, following the instructions described previously.
Reposition the two blade pressing devices by centering the wider part of the slots on the squeegee body fastening pins, then push the blade pressing
Replace the squeegee on its support, following the instructions described previously.
Close the hook again.
devices inwards.
Replace the squeegee on its support, following the instructions described previously.
Ouvrez le clip (Réf. 1).
Close the hook again.
Attaching the brush:
Replace the squeegee on its support, following the instructions described previously.
•
rest the brush on the floor in front of the machine. Raise the front of the machine by levering on the handle, then lower it onto the brush, centring it with the brush cover. Action the drive lever repeatedly until the brush
Retirez les deux dispositifs de retenues de la lame (Réf. 2)
Attaching the brush:
engages..
Attaching the brush:
•
rest the brush on the floor in front of the machine. Raise the front of the machine by levering on the handle, then lower it onto the brush, centring it with the brush cover. Action the drive lever repeatedly until the brush
Removing the brush:
en les poussant vers l'extérieur et extraire la lame. Retirez la lame.
•
rest the brush on the floor in front of the machine. Raise the front of the machine by levering on the handle, then lower it onto the brush, centring it with the brush cover. Action the drive lever repeatedly until the brush
engages..
•
Raise the front of the machine by levering on the handle, then operate the brush lever repeatedly. After operating the lever a few times, the brush is released and falls to the ground.
Attaching the brush:
engages..
Removing the brush:
•
rest the brush on the floor in front of the machine. Raise the front of the machine by levering on the handle, then lower it onto the brush, centring it with the brush cover. Action the drive lever repeatedly until the brush
Removing the brush:
Réutilisez la même lame en inversant le bord en contact avec
•
Raise the front of the machine by levering on the handle, then operate the brush lever repeatedly. After operating the lever a few times, the brush is released and falls to the ground.
engages..
Attaching the brush:
•
Raise the front of the machine by levering on the handle, then operate the brush lever repeatedly. After operating the lever a few times, the brush is released and falls to the ground.
Removing the brush:
•
rest the brush on the floor in front of the machine. Raise the front of the machine by levering on the handle, then lower it onto the brush, centring it with the brush cover. Action the drive lever repeatedly until the brush
le plancher jusqu'à ce que les quatre bords soient usés
•
Raise the front of the machine by levering on the handle, then operate the brush lever repeatedly. After operating the lever a few times, the brush is released and falls to the ground.
engages..
ou remplacez-la par une nouvelle lame en la fixant sur les vis
Removing the brush:
•
Raise the front of the machine by levering on the handle, then operate the brush lever repeatedly. After operating the lever a few times, the brush is released and falls to the ground.
sur le corps de la raclette.
Repositionnez les deux dispositifs de pression de la lame
en centrant la partie la plus large du corps de la raclette
sur les fentes des pièces de fixation, puis poussez les dispositifs
de pression de la lame vers l'intérieur.
Fermez le crochet à nouveau.
Replacez la raclette sur son support, en suivant les instructions décrites
PLDC02099
précédemment.
PLDC02099
PLDC02099
PLDC02099
Les Produits Dustbane Ltée, 25 pl. Pickering, Ottawa, ON K1G 5P4
PLDC02099
DAILY MAINTENANCE
DAILY MAINTENANCE
DAILY MAINTENANCE
DAILY MAINTENANCE
DAILY MAINTENANCE
Check the dirty water tank float
Check the dirty water tank float
Check the dirty water tank float
Check the dirty water tank float
Check the dirty water tank float
Assurez-vous que le sceau extérieur
is undamaged and clean and
is undamaged and clean and
is undamaged and clean and
is undamaged and clean and
is undamaged and clean and
des couvercles est propre et non
moves freely on the pin.
moves freely on the pin.
Check that the
moves freely on the pin.
moves freely on the pin.
moves freely on the pin.
brush is clean.
endommagé. Remplacez-le si
nécessaire.
BATTERY
BATTERY
CHARGER ON
BATTERY
CHARGER ON
BOARD
CHARGER ON
BATTERY
BOARD
BOARD
CHARGER ON
BATTERY
BOARD
CHARGER ON
BOARD
REPLACING THE SQUEEGEE BLADES
REPLACING THE SQUEEGEE BLADES
REPLACING THE SQUEEGEE BLADES
REPLACING THE SQUEEGEE BLADES
REPLACING THE SQUEEGEE BLADES
Ref. 2
ATTACHING/REMOVING THE BRUSH
ATTACHING/REMOVING THE BRUSH
ATTACHING/REMOVING THE BRUSH
ATTACHING/REMOVING THE BRUSH
ATTACHING/REMOVING THE BRUSH
Check that the
Check that the
Check that the
Check that the
Assurez-vous que le filtre de sortie
Check that the
detergent outlet filter
detergent outlet filter
detergent outlet filter
detergent outlet filter
du détergent est propre et exempt
detergent outlet filter
Clean the dirty
is clean.
is clean.
is clean.
is clean.
water tank.
is clean.
de débris.
POUR CHARGER LES
BATTERIES
Branchez le chargeur autonome
dans le port de charge rouge
pour charger les batteries s'il
n'est pas équipé d'un chargeur
de bord.
REMARQUE : n'arrêtez jamais la
charge avant la fin du cycle (feu
vert).
Check that the
squeegee is clean
and the blades are not
worn.
Open the clip (Ref. 1).
Remove the two blade retainers (Ref. 2) by pushing them outwards then extracting them.
Remove the blade.
ATTACHEZ/RELÂCHEZ L'ENTRAÎNEMENT
Reuse the same blade by reversing the edge in contact with the floor until all four edges are worn out, or replace with a new blade, fittin
screws on the body of the squeegee.
Reposition the two blade pressing devices by centering the wider part of the slots on the squeegee body fastening pins, then push the
Placez la brosse sous la tête, au centre (auto-récureuse à brosse
devices inwards.
Close the hook again.
unique), placez les brosses sous la tête des deux côtés (auto-récuresue
Replace the squeegee on its support, following the instructions described previously.
à double brosse), mettez la machine en marche.
Appuyez sur l'interrupteur ON-OFF, une fois après le démarrage, la
Attaching the brush:
machine libère la fixation de la brosse. Le bouton n'est activé que
•
rest the brush on the floor in front of the machine. Raise the front of the machine by levering on the handle, then lower it onto the brush, centring it
engages..
lorsque toutes les fonctions sont désactivées (moteur d'aspiration et
Removing the brush:
•
Raise the front of the machine by levering on the handle, then operate the brush lever repeatedly. After operating the lever a few times, the brush is
brosses).
PLDC02099
•
Tél : 1-800-387-8226 Fax : 1-800-363-5309 www.dustbane.ca
DAILY MAINTENANCE
Assurez-vous que les brosses/
Check that the
Check that the
Check that the
Check that the
Check the dirty water tank float
Check that the
brush is clean.
brush is clean.
tampon d'entraînement sont
brush is clean.
brush is clean.
is undamaged and clean and
brush is clean.
moves freely on the pin.
propres et non usés. Remplacez-les
si nécessaire.
BATTERY
CHARGER ON
BOARD
REPLACING THE SQUEEGEE BLADE
ATTACHING/REMOVING THE BRUS
Check that the
detergent outlet fi
is clean.