DW DWC-B6263WTIR Schnellstart-Handbuch
Blättern Sie online oder laden Sie pdf Schnellstart-Handbuch für Sicherheitskamera DW DWC-B6263WTIR herunter. DW DWC-B6263WTIR 2 Seiten. Universal hd over coax bullet camera
Quick Start Guide
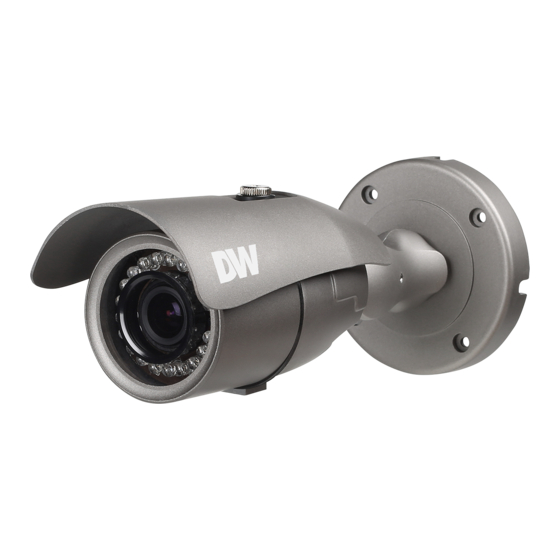
DW® Universal HD over Coax® bullet cameras
DWC-B6263WTIR
WHAT'S IN THE BOX
Hex Allen
Mounting
1
wrench
Torx Wrench
template
DC Plug Cable
Torx Wrench
DC Plug Cable
Test Video Cable
Screws
DC plug
and plastic
1
cable
anchors -
Torx Wrench
DC Plug Cable
Test Video Cable
4pcs
Torx Wrench
DC Plug Cable
Test Video Cable
Template Sheet
Manual
Moisture
Template Sheet
Manual
Test video
absorber
1
cable
and absorber
Torx Wrench
guide
Sunshield cover &
DC Plug Cable
Test Video Cable
Screw &
Template Sheet
Manual
Screw &
Moisture absorber &
Sunshield
Template Sheet
Manual
cover and
Quick setup
1 Set
adjusting
guide
screws
Sunshield cover &
Test Video Cable
Template Sheet
Screw &
Moisture absorber &
Manual
Absorber Guide
NOTE:
Download all your support materials and tools in one place.
1.
Go to: http://www.digital-watchdog.com/resources.
2. Search your product by entering the part number in
the 'Search by Product' search bar. Results for
Screw &
Moisture absorber &
applicable part numbers will populate automatically
Absorber Guide
based on the part number you enter.
3. Click 'Search'. All supported materials, including manuals
and quick start guide (QSGs) will appear in the results.
Attention: This document is intended to serve as a quick reference for
initial set up. It is recommended that the user read the entire instruction
manual for complete and proper installation and usage.
Tel: +1 (866) 446-3595 / (813) 888-9555
Technical Support Hours:
9:00AM – 8:00PM EST, Monday through Friday
STEP 1 – PREPARING TO MOUNT THE CAMERA
1. The mounting surface must withstand five times the camera weight.
2. Do not let the cables get caught in improper places or the electric line cover can be damaged. This may cause a
short or fire.
3. Install the moisture packet in the base of the camera's lens.
a. Remove the moisture absorber from the packaging.
b. Cut the card and folder along the dotted line.
c. Place the moisture absorber behind the camera's lens module. See drawing for more information.
4. Using the mounting template sheet or the camera itself, mark and drill
the necessary holes in the wall or ceiling.
Torx Wrench
DC Plug Cable
Test Video Cable
1
Sunshield cover &
Test Video Cable
Sunshield cover &
Screw &
Template Sheet
Manual
1 Set
Sunshield cover &
Sunshield cover &
Screw &
Moisture absorber &
Absorber Guide
Screw &
Moisture absorber &
Absorber Guide
1
Sunshield cover &
DC Plug Cable
Test Video Cable
Moisture absorber &
Absorber Guide
Absorber Guide
1
Screw &
Moisture absorber &
Manual
Absorber Guide
STEP 2 – CABLING THE CAMERA TO EXTERNAL DEVICES
Pass the wires through the mount bracket and make all necessary connections. Connect the BNC cable and power cables to the camera.
digital-watchdog.com
Sunshield cover &
Please cut the card type absorber along
Please cut the card type absorber along
Moisture absorber &
a dotted line, overlap and attach them
Absorber Guide
a dotted line, overlap and attach them
according to the direction of the arrow.
according to the direction of the arrow.
Power Requirements
DC12V/AC24V dual voltage
Quick Start Guide
Power Consumption
DC12V (LED off): 3.0W
DC12V (LED on): 4.44W
AC24V (LED off): 2.7W
AC24V (LED on): 4.3W