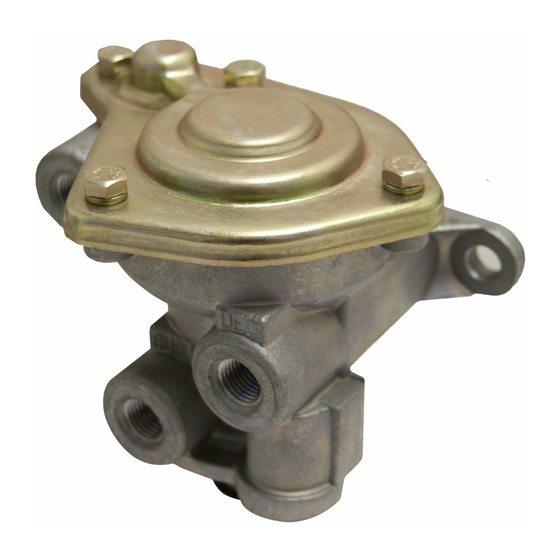
BENDIX SR-1 SPRING BRAKE VALVE Handbuch - Seite 6
Blättern Sie online oder laden Sie pdf Handbuch für Kontrolleinheit BENDIX SR-1 SPRING BRAKE VALVE herunter. BENDIX SR-1 SPRING BRAKE VALVE 8 Seiten. Spring brake valve

Note: A maintenance kit for the SR-1
available from any authorized Bendix outlet. All parts
necessary for minor repair are included.
REMOVAL
1. Prior to removing the SR-1
brakes and drain all the vehicle reservoirs.
2. Identify all air lines before disconnecting.
3. Remove the two mounting bolts from the SR-1
and remove the valve.
DISASSEMBLY (REFER TO FIGURE 2)
1. Remove the socket head pipe plug (1).
2. Remove the check valve spring (2) and the check valve
(4).
3. Remove the two phillips head screws and remove the
exhaust cover (5).
4. Separate the exhaust diaphragm (6) from the cover.
5. Remove the inlet and exhaust valve assembly (7).
6. Remove the inlet and exhaust valve cap nut (8) and
separate the cap nut o-ring (9).
7. Remove the valve stop (10) valve spring (11) and inlet
and exhaust valve (12).
8. Remove the four phillips head screws and lockwashers
that secure the cover to the body. Caution: the cover is
under a spring load, and should be held while removing
the screws.
9. Remove the cover (13) and the three piston springs
(14). Note: Some SR-1
large piston spring.
10. Remove the small piston (15) and the small and large
o-rings (16).
11. Remove the large piston (17). Remove piston o-rings
(18) & (19).
CLEANING & INSPECTION
Inspect all parts for excessive wear or deterioration.
Inspect the valve seats for nicks or burrs.
Check the springs for cracks or corrosion.
Replace all rubber parts and any part not found to be
serviceable during inspection. Use only genuine Bendix
replacement parts.
ASSEMBLY (REFER TO FIGURE 2)
Prior to assembly of the SR-1
all o-rings, o-ring grooves, and piston bores with Bendix
silicone lubricant BW-650-M piece number 291126.
6
™
spring brake valve is
™
valve apply the parking
™
valve piece numbers have one
™
spring brake valve, lubricate
Note:
All torques specified in this manual are assembly
torques and can be expected to fall off, after
assembly is accomplished. Do not retorque after
initial assembly torques fall.
1. Assemble the check valve (4), and valve spring (2) and
install in body.
2. Apply pipe sealant to the socket head pipe plug (1) and
install in the body. Tighten to 130-170 inch pounds
™
valve
torque.
3. Install inlet and exhaust valve assembly (7) in valve body.
4. Secure the exhaust cover (5) with two 10-24 phillips
screws and lockwashers. Tighten to 20-30 inch pounds
torque.
5. Install exhaust diaphragm (6) into the exhaust cover.
6. Place inlet exhaust valve (12) in the body. Install the
valve spring (11) and valve stop (10).
7. Install o-ring (9) on cap nut and install cap nut (8) in
body. Tighten to 100-125 inch pounds torque.
8. Install the small and large o-rings (16) on the small
diameter piston (15) and install piston in the body.
9. Install large o-ring (18) and small o-ring (19) on the large
diameter piston and install piston in the body.
10. Install the piston springs (14) in their respective pistons.
11. Secure the cover to body using four 1/4"-20 phillips head
screws and lockwashers. Tighten to 50-80 inch pounds
torque.
TESTING THE REBUILT SR-1
VALVE
Test the rebuilt SR-1
operation and leakage test outlined in the "Service Checks"
section of this manual.
WARNING! PLEASE READ AND FOLLOW
THESE
PERSONAL INJURY OR DEATH:
When working on or around a vehicle, the following
general precautions should be observed at all times.
1. Park the vehicle on a level surface, apply the
parking brakes, and always block the wheels.
Always wear safety glasses.
2. Stop the engine and remove ignition key when
working under or around the vehicle. When
working in the engine compartment, the engine
should be shut off and the ignition key should be
removed. Where circumstances require that the
engine be in operation, EXTREME CAUTION should
be used to prevent personal injury resulting from
contact with moving, rotating, leaking, heated or
electrically charged components.
™
SPRING BRAKE
™
spring brake valve by performing the
INSTRUCTIONS
TO
AVOID
