HiB Zephyr 60 Handbuch - Seite 2
Blättern Sie online oder laden Sie pdf Handbuch für Körperpflegeprodukte HiB Zephyr 60 herunter. HiB Zephyr 60 4 Seiten.
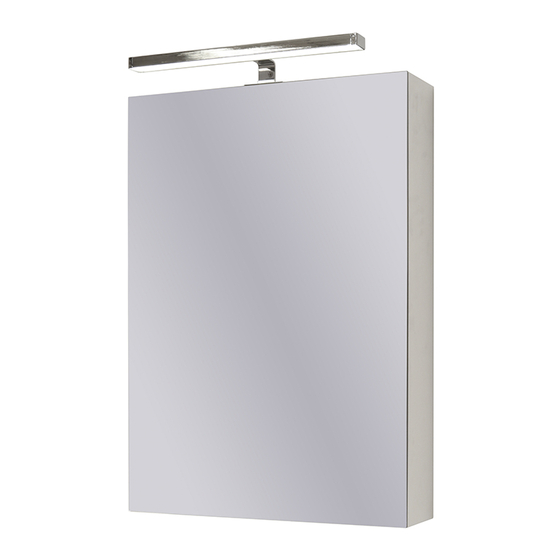
Attachment Light Fitting
(Orbital Only)
Fixing Preparation
1. On the Orbital cabinet only attach the LED light fitting on the top of the cabinet using the pre-
drilled holes and the screws provided. Push the male and female electrical connections together
until they 'click'. (Fig. A).
2. Position the cabinet in a suitable location, (according to Fig. 1 on the back page), ensuring that
the domestic electrical mains supply is within reach of the electrical connection point of the
cabinet. Carefully mark the position of the top of the cabinet using a soft pencil ensuring it is level.
3. Remove the cabinet from the wall and using a spirit level, mark a horizontal line 50mm below the
original pencil mark. Hold the mounting bracket in place with the holes corresponding with the
marked line. Ensure the bracket is central, and mark the position of the holes. (Fig. B).
4. Drill the required holes in the marked positions. If drilling through tile, use a ceramic drill bit.
Insert the wall plugs level with the surface of the wall. If fitting to a tiled surface, wall plugs should
be inserted below the tile surface to avoid cracking. NB. For plasterboard walls, specialist fixings
should be purchased, available from any DIY or hardware store. Fix the bracket to the wall using
the screws provided.
5. This cabinet is provided with an electrical supply cable already fitted. This cable should be
connected to the household electrical circuit, and connections should be made in accordance
with the latest IEE regulations. This is a Class I product and must be connected to Earth.
Ensure the domestic electrical mains supply to which the product is being connected is
turned off. Connect the domestic mains supply according to fig. 2 on the back page.
2
(Fig A)
(Fig B)
Securing Hole
Wall Mounting
(Fig C)