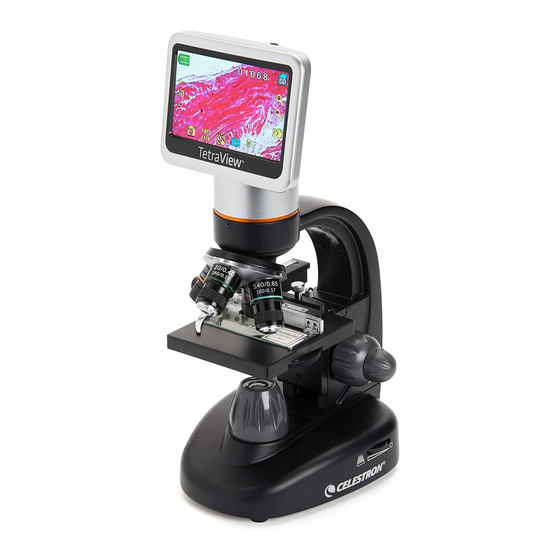
Celestron TetraView 44349 Handbuch zur Schnelleinrichtung - Seite 2
Blättern Sie online oder laden Sie pdf Handbuch zur Schnelleinrichtung für Mikroskop Celestron TetraView 44349 herunter. Celestron TetraView 44349 4 Seiten. Lcd digital microscope
Auch für Celestron TetraView 44349: Gebrauchsanweisung (8 seiten), Schnellstart-Handbuch (2 seiten)

SPECIFICATIONS
Stage
Mechanical Stage 3.5 in x 3.5 in (88 mm x 88 mm)
5 MP 1/2.5" CMOS; 10x Magnifi cation in lieu of an eyepiece
Digital Camera
LCD Monitor
4.3 in (109 mm) TFT LCD touch screen with 4x digital zoom —
Touch digital TFT display
Resolution — 480 x 272 pixels
Focuser
Dual — Coarse/Fine
Objectives
Glass type — 4x, 10x 20x, 40x
Memory
8GB SD card (approximately 2200+ snapshots @ 5 MP)
LCD Rotation
180° – 90° left / 90° right
Filter Wheel
Red/Green/Blue/1 mm hole/3 mm hole/6 mm hole (default)
Nosepiece
Quad with click stop
Illuminator
Built-in electric — LED 6 Volt and 6 Watt
Condenser
N.A. 0.65
AC Adapter
Input Universal 100 to 240 Volt 50/60HZ
Batteries
User supplied 4 AA — (optional - up to 3 hours usage)
Weight/Dimensions
67 oz/1.9 kg 7.0" (178 mm) x 5.5 in (140 mm) x 13.0 in (330 mm)
SETTING UP YOUR MICROSCOPE
1. Carefully remove the microscope and other parts from the carton and set
them on a table, desk, or fl at surface.
2. Remove the plastic cover from the microscope.
3. Plug the small cable from the AC adapter into the socket on the back of the
base (see Figure 2).
4. Insert the plug you need (see note below) into the AC adapter and then plug
the adapter into the proper power source.
Battery Operation — You can use your microscope without AC power if you choose. This gives you the freedom to operate the microscope
outdoors or indoors anywhere you please. You'll need 4 AA batteries (user supplied). Open the battery door on the bottom of the microscope
and insert the batteries according to the battery polarity shown in the battery compartment (Figure 3). After the batteries are installed, close
the battery door. Battery life will typically be three hours.
USING AN SD CARD
The TetraView
comes with a 8GB SD card, which you can use to capture images (snapshot or video). SD cards are inserted into the SD
TM
card slot in the LCD monitor (Figure 1).
YOUR MICROSCOPE HAS A TWO YEAR LIMITED WARRANTY.
FOR MORE DETAILED INFORMATION, PLEASE VISIT CELESTRON.COM
©2020 Celestron • All rights reserved • 06-20
celestron.com/pages/technical-support
2835 Columbia Street • Torrance, CA 90503 USA
| ENGLISH
2
MAGNIFICATION (POWER)
MAGNIFICATION (POWER)
Use the following table to determine the magnifi cation
Use the following table to determine the magnifi cation
of the different objective lenses in combination with
of the different objective lenses in combination with
your microscope using the normal mode of the digital
your microscope using the normal mode of the digital
image on the LCD screen and using the digital zoom
image on the LCD screen and using the digital zoom
feature.
feature.
Objective Lens
Objective Lens
Objective Lens
Digital Image
Digital Image
Digital Image
Maximum with 4x
Maximum with 4x
digital zoom feature
digital zoom feature
digital zoom feature
WORKING DISTANCE
WORKING DISTANCE
Objective Lens
Objective Lens
Objective Lens
Working
Working
Distance (mm) - est.
Distance (mm) - est.
Distance (mm) - est.
TOUCH PEN
You can keep the touch pen handy in the receptable behind
the Power ON/OFF button.
Product design and specifi cations are subject to change without prior notifi cation.
This product is designed and intended for use by those 14 years of age and older.
4x
4x
4x
10x
10x
10x
20x
20x
20x
40x
40x
40x
40x 100x 200x 400x
40x 100x 200x 400x
40x 100x 200x 400x
160x 400x 800x 1600x
160x 400x 800x 1600x
160x 400x 800x 1600x
4x
4x
4x
10x
10x
10x
20x
20x
20x
40x
40x
40x
35.3 7.8
35.3 7.8
35.3 7.8
1.9
1.9
1.9
0.7
0.7
0.7
ON/OFF Button
Touch Pen
Fig 2
Fig 3
