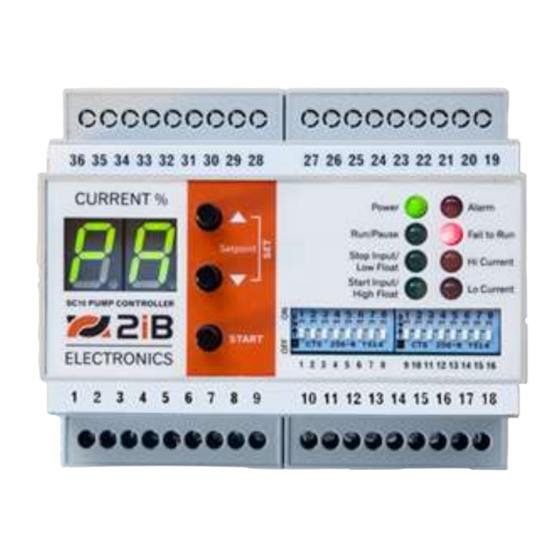
2iB SC10 Installations- und Benutzerhandbuch - Seite 5
Blättern Sie online oder laden Sie pdf Installations- und Benutzerhandbuch für Controller 2iB SC10 herunter. 2iB SC10 16 Seiten. Single pump controller
Auch für 2iB SC10: Schnellstart-Handbuch (5 seiten)

Tip: Generally it is better to have the pump start at a lower than a higher level, so select a Target Run Time which is lower or equal
to what you expect to need.
5.3
Start and Stop Modes
The standard operating mode of the SC10 starts the pump based on the
timer or the high float switch and stops when either the pump snores or
the low float switch activates.
Stop on Low Float Only / Disable Snore Stop: Using DIP Switch 15 you can
disable the pump stop based on the pump snoring so that the pump will
only stop when the low float switch is reached. This can be useful if you
need the pump to stop at a specific level (that of the low float switch).
Start on High Float Only / Disable the Timer Start: Using DIP Switch 16 you can disable pump start based on the timer. This
means that the pump will only start based on the float switch. This may be useful if you want the pump to start at a specific level
(that of the high float switch). This can be useful in hoppers or tanks.
Float Switch Only Operation: By switching both DIP Switches 15 and 16 ON the pump will start on the high float switch and stop
on the low float switch. (Timer start and Snore Stop will be disabled.) This mode can be useful in hoppers or tanks. This same
operating mode can be used to start and stop the pump only on Start and Stop Pushbuttons.
5.4
Alarm Relay Activation
The SC10 has a single alarm output can be set to any combination of four
functions and displayed externally with a fault lamp if desired. Ref DIP
Switches (6, 7, 8, 9) on front of SC10.
CT Fault (diagnostic monitoring of CT)
Sump Low
Sump High
Failed to Run (pump called to run no current detected)
5.5
Stop / Low Level Switch Invert
If a low level switch is used then the switch contact status needs to be set
to normally open or closed. Ref DIP Switch (10) on front of SC10.
Tip: If both the High and Low Level Switches are the same and their
contacts close when the float switch is covered then you will need to set
SW 10 to ON.
5.6
Setting the Stop Current Setpoint
Pressing the Set button combination (+ simultaneously) sets the Stop Current to Measured Current
+ Window Current
To Set the Stop Current Setpoint perform the following steps:
1.
Ensure that there is enough fluid in the sump or container so the pump doesn't immediately
draw in air
2.
Press the Start button on the relay or on the front of the panel to start pump.
When the pump running and is snoring (drawing air), press the Up and Down buttons
3.
simultaneously. The stop current setpoint is now set to the displayed percentage.
4.
Allow water to fill above pump suction and start the pump again to ensure it stops when
snoring. If it doesn't stop adjust setting or expand window current.
Note: This settings is non-volatile. It is stored through power-cycles of the SC10.
Single Phase Motors. See also the note about single-phase motors in section 4.1 Snoring Detection Explained.
Modes
SW
Setting
15
On: Disable Snore Stop
16
On: Disable Timer Start
Default = Off, Off.
Alarm Relay Activates for ...
SW
Setting
6
AIN (CT) Fault
7
Stop / Low Float
8
Start / High Float
9
Fail to Run (Low Current)
On = Activates for this condition.
Default= Off, Off, Off, Off
Stop / Low Float Invert
SW
10
Setting
Off
Closed = Low (default)
On
Open = Low
5
