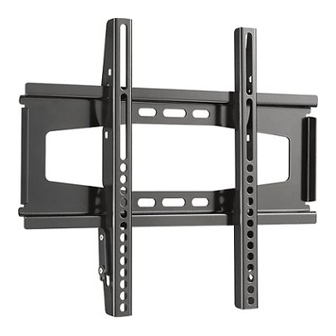
Dynex DX-TVM112 Montageanleitung - Seite 6
Blättern Sie online oder laden Sie pdf Montageanleitung für TV-Halterung Dynex DX-TVM112 herunter. Dynex DX-TVM112 13 Seiten. Quick setup guide (french)
Auch für Dynex DX-TVM112: Handbuch zur Schnelleinrichtung (2 seiten), (Englisch) Kurzanleitung zur Konfiguration (2 seiten), (Französisch) Guide D'installation Rapide (2 seiten)

6
DX-TVM112
STEP 2 - Option 2: Installing on a solid concrete or concrete block wall*
CAUTION:
directly onto the concrete surface.
1 Align the wall plate template (P) at the height you determined in the previous step, make sure that it is level,
then tape it to the wall. Use a pencil to mark the lag bolt hole locations (3). Remove the template.
2 Drill pilot holes to a depth of 2 1/2 in. (63.5 mm) using a 1/2 in. (13 mm) diameter masonry drill bit.
3 Insert the concrete wall anchors (O) into the pilot holes and use a hammer to make sure the anchors are flush
with the concrete surface.
4 Align the wall plate (A) with the anchors, insert the lag bolts (N) through the lag bolt washers (M), then
through the holes in the wall plate. Tighten the lag bolts only until they are firm against the wall plate.
CAUTION:
DO NOT over-tighten the lag bolts (N).
* Minimum solid concrete thickness: 8 in. (203mm).
* Minimum concrete block size: 8 x 8 x 16 in. (203 x 203 x 406 mm).
The minimum distance between the top two fasteners cannot be less
than 2.865 in. (72.8 mm)
You'll need
N (3)
M (3)
O (3)
DX-TVM112 Wall Plate Template • Gabarit de la plaque de montage • Plantilla de la placa de montaje
Top
Top
Dessus
Dessus
Vista superior
Vista superior
Note: For wood frame installations, use
Tools Needed
a stud finder to locate a wood stud first.
Outils nécessaires
Remarque : Pour des installations sur
Herramientas requeridas
des structures en bois, utiliser d'abord un
localisateur de montants pour détecter
un montant en bois.
Nota: para las instalaciones en marcos
de madera, use primero un localizador
de viga para ubicar las vigas de pared.
Need more information about your mount? Scan this QR code or visit www.dynexproducts.com.
Besoin de plus de renseignements au sujet du support de montage? Numériser ce code QR ou
aller sur le site www.dynexproducts.com.
¿Necesita más información sobre su soporte de montaje? Escanee este código QR o visite
www.dynexproducts.com.
V1 13-0139
Wall plate template (P)
To prevent property damage or personal injury, never drill into mortar between blocks. Mount wall plate
Avoid potential injuries or property damage!
DX -TV M1
To p
12 Wa
De ssu
ll Pl at
s
e Te m
Vis ta
sup eri
pla te
or
• Ga ba
rit de
la pla qu
e de m
on ta ge
Too ls
Nee ded
• Pl an
Out ils
Her ram
néc essa
til la de
ires
ient as
la pla ca
requ erid
as
de m on
ta je
To p
De ssu
s
Vis ta
sup eri
or
No te:
Need more
For wo
Besoin
inform ation
a stu d
od fram
de plus
about your
find er
e inst alla
aller sur
le site www.
de rensei
gneme
moun t?
Scan this
¿Neces ita
nts au sujet
QR code
Rem arq
to loca
tion s, use
más inform
dynex produ
du suppo
or visit
te a wo
www. dynex
ación sobre
cts.com
.
rt de monta
www. dynex
ue : Pou
od stu d
produ cts.com
su soport
ge? Numé
produ cts.com
des stru
r des inst
firs t.
.
e de monta
riser ce
code QR
.
ctu res
je? Escane
ou
loca lisa
en boi s,
alla tion
e este código
s sur
QR o visite
teu r de
util iser
un mo
mo nta
d'a bor
nta nt en
nts pou
d un
boi s.
r dét ect
No ta:
par a las
er
de ma der
inst ala
cion es
a, use
de vig a
prim ero
en ma
par a ubi
un loca
rco s
car las
liza dor
vig as de
par ed.
P
V1 13-013
9
Wall plate (A)
Tape
Level
Pencil
Hammer
Installation instructions
2.5 in.
(63.5 mm)
1/2" masonry
drill bit
1/2" socket
Drill
wrench
