Gama Sonic GS-178W Gebrauchsanweisung - Seite 3
Blättern Sie online oder laden Sie pdf Gebrauchsanweisung für Lantern Gama Sonic GS-178W herunter. Gama Sonic GS-178W 4 Seiten. With gs solar light bulb
GS-178P (Pier Mount)
1. Use an electric drill to make four holes in the desired
surface. Place provided anchors into the holes. Place the
base of the lamp (E) in line with the holes and attach with
the provided screws.
2. Slide Part (C) on top of Part (E), secure it with the set screw
using the provided Allen wrench.
GS-178W (Wall Mount)
Note: Installing the light on a wall may limit the solar panel for sun exposure. Make
sure the lamp is mounted so direct sun exposure is available.
1. Use an electric drill to make two holes in the wall and
place provided anchors into holes. Place the wall bracket
Part (D) in line with the holes and attach with the
provided screws.
2. Slide Part (C) on top of Part (D), secure it with the set
screw using the provided Allen wrench.
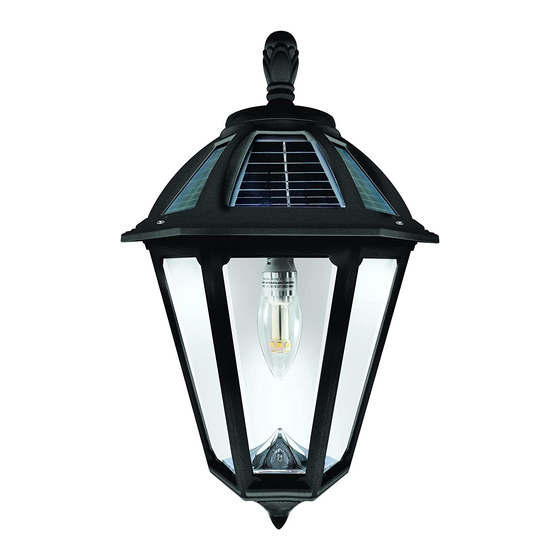
Solar LED Light Bulb Assembly
The GS Solar LED Bulb is designed to last up to 10 years, however if it
doesn't work, or if you want to use different color temperature bulb, it
can be easily replaced.
1. Detach the top of the lamp unit (B) by releasing the 3 screws.
Make sure the Low/OFF/High switch is in the OFF (O) position.
2. Remove (if needed) the existing bulb by turning it
counterclockwise.
3. Install the new GS Solar LED Bulb by turning into the bulb socket
clockwise (Fig.2).
4. Reassemble the unit by reversing the above procedure
** Gama Sonic Bulbs are available at
You can purchase it directly at:
Make sure the new bulb you purchase is compatible with this model (A50 bulb)
3. Operation Instructions (Fig. 3)
1. Remove the final Part (A) from Part (B). Turn the
operation switch to the Low or High position (Fig.3)
according your preferences:
a. (Low) For softer light and longer duration.
b. (High) For brighter light output.
2. The solar lamp will automatically operate at dusk.
3. Re-Install the final Part (A) on top of Part (B).
3
https://gamasonic.com/product-category/parts-and-accessories/
www.gamasonic.com
Fig.3
Fig.2