Bristan Quest Easyfit Installationsanleitung & Benutzerhandbuch - Seite 7
Blättern Sie online oder laden Sie pdf Installationsanleitung & Benutzerhandbuch für Sanitärprodukt Bristan Quest Easyfit herunter. Bristan Quest Easyfit 13 Seiten. Kitchen sink mixer
BRISTAN
Installation Cont.
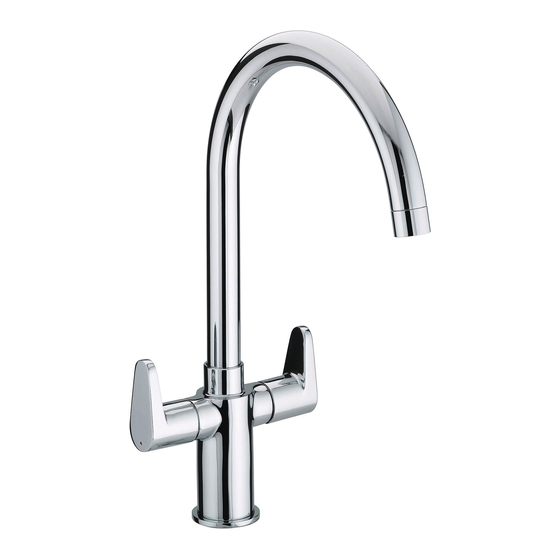
Identify all
components
are present prior to starting installation using the diagram on
page 06
.
1
.
Spout Assembly
x1
6.
Handle
2.
Spout Grub Screw
x1
7.
Tap Base Grub Screw
3.
Valve
x2
8.
Easy Fit Assembly
4.
Spline Adapter
x2
9.
Flexible Connecting Pipe
5.
Screw
x2
10
.
Isolation Valve
Flush through the pipework to ensure removal of debris. Turn off
the mains water supply and close any isolating valves
.
1.
Fit push-fit connector
Place the 'push-fit
connector·
into the hole in the basin top
.
Ensure the rubber washer is fitted to the underside and the side
with
·
FRONT' on is at the front
.
2.
Attach hot and cold connectors
A re-enforcing plate, [not supplied or shown in diagram] can be
used to distribute the weight of the tap if fitted to thin worktops or
stainless steel sinks
.
If required, this should be fitted underneath
work surface above the back nut
.
Position the back nut under the
basin [with the rubber seal on top]. ensuring the locating pin fits
into the hole in the back nut
.
Insert and loosely tighten the
threaded cold connector by turning the 6mm hexagonal key
clockwise
.
Once threading has started you can let go of the back nut
.
Before
6mm
hexag onal
key
Hot
connec
tor
Under
the
ba sin
Rubber
w
asher
fully tightening the cold connector, place the 'hot
connector·
into the push-fit connector -
ensure it fits fully through the basin hole
.
x2
x1
x1
x2
x2
Note: The hot connector has 2 flat edges at the top to allow it to fit fully down and close to
the top of the cold connector. Failure to do this may prevent the tap fitting onto the
connector.
&
Important: The push-fit connector must be fully tightened to the back nut before
attaching the flexible connecting pipes
.
07