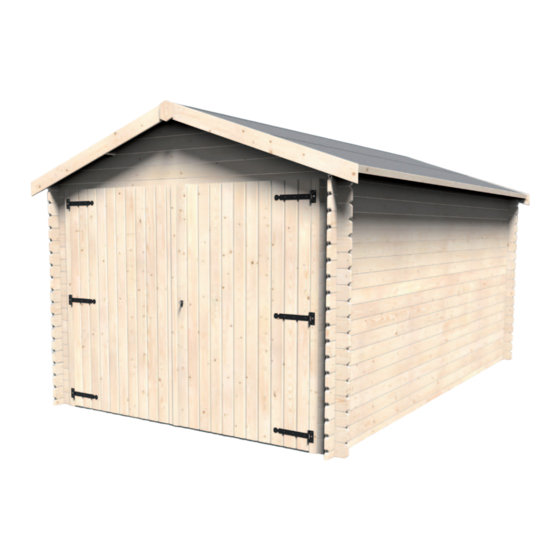
Décor et Jardin 61820S936 Hinweis zur Montage - Seite 2
Blättern Sie online oder laden Sie pdf Hinweis zur Montage für Lagerung im Freien Décor et Jardin 61820S936 herunter. Décor et Jardin 61820S936 19 Seiten. 3×4,80m sf/dp
Auch für Décor et Jardin 61820S936: Hinweis zur Montage (20 seiten)

General instructions – Read carefully before you
start
Thank you for buying your shed. We would ask that you
read these instructions carefully before unpacking the
parts.
Storing the packages before assembling the shed
Store the packages in a dry and ventilated place, out of
direct sunlight and protected from the weather (packaging
not waterproof).
The packages and parts should be laid flat on the ground
in order to avoid any deformation.
Assemble the shed as soon as possible after it arrives (the
after sales service is available for a maximum of 10 days
after the date of purchase).
Safety advice
The wooden parts may cause splinters. Handle the wood
carefully, using protective gloves.
Check there are no protruding nails, screws or staples in
the assembled pieces.
Always follow the instructions carefully, keeping to the or-
der in which they are to be assembled.
Assembly
The shed must be built in an area sheltered from strong
winds.
Do not expose the wooden parts or the roof covering to
direct sunlight during assembly.
Start by checking that all parts have been included, us-
ing the inventory provided to identify them by shape and
length.
Before starting, check that the base on which the shed is
to be built is perfectly flat and level.
The with-floor model consists of beams and panels/planks
to be assembled on a solid and stable floor surface. Lay
down supports (concrete beams or blocks, min 40mm
thick) in order to ensure good ventilation.
For the floorless shed models, the concrete slabs should
be the same size or larger than the floor. Check that it is
square by measuring the diagonals.
All parts are the correct size and do not need to be cut
(except some types of crosspieces, glazing stops and the
roofing).
Whilst assembling the shed, regularly check that every-
thing is level and square.
For all parts that need to be assembled using screws, it is
advisable to pre-drill holes in the first part, otherwise there
is a risk that the wood will split when screwing.
Interior reinforcements (for plank-construction sheds)
The reinforcement battens should be placed in the internal
corners in order to fix the points to the main body of the
shed (one single screw at the ends of the reinforcements).
Regularly check these joints, and adjust them according
any movement of the wood (dryness, humidity etc.).
For fixed window frames (depending on the model): Before
screwing, it is advisable to size the mortises and tenons
of the vertical and traverse sections using wood glue (not
supplied).
The crosspieces and glazing stops for the doors and win-
dows are obtained by cutting this wood to the correct size.
Fixing the shed
Always fix the shed securely to the ground using all appro-
priate methods (not supplied).
For the with-floor model: Fix it to the body of the shed, and
place weight on it as ballast. Fixings are not supplied.
Roof
Start laying the roof covering at the bottom of the roof,
leaving an overhang of 40 mm at the front and back, and
then fold it over the edge of the roof.
For black roofing: Leave a 70mm overhang of roofing on
the side, then fold it under the roof panel and fix it using
large-headed nails (200 mm max).
For green roofing: Leave a 10mm overhand of roofing on
the sides, and fix it using large-head nails (200 mm max).
Finish by affixing the edging planks using screws.
Advice
Pine wood is a living material that never stops moving and
may be slightly deformed (wood slightly bowed or warped)
or have imperfections such as splits, knots and resin pock-
ets.
This is normal and does not affect the lifespan of your
shed. Wood putty (not supplied) may be an easy solution.
For interlocking sheds, note that all planks have a good
face which should face towards the outside of the shed
(the non-visible face may have some planning defects,
bark, splits etc.).
Synthetic panes should not be nailed as there is a risk they
may split. We recommend fixing them with silicone (not
supplied) or pre-drilling the holes before screwing.
Maintenance
It is important to treat the shed using a product for protect-
ing exterior wood surfaces, containing fungicides, insecti-
cides and UV protection. Apply a minimum of 2 coats to the
outside and 1 to the inside. Repeat regularly, as required.
After Sales Service
Any missing parts or defects must be declared using the
After Sales Service form (available in shops) within 10 days
following purchase of the shed, supported by an invoice or
till receipt.
Our After Sales Service can repair or replace faulty parts.
Any costs for fitting and removal are not included.
Décor et Jardin SA will not be responsible in the event that
a client chooses to alter a product without prior permission.
For all After Sales Service requests, please ensure that you
adhere strictly to the procedure available in shops (After
Sales Service procedure): You need your till receipt or
proof of purchase, product reference, and exact reference
of the faulty piece.
