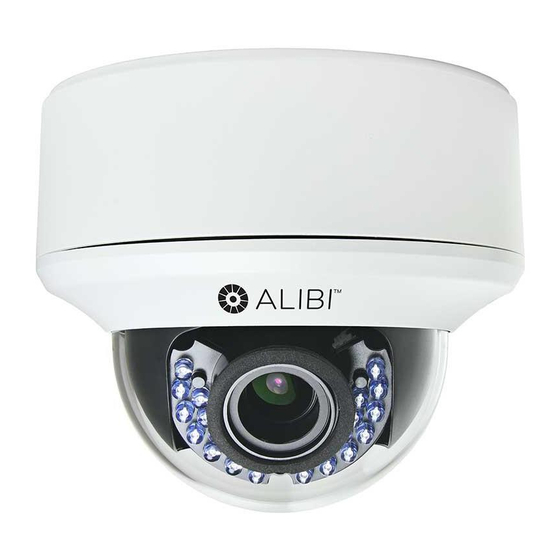
ALIBI ALI-CD1080PVF Schnellinstallation und Benutzerhandbuch - Seite 2
Blättern Sie online oder laden Sie pdf Schnellinstallation und Benutzerhandbuch für Sicherheitskamera ALIBI ALI-CD1080PVF herunter. ALIBI ALI-CD1080PVF 4 Seiten. Hd-tvi outdoor infrared dome camera

Step 1.
Install the camera
The camera includes hardware to install it directly to a mounting surface. You can also easily install the
camera onto a single- or double-gang electrical box. Camera drop cables can be routed through the
conduit port on the side of the camera base housing, through the mounting surface or into an electrical
box, if used.
Before installation:
Make sure that the device is in good condition and all the assembly parts are included.
•
Check the specification of the products for the installation environment.
•
Make sure that the wall or the ceiling is strong enough to withstand 3 times the weight of the camera.
•
To avoid fire or shock hazard, use only UL listed power supplies. Verify that the power supply will
•
provide the rated voltage and wattage for the camera. See the Specifications section.
During installation:
Camera Lens: Handle the camera carefully to prevent scratching or soiling the lens or dome. If the
•
lens or IR array shield becomes soiled, clean it only with approved products. See the
Monitor impedance: You can attach the CVBS drop cable to a setup monitor. Ensure that the
•
monitor input impedance is set to 75 Ω.
Power supply: Camera drop cable: The camera drop cable includes two connectors:
•
Video BNC connector: For transmission of the video signal across a coax (75 Ω) extension cable.
—
Power connector: When applying 12 Vdc power, observe the power polarity. See the picture to
—
the right for the connector polarity configuration.
The following procedure outlines an installation of the camera to a mounting surface. Your installation
steps may differ, depending on how the camera is mounted and how the drop cable connects to video and
power extension cables. To install the camera onto a surface:
1.
Separate the camera dome cover assembly from the camera module by loosening the three captive
dome screws using the security L-wrench provided. Note that the dome cover is tethered to the
camera module.
2.
Remove the camera module assembly from the base housing after loosing the three captive screws.
Note that the camera module may be tethered to the base housing.
3.
Using the drill template or the base housing, mark the locations of the mounting screw holes, and
the hole for the drop cable if routing the cable through the mounting surface.
Inside view of base housing
Several holes are provided in the base housing for securing it to a surface mounting, a gang box
NOTE
and other configurations. Use at least four screws to secure the camera.
4.
Using appropriate fasteners, secure the base housing to the mounting surface or gang box. The
mounting screws and wall inserts are adequate for surface types.
5.
Route power and video extension cables from your power source (12 Vdc or 24 Vac) and monitoring
equipment to the mounting location. Do not apply power to the power extension cable at this time.
If the extension cables will be attached to the camera drop cables within the base housing, route the
cables into the housing.
www.observint.com
2
NOTE
Camera drop cable connectors are not waterproof.
6.
Connect the camera drop cables to the video and power extension cables, and then secure the
camera module to the housing using the security L-wrench provided. Tighten the screws until snug.
The HD-TVI video cable must attach to the HD-TVI compatible equipment.
NOTE
The CVBS video cable an attach to any equipment compatible with an NTSC signal.
7.
Apply power to the camera. Use caution to observe the DC power polarity shown in the photo on
page 1.
8.
Verify that a video signal can be seen on your video monitoring equipment.
Step 2.
Adjust the camera for your surveillance target
1.
Observe the live video on your monitoring equipment, or plug the video test cable provided into the
mating plug on the camera module and then into a local video setup monitor (not provided).
section.
Cleaning
2.
Remove the black liner from the camera gimbal.
3.
To adjust the camera pan, grasp the camera gimbal on both sides at the pivot point, then rotate the
as shown in the illustration below to point it at your surveillance target.
Pan adjustment
To adjust the tilt, rock the gimbal as shown above in the right illustration.
To adjust the camera horizon line, grasp the camera head carefully and rotate it as shown in the phot
below.
4.
Unscrew the Wide - Tele and Near - Far adjustment levers about 1/4 turn, then adjust the lens zoom
and focus as needed. Tighten the levers screws until snug to hold them in place.
Gimbal
pivot
point
Tilt adjustment
Horizon line adjustment
© 2016 Observint Technologies. All rights reserved.
