ß
2. Press the On/Off button
.
8a
The pump switches off.
3. When switching on, keep the On/Off button
until the green LED no longer flashes.
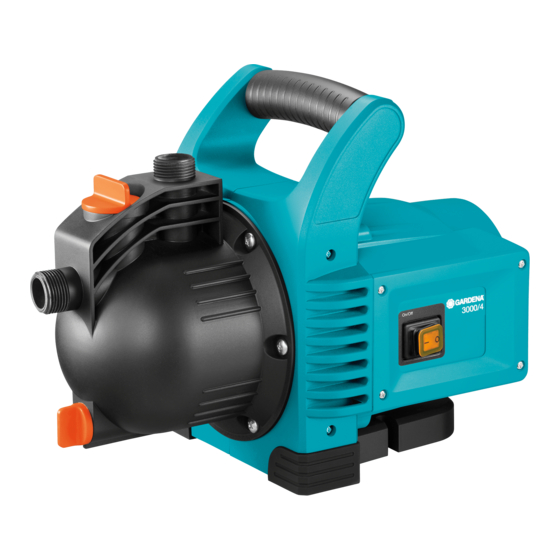
safe-pump-function:
The safe-pump function uses the LED status display to alert the user
that there is no water flow. In addition, it acts as Dry-Running Safety,
guarding against pump damage if the delivery side is closed too long
(e. g. closed valves) or if the water supply fails (e. g. empty cistern).
LED flashes green:
Normal operation
LED flashes orange:
No water flow for at least 20 seconds
LED shines red:
No water flow for at least 5 minutes
(pump has switched off automatically)
LED flashes red:
Alarm! Pump was started 3 times within
20 min. without water flow. (Pump can
no longer be started for 5 min. to allow
cooling, after which the LED shines red)
4. STORAGE
To put into storage [ Fig. S1 ]:
Before the start of the frost period the Garden Pump should be stored
protected from frost.
9
1. Open the water drain screw
The Garden Pump drains.
2. Store your Garden Pump so that it is protected from frost.
Disposal:
(in accordance with RL2012/19/EC)
The product must not be disposed of to normal household waste.
It must be disposed of in line with local environmental regulations.
IMPORTANT!
Dispose of the product through or via your municipal recycling collection
centre.
5. MAINTENANCE
DANGER! Electric shock!
Risk of injury due to electric current.
v Disconnect Garden Pump from the mains before carrying out
maintenance.
Cleaning the filter [ Fig. M1 ]:
If the filter is dirty it has to be cleaned.
1. Close all shut-off valves, if any, on the suction side.
6
2. Unscrew and remove cover
3. Draw out filter unit vertically upwards.
0
4. Hold beaker
firmly, turn filter
(bayonet fitting). [ Fig. M2 / M3 ].
0
5. Clean beaker
under running water and clean the filter
e. g. with a soft brush.
6. Refit filter again in reverse order.
Flush through Garden Pump:
The pump must be flushed through after discharging chlorinated
swimming pool water.
1. Pump through lukewarm water (max. 35 °C), possibly adding a mild
cleaning agent (e.g. detergent) until the pumped water runs clear.
2. Remove residuals according to the waste disposal laws applicable in
your area.
6. TROUBLESHOOTING
DANGER! Electric shock!
Risk of injury due to electric current.
v Disconnect Garden Pump from the mains before
troubleshooting.
ß
depressed for 8 seconds
8a
.
of the filter chamber.
q
anti-clockwise 1 and draw out 2
q
Free the impeller [ Fig. T1 ]:
An impeller blocked by dirt can be freed again.
v Turn the impeller bolt
w
using a screwdriver.
This will free the blocked impeller.
Cleaning the flow sensor [ Fig. T2 ]:
If the flow sensor is dirty, this may result in spurious error messages
(LED flashes orange).
1. Unscrew both screws
e
.
r
2. Remove the cover
.
t
3. Undo the screw
and detach the clip
u
4. Unscrew the cap
anticlockwise.
i
5. Remove the impeller
and clean it. Clean the housing of the flow
sensor.
i
6. Re-fit the impeller
with the metal part in the mounting direction.
u
7. Screw the cap
into place clockwise.
u
8. Secure the cap
by way of the clip
9. First insert the cover
r
at the top and then tighten the two screws
at the bottom.
Problem
Possible Cause
Pump runs, but the suction
Pump sucks in air at a joint.
action doesn't take place
Leaky or damaged suction
hose.
The pump was not filled with
the liquid to be pumped.
The liquid escapes over the
hose which is connected to
the delivery side during the
suction action.
Absolutely vacuumresistant connection is achieved by using
GARDENA Suction Hoses (see point 7. ACCESSORIES).
Leaky screw fitting
7
filler cap
Air cannot escape, since
delivery side is closed or
remaining water is in the
pressure hose.
The waiting time wasn't
observed.
Suction filter or backflow
preventer in the suction hose
clogged.
Too high suction height.
In case of any other difficulties concerning the suction action,
use GARDENA Suction Hoses with Backflow Preventer
(see point 7. ACCESSORIES) and fill in the liquid to be pumped
over the filler cap
Pump motor runs,
Suction filter at the suction
but delivery capacity
hose is sucked free.
or pressure suddenly
decreases
Suction filter or backflow
preventer clogged.
Leaks at suction side.
Impeller blocked.
Pump motor doesn't start
No power.
or suddenly stops
Circuit breaker has switched
off the motor due to overheat
ing / overload.
Electric failure.
5000/5; 6000/6 inox:
The flow sensor is dirty.
Pump delivers and
LED flashes orange
z
.
z
t
using the screw
.
Remedy
v Seal connections on suction
side so are airtight.
v Check suction line for dam
age and seal so is airtight.
v Fill the pump
(see 3. OPERATION).
1. Fill the pump again
(see 3. OPERATION).
2. When starting operation hold
the pressure hose approx.
1 m vertically above the
pump, until the suction action
has taken place.
6
at the
v Check seal (replace if
.
necessary) and tighten
connection securely
(do not use pliers).
v Open shutoff valves
(e. g. nozzle) in the delivery
line, empty the delivery
hose or disconnect it from
the pump during priming.
v Switch on the pump and
wait up to 5 min.
v Clean the filter or the back
flow preventer.
v Reduce suction height.
7
before operation.
v Reduce flow rate on the
delivery side with a control
valve, e.g. GARDENA
Art. (2)977.
v Clean filter or backflow
preventer.
v Eliminate leak.
v Release impeller.
v Check fuses and electric
connections.
v Ensure sufficient cooling /
ventilation and clean the
impeller chamber.
v Send the pump to one
of our GARDENA Service
Centres.
v Clean the flow sensor.
e
9