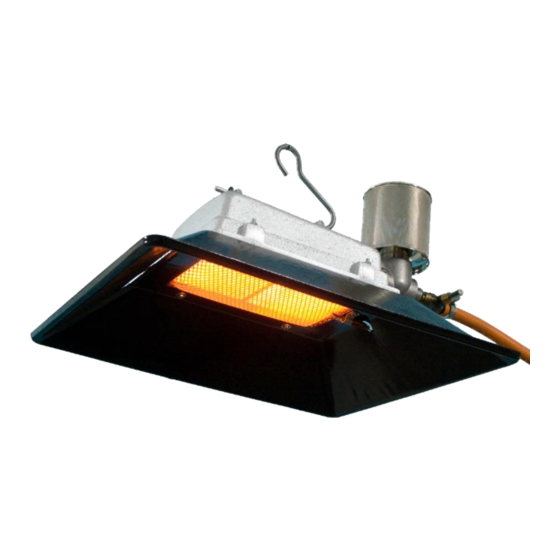
Alke 61 Series Benutzer-, Service- und Installationshandbuch - Seite 8
Blättern Sie online oder laden Sie pdf Benutzer-, Service- und Installationshandbuch für Heizgerät Alke 61 Series herunter. Alke 61 Series 13 Seiten. Atmospheric ceramic luminous infra-red heaters for use in well ventilated areas
Auch für Alke 61 Series: Benutzer- und Installationshandbuch (8 seiten)

Service and maintenance
General
The frequency of maintenance is strongly depending on the quality of the combustion air and the
intensity of use. When used in poultry houses, maintenance is advised every 6 weeks or by changing
the animals. By use in clean environment conditions, the maintenance period can be extended but not
longer than 6 months. In case heaters are not used for a long period, always do maintenance first before
using them again. Wear safety goggles during cleaning with compressed air.
Parts that are broken, or are not functioning well, must be replaced directly by identical ones of same
brand and type. Consult the dealer or manufacturer in case of doubt.
WARNING: always switch off the heater and isolate the gas before carrying out any service or
maintenance operation.
Order of maintenance
•
First clean the heater and filter as described below by daily maintenance. Especially remove dust
directly behind the venturi.
•
Clean the reflector (5) and other parts (excluding the burner ceramics (3) and burner gauze(4)) with
water and mild detergent and a cloth or soft brush.
•
Carefully inspect the burner gauze (4) and burner ceramics (3) on damage, cracks and holes.
Replace when needed.
•
To clean the burner (1), burner gauze (4) and ceramic stone (3) use an air hose (pressure max 2
bar/30 psi) and blow inside the venturi (12) and on the ceramic stone (3). Do this for 60 seconds
and repeat 2-3 times. Never use water to clean your heater or any steel brush.
•
Check the injector (16) for obstructions. Remove obstructions by brushing them away and by using
a pin or drill to clean the injector hole. Make sure that the injector hole does not become wider by
using a pin or drill that is larger than the size stamped on the side of the injector.
•
Clean the inside of the gas safety device (23) and injector (16) with compressed air. Make sure that
the pressure of the compressed air is not larger than the 1,5x the pressure stamped on the safety
device (65 or 1400 mbar). Otherwise the rubber seals inside the safety device will become damaged.
•
Check the condition of the thermocouple sensor (28). Replace in case the tip is burnt-in already, or
the copper tube is kinked, to avoid unnecessary shut down later on.
•
Check all gas carrying parts and connections for gas tightness with leak detection liquid or soapy
water according the procedure in the standards applicable in the local installation situation. Never
use a flame for soundness checks!
•
In case a gas hose is used, check this carefully for cracks, wear and other signs of damage or
alteration. Replace it also when the maximum lifetime printed on the hose, or the maximum allowed
by local requirements, has passed.
•
Commission the heater after maintenance and check it carefully during first ignition, firing and
extinguishing.
In case the heaters need to be stored for a long time, make sure that no dust, spiders, etc. can enter
the heater. Use the carton packaging box to store the heater, or a plastic bag if the box is not available
anymore, and close this carefully.
Daily maintenance
In dusty or dirty environments check and clean a heater every day. In case a heater is not cleaned
internally, especially the venturi, the heat efficiency will drop and the lifetime of the burner gauze will
become shorter or they will be destroyed. Also, there is a possibility that carbon monoxide (poisonous)
will be produced and soot deposit will occur. To keep the heater internally and externally free of dust is
important. Inspect and clean also every day the combustion air openings into the building and the proper
functioning of exhaust fans.
Dust filter
Dust filters must be check every day and cleaned in case needed. Remove a filter before cleaning. Dry
dust can be removed by tapping the filter softly against a solid surface like the sole of a shoe. The dust
will fall off easy now. In case the filter is still not clean, brush the surface gently with a brush or clean it
with compressed air from inside to the outside. In case the dust is greasy, clean the filter in warm water
with a bit detergent. Make sure that filters are dry before placing them back. Even with the use of a filter
still check the heater regularly inside while very fine dust still will pass the filter and pollute the heater
internally.
Advice: Lots of farmers use a second set of dust filters. They replace the dusty ones directly with the
clean ones and clean the filters outside the barn to avoid unneeded disturbance of the animals.
Version 1.0: March 2018
8
manual number: 0009 0520EN
