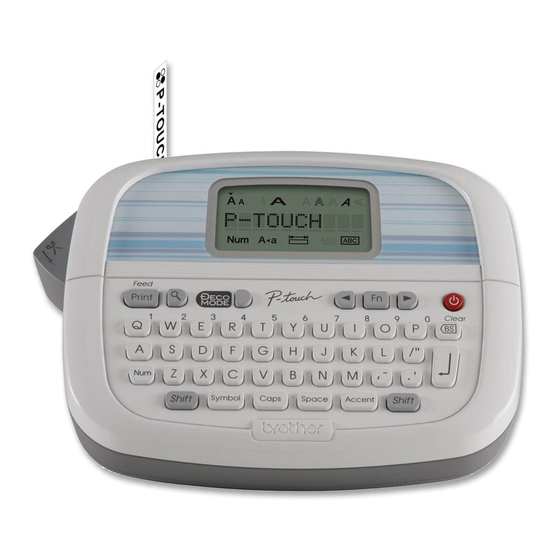
Brother P-touch 90 Benutzerhandbuch - Seite 2
Blättern Sie online oder laden Sie pdf Benutzerhandbuch für Etikettenhersteller Brother P-touch 90 herunter. Brother P-touch 90 2 Seiten. P-touch
Entering Text and Symbols
Switching Upper Case/Lower Case
Upper case (
ON)
Lower case (
OFF)
Entering Numbers
Num Lock ON
Num Lock OFF
Making a Two Line Label
1.
Enter the text for the first line and press
.
2.
Enter the text for the second line and press
• Do not press
after the second line; otherwise the "Line
Limit!" error message will appear.
• Use either 9mm or 12mm wide tape for two line text.
Display
Label image
Entering Symbols
Example: Entering
[Pictograph]
[A7]
Display
Label image
• Pictographs are displayed on the LCD display with the
corresponding alphabet and number of the Pictograph
table. For the Pictograph table and Pictograph List, refer
to "Symbols".
Designing Labels
1
Press
, use
to select a function under column [A], and then press
can also be selected with the shortcut keys listed under column [C]. (
2
Use
to select a setting listed under column [B], and then press
Design
[A]
1
Large*
Size
Size
Small
1
Normal*
Width
Width
×2
×1/2
1
Normal*
Bold
Outline
Shadow
Style
Style
Italic
Italic Bold
Italic Outline
Italic Shadow
Vertical
1
Off*
Underline
Round
Leaf
Underline/Frame
Undl/Frame
Tile
Star
Heart
Square
Bubble
1
Label length
Label Length
Auto*
/30mm - 300mm*
*1 Default setting. To return to the default setting, press
*2 You can select the length by entering the length with the Number Keys
Entering Accented Characters
-
Accented Characters
A
a
C
c
D
d
E
e
G
g
I
i
K
k
L
l
N
n
O
o
R
r
S
s
.
T
t
U
u
Y
y
Z
z
• To cancel operations, press
• The order of accented characters differs by the selected
LCD language.
To Clear (
+
)
By pressing
, the letters will be deleted one by one.
To delete all text and settings :
+
To delete text only :
+
+
.
[B]
Label image
2
The label is printed with the specified length.
.
~
. To return to [Auto], press
Printing Labels
Text Preview
You can preview the text before printing.
/
Accented Characters
• The LCD shows the whole text and the label length (mm/
inch), then returns to the original text.
• Only the text can be previewed, not the style, size,
underline/frame or any additional features.
Feeding (Tape Feed)
+
The machine will feed 25mm of tape, which may be needed
when installing a new tape cassette.
Printing
• To prevent damage to the tape, do not touch the cutter
lever while the message "Printing..." or "Feeding..." is
displayed.
• To cut off the label, push in the tape cutter lever on the
upper-left corner of the machine.
• Peel the printed label from backing and apply the label.
Making Copies (
You can print up to 9 copies of each label.
.
• You can also select the number of copies by entering with
the Number Keys
Removing the Label Backing
This machine is equipped with a peeler that allows you to
easily remove the backing from labels.
[Txt&Format]
1.
Insert the label, with the printed surface facing down,
as far as possible into the built-in peeler.
2.
Fold back the label to the right and quickly pull out the
label. The end of the backing is separated from the
label.
[Text Only]
Resetting the P-touch
You can reset the P-touch when you want to initialize the
settings, or in the event that the P-touch is not working
properly.
. (The function
1
Press
to turn off the power.
to
))
2
While holding down
turn on the power.
3
[C]
Release
The internal memory is reset, and all text, settings and
stored files are cleared.
+
DECO MODE
This function allows you to create unique labels by using
some built-in templates. You can choose from 8 types of
+
templates.
Design
1
2
3
4
5
6
+
7
8
Example: Design 8
30-200mm]
NOTE
• Some Deco Mode formats may require cooling (indicated
on the above table). If the print head becomes too hot,
your machine will stop printing and automatically start to
cool down. The cool down time will be displayed. Once
the print head is cool, printing will automatically continue.
Do not touch the P-touch while cooling.
• Only one line of text can be entered in DECO MODE.
+
• Depending on the selected format, the entire text entered
may not be printed.
• The formats of the DECO MODE templates cannot be
changed.
• Symbols surrounded by a box in the Basic table are
available in DECO MODE. For the Basic table, refer to
"Symbols".
• To clear all the entered text, press
"Clear?" is displayed. Press
cancel this operation.
• When you access DECO MODE, your most recently
printed DECO MODE text and label length will be recalled.
• Press
to return to the previous step.
+
• To exit DECO MODE, press
to the text entry screen. You can also exit this mode by
pressing
.
[Quit].
• 12mm wide tape cassettes are recommended when
using the DECO MODE feature.
• The maximum label length is 200mm for DECO MODE.
• When [Auto] is selected for [Label Length], the label will
automatically adjust to the correct length for printing the
text one time.
• Press
to return to [Auto] for [Label Length] mode.
If you try to store a label when there is already a label
+
)
stored to that number, a message "Overwrite?" will appear.
Press
[Copies]
~
.
and
, press
to
, and then release
and
.
Label Image
Cooling
[Design 8]
[Auto/
ABC
1
[Print]
2
For memory back up, we recommend using AAA alkaline
batteries (LR03) together when using the AC adapter.
and
.
Dimensions:
to clear the text, or
to
(W × D × H)
Weight:
Power supply:
until the display returns
Tape cassette:
when [Print] is displayed, and selecting
Saving Label Files
Memory (
+
)
You can save your original labels on to your machine. Up to
three labels can be saved and recalled for printing at a later
time. You can also edit and overwrite the stored label.
[File]
To Save:
[Save]
To Print:
[Print]
To Open:
[Open]
NOTE
to save your new label. Press
to cancel.
Symbols
The following symbols are available.
Basic
.
,
:
;
"
'
01
& ~
_
@ -
\
/
02
# % ?
!
*
03
04
05
§
06
07
08
09
0
1
2
3
4
5
6
0
1
2
3
10
7
8
9
4
5
6
7
8
9
11
12
13
Pictograph
1
2
3
4
5
6
7
A
B
C
D
E
F
G
H
I
J
K
L
• To display the next group, press
.
• To cancel operations, press
.
• Symbols surrounded by a box in the Basic table are
available in DECO MODE.
• The rows of symbols (A to L) in the Pictograph table can
be selected by pressing the corresponding character.
Printing the Pictograph List
[Print List]
Label image
Using Optional AC Adapter
Insert the small plug on the adapter cord into
the AC adapter socket on the top end of the
machine.
Insert the power plug into the nearest
standard electrical outlet.
NOTE
Specifications
Approx. 156 × 111 × 56.5mm
Approx. 255 g
(without batteries and tape cassette)
Four AAA alkaline batteries (LR03)
Optional AC adapter (AD-24ES)
Brother M tape (width) :
9mm, 12mm
Contact Information
Contact may differ by country.
See the website http://www.brother.eu/