Indesit IS31V Gebrauchs-, Pflege- und Installationsanleitung - Seite 5
Blättern Sie online oder laden Sie pdf Gebrauchs-, Pflege- und Installationsanleitung für Trockner Indesit IS31V herunter. Indesit IS31V 40 Seiten. Indesit tumble dryer use and care & installation instructions
Auch für Indesit IS31V: Gebrauchs-, Pflege- und Installationsanleitung (16 seiten)

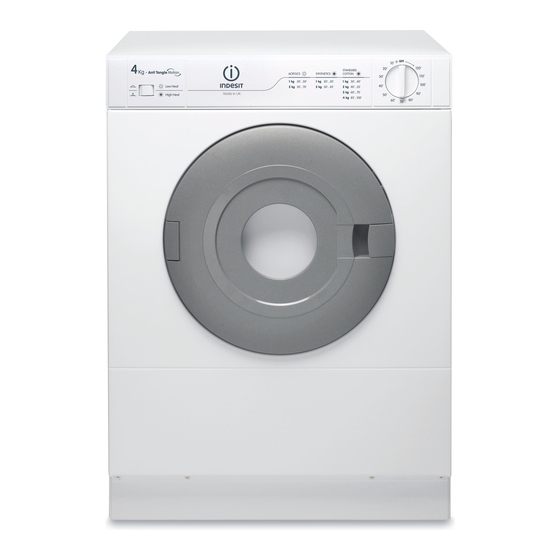
Features - Get to know the main parts of your dryer
Heat Selector Switch
Filter Assembly
(on inside of the door)
Where to put and vent your dryer
●
Your tumble dryer should NOT be located adjacent to a gas hob,
cooker, heater, or eye level grill as flames from the burners could
cause damage to your machine.
●
The dryer should be placed where air can freely circulate around
it, preferably near a window that can be opened to reduce the pos-
sibility of condensation occuring while the dryer is in use.
●
When operating the dryer, there has to be adequate ventilation to
avoid the back flow of gases into the room from appliances
burning other fuels, including open fires.
●
A vent hose is recommended for optimum performance.
●
DO NOT operate the dryer in an enclosed environment,
ensure the dryer is adequately ventilated.
●
If the dryer is enclosed or fitted under a work surface, a gap
of at least 50mm (2") must be allowed above the top across
the full width of the dryer and at least 25mm (1") either side.
This allows air to enter into the rear air inlet. The dryer must
NEVER be run in a cupboard with a closed door.
●
We do not recommend that the dryer is installed in a cupboard
but the dryer must never be installed behind a lockable door,
a sliding door or a door with a hinge on the opposite side to
that of the dryer door.
●
DO NOT allow clothes, towels etc., to hang down the front of
the dryer into the airstream. This obstructs the airflow and
may damage the dryer.
●
Ensure that the end of the hose is not directed towards the
air intake grille at the rear of the dryer.
●
NOTE: The vent hose should not exceed 2.4 metres in length,
and should be kept free of any possible accumulation of fluff
lint (and water) by frequently shaking it out. Always ensure
that the hose is not squashed.
Wall Hanging Kit
This allows the dryer to be mounted on a wall of suitable strength to
take the weight. Alternatively it should be used when the dryer is
mounted on top of a work surface to secure the dryer to the wall.
WARNING:
DO NOT DISCHARGE THE EXHAUST AIR INTO A FLUE WHICH
IS USED FOR EXHAUSTING FUMES FROM OTHER
APPLIANCES BURNING GAS OR OTHER FUELS.
Mains On/Off Indicator Light (if fitted)
Timer Knob
Door Release
How to use your dryer
1. Plug in, switch
on electricity.
WARNING: WHEN
SWITCHING ON
OR OFF, PLEASE
ENSURE THAT
YOUR HANDS
ARE DRY
3. Open the door.
Check that the fluff
filter is clean (see
section How to
remove and clean
the fluff filter).
5. Select the
relevant heat setting
(see section "Sorting
your Laundry").
Push IN for high heat, for cottons, linens
and synthetics.
Low setting - button OUT for acrylics and
acrylic mixtures.
6. Turn the Timer clock-
wise to select the
required drying time.
(See Section "The
Controls".)
The dryer will start
7. When finished
open the door and
take out the laundry.
Clean and replace
the fluff filter.
Never switch the dryer off with a hot load in the drum.
You must terminate every programme with the Cool Tumble Phase.
2. Sort your laundry
(see section "Sorting
Your Laundry")
4. Load the dryer
placing the
clothes carefully in
the drum, pushing
them well towards
the back and
away from the
door seal. Close
the door.
Button OUT
LOW HEAT
Button IN
HIGH HEAT
8. Switch off electricity
WARNING: WHEN
and remove plug from
SWITCHING ON
socket.
OR OFF, PLEASE
ENSURE THAT
YOUR HANDS
ARE DRY
3
