Aqua Lung Mistral Mouthpiece Technisches Wartungshandbuch - Seite 6
Blättern Sie online oder laden Sie pdf Technisches Wartungshandbuch für Haushaltsgerät Aqua Lung Mistral Mouthpiece herunter. Aqua Lung Mistral Mouthpiece 14 Seiten.
Auch für Aqua Lung Mistral Mouthpiece: Service-Handbuch (14 seiten)

6
5. Insert the o-rings (7) into the mouthpiece body (10) to the
left of the decal.
6. Install the o-rings (7) to the two connectors (6).
7. Lubricate the two o-rings (7) and the surface in contact
with the mouthpiece body using a brush.
8. Install the connectors (6) into the mouthpiece body (10).
Make sure mold line of connector lines up with mold line
on body.
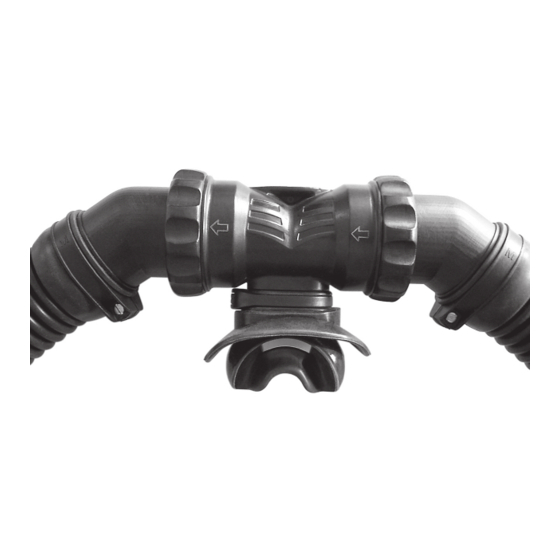
NOTE:
Connectors must be correctly
installed for correct airfl ow direction.
9. Tighten the two screws (5) snug by hand.
10. Install the mouthpiece (14) using the mouthpiece
clip (13).
11. Install the lip guard (12).
12. Clean and check the condition of the two corrugated
hoses (1). Replace the hoses if they show any cuts or other
signs of deterioration.If the hoses are in good condition, it is
not necessary to replace them.
NOTE:
Cleaning procedures for the corrugated
hoses are found on p. 10, Procedure A: Cleaning
and Lubricating.
13. Place the clean corrugated hoses (1) onto the
connectors (6). Make sure the mold line on the hose lines up
with the mold line on the body.
CAUTION:
The corrugated hose should be
fi tted to the connectors so that the gas can
circulate in the direction indicated by the
arrows engraved on the mouthpiece body.
14. Lay the regulator fl at with the mouthpiece pointing up-
wards. The corrugated hose mold line should be identical to
the two fi gures shown below.
