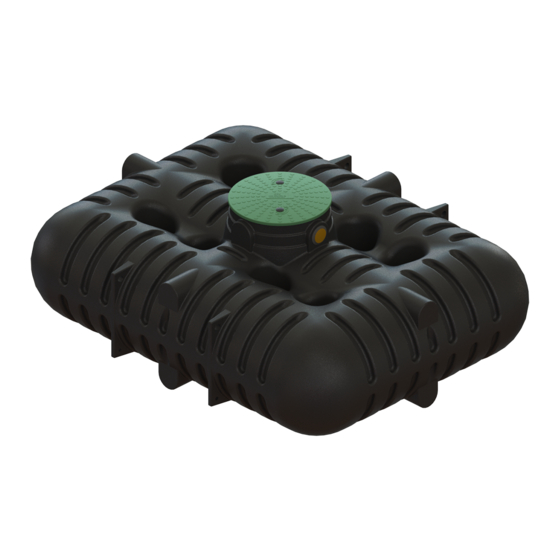
Cipax CPX 23032/-1 Installationshandbuch - Seite 4
Blättern Sie online oder laden Sie pdf Installationshandbuch für Warmwasserbereiter Cipax CPX 23032/-1 herunter. Cipax CPX 23032/-1 10 Seiten. Septic tank 3200l

Anchoring
If there is a risk for high ground water level the Septic tank must
be anchored to avoid being pushed up from the ground. We
recommend using a geotextile as cover with anchor trenches
around the Septic alternatively durable anchoring bands com-
bined with anchoring plates. The Septic tank can be influenced
by very large forces so make sure to spread these over as large
surface as possible. Make sure that no sharp edges are in contact
with the tank like for instance locking devices from bands.
Pipe connections
The septic tank is supplied with installed T-pipe. Inlet hole is
predrilled and Ø110 mm rubber sealing is mounted. Outlet has
a Ø110 mm female connection. The Septic Tank alternative
locations for inlet and outlet connections that are clearly marked
with direction arrows, text and drill marks in case alternative
placement of Septic tank is needed. Please contact CIPAX if al-
ternative predrilling is requested. Recommended is use of one
inlet and one outlet.
Do not use pipes at 90-degrees bends neither to or from the
tank. If this cannot in any way be avoided then use two 45°
bends instead. Recommended is that in and out piping shall be at
freeze safe depth. The in-pipe should be pushed in at least 200
mm into the tank. Make sure all piping has a stable support from
below before refilling.
Never connect rainwater drainage to the Septic tank!
Ventilation
The septic system must have a good ventilation to work proper-
ly. Normally the ventilation from the sewer piping is led above
the roof of the building. In some cases the ventilation is attached
directly to the Septic tank. That solution require a pipe dimen-
sion of minimum 75 mm. It can also in some cases cause smell
but by using a ventilation valve equipped with active coal filter
the smell will disappear.
Back filling
When it is time for back filling to cover the Septic tank it is
strongly recommended to fill with water simultaneously. It will
then stabilize and resist impact from the backfilling.
The backfilling approx. 200 mm closest to the tank should con-
sist of gravel or sand without sharp stones that can cause dam-
age and that also will improve water drainage. Make sure to fill
out carefully around the lower rounded areas of the tank and in
the through-holes. Pack the filling gradually around the tank. Do
not use vibrator when backfilling!
Function and operation
The main function of the Septic tank is to separate sludge parti-
cles from water. Incoming particles arriving via piping from e.g. a
house is moving slowly through the different chambers inside.
The different chambers are communicating via specific holes
placed at a certain height between the bottom and the liquid
surface. Thereafter the separated water is leaving the Septic tank
via a T-pipe alternatively via a pump with built in T-pipe function
Only let black or grey water pass through the sewer and avoid
strong chemicals or toxins. Minimize the amount of oil or fat
from cooking into the sewer and also passing large quantities of
water in short time like emptying of bath tub. Try to empty
gradually to avoid swirls risking to pass sludge to the infiltration.
After completed installation the Septic is almost start operate.
First quick check that it is filled with water up to the outlet pipe.
If not, fill it all the way up. During first week of usage make a few
checks that sewage comes in and water goes out and the level is
intact to ensure the whole system works properly. The Septic
does not work properly if it is not filled with water all the way
up to the outlet pipe. If it is not filled there is a risk for escape of
sludge which can clog the infiltration. We do not recommend
filling the Septic with sewage water containing any sludge.
Emptying and filling
The Septic must be emptied in time to prevent potential escape
of sludge out to the infiltration. It is very important to refill the
Septic with water directly after sludge emptying. The Septic shall
not be left empty during longer time while installed.
The Septic is classified for a household up to 10 persons. At
normal use one emptying per year is required. If the Septic Tank
is used for only greywater then emptying normally will be re-
quired every second year.
Majority of the sludge shall stay in the first chamber. If sludge
appears in chamber two or even in chamber three a more fre-
quent emptying can be required.
Emptying procedure
To prevent escape of sludge start with emptying chamber 1
thereafter 2 and last chamber 3. Then inspect the inlet and out-
let and clean with water if needed.
Filling procedure
The Septic Tank shall be filled in reverse order as filling. Start
filling chamber 3, then chamber 2 and last chamber 1. Check
that water level goes up to outlet.
Maintenance
Even though the Septic is more or less maintenance free it is
wise to check function and status on a regular basis like for ex-
ample at sludge emptying. A visual check that debris aren't block-
ing any and that no damages shows is enough. It is recommend-
ed to make a note when the Septic has been emptied to keep
track at frequency.
Recycling
The septic tank including interior and lid is made from polyeth-
ylene that can be returned for recycling at local waste deposit
after being cleaned and cut to smaller pieces.
4/10
