CIPU CSPPS702 Benutzerhandbuch - Seite 6
Blättern Sie online oder laden Sie pdf Benutzerhandbuch für Schwimmbadpumpe CIPU CSPPS702 herunter. CIPU CSPPS702 11 Seiten.
Maintenance
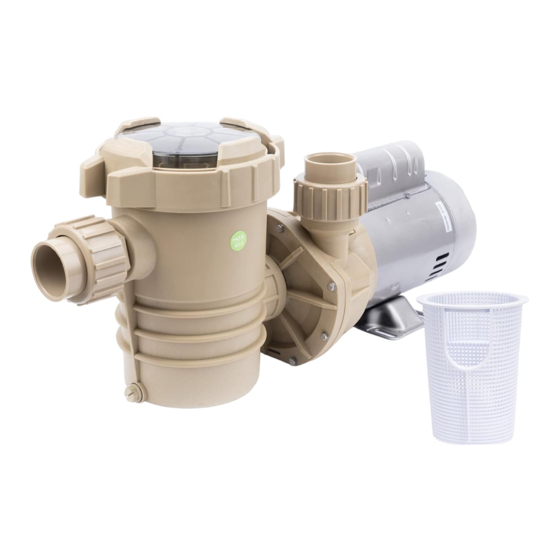
The strainer basket in the filter tank should be inspected and cleaned at
The strainer basket in the filter tank should be inspected and cleaned at regular intervals.
1. Remove lid and lift out basket.
2. Remove debris and hose off with clean water if
2. Remove debris and hose off with clean water if necessary.
3. Inspect the lid gasket, lubricate with
3. Inspect the lid gasket, lubricate with silicon based grease
only if needed. If it is damaged, pls replace.
only if needed. If it is damaged, pls replace.
4. Replace the strainer.
5. Re-prime the filter tank.
6. Correctly locate the o-ring.
7. Replace the lid hand tighten only.
8. Switch on pump.
In climates where the pump may be
limates where the pump may be exposed to frost or freezing,care must be taken to ensure
the pump is protected from damage.It is
pump is protected from damage.It is recommended that if the pump is not used during
winter period it should be drained completely
the drain plug. Store it in a safe place when not use. An
the drain plug. Store it in a safe place when not use. An example would be store plug in the
filter tank basket.
When you are activate the pump ensure all seals and o
re activate the pump ensure all seals and o-rings are in operational condition,
re-grease if necessary, replace if unsure of condition.
Check that the motor shaft moves freely before re
Check that the motor shaft moves freely before re-activation.
1. When connecting electric cables to the motor of the pump, be careful to correctly arrange
1. When connecting electric cables to the motor of the pump, be careful to correctly arrange
1. When connecting electric cables to the motor of the pump, be careful to correctly arrange
them inside the connection box, verify that no bits of cable are l
them inside the connection box, verify that no bits of cable are left inside the box on closing it.
See that the ground wire is correctly connected. When connecting the motor, follow the wiring
See that the ground wire is correctly connected. When connecting the motor, follow the wiring
See that the ground wire is correctly connected. When connecting the motor, follow the wiring
diagram supplied with the pump.
2. Be especially careful that no water enters the motor or electrical parts under voltage.
2. Be especially careful that no water enters the motor or electrical parts under voltage.
2. Be especially careful that no water enters the motor or electrical parts under voltage.
3. In the event that the planned use is not as specified, adaptations and supplementary
the event that the planned use is not as specified, adaptations and supplementary
the event that the planned use is not as specified, adaptations and supplementary
technical rules may be necessary.
4. Before starting the pump, verify the calibration of the electrical protection devices of the
4. Before starting the pump, verify the calibration of the electrical protection devices of the
4. Before starting the pump, verify the calibration of the electrical protection devices of the
motor and that the protections against elec
the protections against electrical and mechanical contacts are correctly
positioned and attached.
5. It is advisable to follow the steps listed below before handling the pump in any way.
5. It is advisable to follow the steps listed below before handling the pump in any way.
5. It is advisable to follow the steps listed below before handling the pump in any way.
a) Turn off the voltage to the pump.
a) Turn off the voltage to the pump.
b) Lock starting devices.
c) Verify that there is no voltage in the circuits, including ancillary devices and auxiliary circuits.
d) Wait until motor stops completely.
d) Wait until motor stops completely.
The above list should be considered indicative and not binding for the purpose of safety,
The above list should be considered indicative and not binding for the purpose of safety,
The above list should be considered indicative and not binding for the purpose of safety,
specific safety rules may exist in particular regulations.
rules may exist in particular regulations.
Assembly Instructions (some parts may be pre
Assembly Instructions (some parts may be pre-assembled)
F
ollow the step below and the corresponding diagrams for assembly.
ollow the step below and the corresponding diagrams for assembly.
Step 1.
Place the strainer basket to the strainer housing. Be sure that the opening the basket is
Place the strainer basket to the strainer housing. Be sure that the opening the basket is
Place the strainer basket to the strainer housing. Be sure that the opening the basket is
aligned with the opening in the housing. Secure Lid
only.
drained completely and store pump in a dry location. Do not replace
replace if unsure of condition.
trical and mechanical contacts are correctly
in the circuits, including ancillary devices and auxiliary circuits.
in the circuits, including ancillary devices and auxiliary circuits.
housing. Secure Lid
are must be taken to ensure
that if the pump is not used during
dry location. Do not replace
example would be store plug in the
rings are in operational condition,
eft inside the box on closing it.
5
regular intervals.