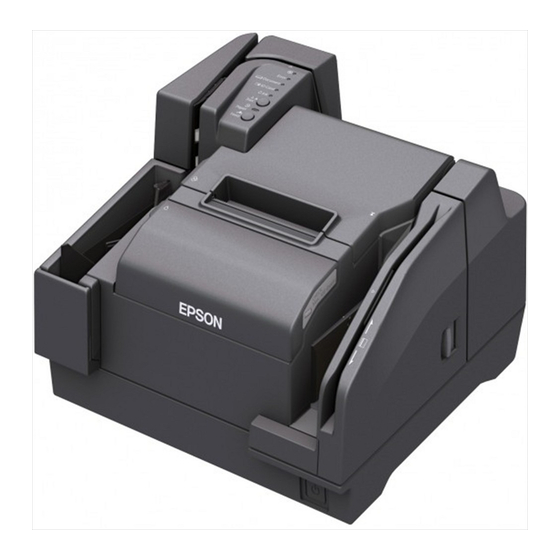
Epson A41CG59101 Hier beginnen - Seite 2
Blättern Sie online oder laden Sie pdf Hier beginnen für Drucker Epson A41CG59101 herunter. Epson A41CG59101 2 Seiten.

6
Installing the Ink Cartridge/Installation de la cartouche d'encre/Installieren der Tintenpatrone/De inktpatroon installeren/
Installazione della cartuccia dell'inchiostro/Instalación del cartucho de tinta/Instalar o tinteiro/
1
2
3
Install the ink cartridge in the correct direction,
EN
and push it until it clicks in place.
Installez la cartouche d'encre dans le bon sens
FR
et enfoncez-la jusqu'à ce qu'elle s'enclenche.
Installieren Sie die Tintenpatrone in der
DE
korrekten Ausrichtung und drücken Sie sie, bis
sie mit einem Klickgeräusch einrastet.
Installeer de inktpatroon in de juiste richting
NL
en duw hem aan tot hij op zijn plaats vastklikt.
Installare la cartuccia dell'inchiostro nella
IT
direzione corretta e premerla fi no a farla
scattare in posizione.
Instale el cartucho de tinta en la dirección correcta
ES
y empújelo hasta que haga clic en su sitio.
Instale o tinteiro na direcção correcta e exerça
PT
pressão até o encaixar.
ر ﻛ ﱢﺐ ﺧﺮﻃﻮﺷﺔ اﻟﺤﺒﺮ ﻓﻲ اﻻﺗﺠﺎه اﻟﺼﺤﻴﺢ وادﻓﻌﻬﺎ ﺣﺘﻰ ﺗﺴﺘﻘﺮ
AR
5
4 min
ﺗﺮﻛﻴﺐ ﺧﺮﻃﻮﺷﺔ اﻟﺤﱪ
Use the supplied new ink cartridge. Do not install a
EN
used one.
Utilisez la cartouche d'encre neuve fournie. N'en
FR
installez pas une usagée.
Verwenden Sie die beiliegende neue Tintenpatrone.
DE
Installieren Sie keine gebrauchte.
Gebruik de meegeleverde nieuwe inktpatroon. Plaats
NL
geen exemplaar dat reeds gebruikt is.
Utilizzare la cartuccia dell'inchiostro nuova in
IT
dotazione. Non installarne una usata.
Utilice el cartucho de tinta nuevo suministrado. No
ES
instale uno usado.
Utilize o tinteiro novo fornecido. Não instale um
PT
usado.
اﺳﺘﺨﺪم ﺧﺮﻃﻮﺷﺔ اﻟﺤﺒﺮ اﻟﺠﺪﻳﺪة اﻟﻤﺮﻓﻘﺔ. ﻻ ﺗ ُﺮ ﻛ ﱢﺐ ﺧﺮﻃﻮﺷﺔ ﺣﺒﺮ
AR
.ﻣﺴﺘﺨﺪﻣﺔ
4
.ﻓﻲ ﻣﻜﺎﻧﻬﺎ
Do not tilt the product, turn off the product, or open
EN
the covers while
(Power) LED is fl ashing.
N'inclinez pas le produit, ne mettez pas le produit
FR
hors tension ou n'ouvrez pas les capots lorsque le
voyant
(alimentation) clignote.
Kippen Sie das Produkt nicht, schalten Sie es nicht aus
DE
und öff nen Sie die Abdeckungen nicht, während die
(Strom) LED blinkt.
Het product niet kantelen of uitschakelen en geen
NL
kappen openen terwijl de LED
(aan/uit) knippert.
Non inclinare o spegnere il prodotto e non aprire gli
IT
sportelli mentre il LED
(Alimentazione) lampeggia.
No incline el producto, apague el producto ni
ES
abra las tapas mientras parpadee el indicador
(alimentación).
Não incline o produto, não o desligue nem abra as
PT
tampas enquanto o LED
(Alimentação) estiver
intermitente.
ﻻ ﺗﻘﻢ ﺑﺈﻣﺎﻟﺔ اﻟﻤﻨﺘﺞ، أو إﻳﻘﺎف ﺗﺸﻐﻴﻠﻪ، أو ﻓﺘﺢ اﻷﻏﻄﻴﺔ، أﺛﻨﺎء وﻣﻴﺾ ﻣﺆﺷﺮ
AR
.()اﻟﻜﻬﺮﺑﺎء
LED
7
Test Printing/Test d'impression/Testdruck/Een testafdruk maken/Stampa di prova/Impresión de prueba/Teste de impressão/
ﻃﺒﺎﻋﺔ اﺧﺘﺒﺎر
1
2
ON
Nozzle check pattern
EN
When the printout is faint, press the cleaning button for at least 3 seconds to run print head cleaning.
Lorsque l'impression est pâle, appuyez sur le bouton de nettoyage pendant au moins 3 secondes
FR
pour eff ectuer un nettoyage de la tête d'impression.
Wenn das Druckbild blass ist, halten Sie die Reinigungstaste mindestens 3 Sekunden gedrückt, um
DE
eine Druckkopfreinigung durchzuführen.
NL
Als de afdruk zwak is, druk dan drie seconden of langer op de knop voor reiniging om de printkop te reinigen.
Se la stampa è sbiadita, premere il pulsante di pulizia per almeno 3 secondi in modo da eseguire la
IT
pulizia della testina di stampa.
Si el documento impreso sale pálido, pulse el botón de limpieza durante al menos 3 segundos para
ES
ejecutar la limpieza de los cabezales de impresión.
Quando a impressão estiver esbatida, prima o botão de limpeza durante, pelo menos, 3 segundos
PT
para executar a limpeza da cabeça de impressão.
AR
For detailed information on operation and safe use of the product, refer
EN
to the other manuals included with the product.
Pour plus d'informations sur le fonctionnement et une utilisation sans
FR
danger du produit, reportez-vous aux autres manuels fournis avec le produit.
Nehmen Sie für detaillierte Informationen zur Bedienung und sicheren Verwendung
DE
des Produkts auf die anderen dem Produkt beiliegenden Anleitungen Bezug.
Raadpleeg de andere handleidingen van het product voor details over
NL
de bediening en veilig gebruik ervan.
Make sure all the covers are closed. Then hold down the
EN
cleaning button and turn on the product.
Assurez-vous que tous les capots sont fermés. Ensuite,
FR
maintenez le bouton de nettoyage enfoncé et mettez le
produit sous tension.
Vergewissern Sie sich, dass alle Abdeckungen
DE
geschlossen sind. Halten Sie dann die Reinigungstaste
gedrückt und schalten Sie das Produkt ein.
Controleer of alle kappen zijn gesloten. Druk op de knop
NL
voor reiniging en zet het product aan terwijl u de knop
ingedrukt houdt.
Verifi care che tutti gli sportelli siano chiusi. Quindi, tenere
IT
premuto il pulsante di pulizia e accendere il prodotto.
Asegúrese de que todas las tapas estén cerradas. A
ES
continuación, mantenga pulsado el botón de limpieza y
encienda el producto.
Certifi que-se de que todas as tampas estão fechadas. Em seguida,
PT
mantenha o botão de limpeza premido e ligue o produto.
.ﺗﺄﻛﺪ ﻣﻦ إﻏﻼق ﺟﻤﻴﻊ اﻷﻏﻄﻴﺔ. وﺑﻌﺪﺋ ﺬ ٍ ، اﺿﻐﻂ ﻣﻄﻮ ﻻ ً ﻋﻠﻰ زر اﻟﺘﻨﻈﻴﻒ وﺷ ﻐ ﱢﻞ اﻟﻤﻨﺘﺞ
AR
.ﻋﻨﺪﻣﺎ ﺗﻜﻮن اﻟﻄﺒﺎﻋﺔ ﺑﺎﻫﺘﺔ، اﺿﻐﻂ ﻋﻠﻰ زر اﻟﺘﻨﻈﻴﻒ ﻟﻤﺪة 3 ﺛﻮانٍ ﻋﻠﻰ اﻷﻗﻞ ﻟﺘﺸﻐﻴﻞ ﺗﻨﻈﻴﻒ رأس اﻟﻄﺒﺎﻋﺔ
Per informazioni dettagliate sul funzionamento e sull'uso sicuro del
IT
prodotto, vedere gli altri manuali in dotazione con il prodotto.
Para más información sobre el funcionamiento y el uso seguro del
ES
producto, consulte los otros manuales suministrados con el producto.
Para obter informações pormenorizadas sobre o funcionamento e a utilização
PT
segura do produto, consulte os outros manuais fornecidos com o produto.
ﻟﻤﺰﻳﺪ ﻣﻦ اﻟﻤﻌﻠﻮﻣﺎت اﻟﺘﻔﺼﻴﻠﻴﺔ ﺣﻮل اﻟﺘﺸﻐﻴﻞ واﻻﺳﺘﺨﺪام اﻵﻣﻦ ﻟﻠﻤﻨﺘﺞ، ارﺟﻊ إﻟﻰ اﻷدﻟﺔ اﻷﺧﺮى
AR
.اﻟﻤﺮﻓﻘﺔ ﻣﻊ اﻟﻤﻨﺘﺞ
