Fiber Options S711D Gebrauchsanweisung - Seite 9
Blättern Sie online oder laden Sie pdf Gebrauchsanweisung für Mikrofonanlage Fiber Options S711D herunter. Fiber Options S711D 14 Seiten. Universal data
RS485 APPLICATION NOTES
The S711D is configurable for both full-duplex (4-wire) and
half-duplex (2-wire) operation. It can be used for interfac-
ing to systems adhering strictly to the RS485 specification
and for use with systems that use a modified, "fail-safe
biased" RS485 bus.
Connection:
Use high quality twisted-pair wiring, and
make sure all connection points are clean and tight. A
loose connection on one of the wires can appear to func-
tion, yet cause intermittent errors: data LEDs may be flash-
ing as signals pass through the system, but those signals
will be corrupt.
Configuration: Fiber Options Universal Data units are
designed to work with virtually any RS485 system.
Unfortunately, some systems operate on a "modified" ver-
sion of RS485; they use failsafe biasing to pull up/down
their bus during a tri-state condition. In a standard RS485
system, when a driver on a properly terminated bus goes
into tri-state (inactive), the voltage between the differential
outputs should be less than 200 millivolts. (This is what is
considered "standard offset" in the product instruction man-
uals). A differential output tri-state voltage this small can
cause some nonstandard systems to latch up, since they
are designed for much larger, "fail-safe," offsets. To be able
to interface to such equipment, Fiber Options Universal
Data products offer two more "offset" level modes. That is,
the maximum differential input voltage that can be applied
where it will be perceived to be in tri-state. Of course, the
equipment manufacturer does not disclose this information.
In most cases, the Fiber Options unit should be configured
for "standard offset" operation. When the system is oper-
ating properly, the DATA IN and DATA OUT LEDs will be off
when there is no communication (tri-state) and they will
flash when data is being sent or received. In the case
where the link is not functioning properly, (LEDs will most
likely not turn off), change the DATA SELECT switch on the
unit to a higher offset mode. First try 1 V, then 2 V. If sim-
ply switching the mode switch does not prove effective, the
offset level may have to be emulated at one end of the sys-
tem by using pull-up/down resistors on the data connector.
The S711D has a +5 V bias pin and ground pins on the con-
nector for this purpose. Contact equipment manufacturer's
technical support for recommended resistor values and
configuration.
Termination: RS485 systems need to be properly termi-
nated in order to work reliably. Exactly two terminating
resistors are used on each RS485 bus, at the furthest ends
of the link.
Fiber Options
RS485 APPLICATION NOTES
NOTE: The resistors for terminating RS485 data are built
into the S711D.
If the S711D is positioned at either end of the data bus, ter-
minate the unit by connecting a jumper between the pins
indicated in Tables 7, 8, 16, and 18.
If the terminating resistors are left out, the tri-state condition
will not be detected, and the bus may lock up. If there are
too many terminations on the bus, signal levels may drop
too low, or driver circuitry may fail.
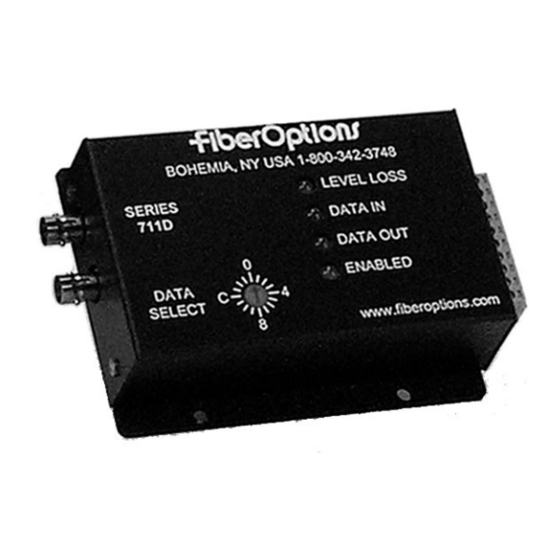
TEST MODE
Test mode allows the end user to verify the operation of the
copper receiver/driver circuit in an S711D, as well as the
fiber connection from one S711D to another. Using the test
mode is simple:
1. Switch one of the S711Ds to be tested into position F
(TESTMODE) on the rotary switch. At this end only, wire
the connector as shown in Table 9.
NOTE: The unit set to position F (TEST-MODE) is the
transmitter during testing.
2. At the receiving (or opposite) end, switch the S711D to
position 9 on the rotary switch.
3. In test mode, the test transmitter should behave as fol-
lows:
A. Enabled LED is RED, indicating that a valid data format
has not been selected.
B. Data OUT LED is slowly flashing between amber,
green, and off. This indicates that the test mode is gen-
erating an output pattern and sending it out on copper.
C. Data IN LED should mimic the DATA OUT LED. This
indicates a good, proper loopback connection, and proves
that the data transmit/receive circuitry is working properly.
D. Level/Loss may be red or green - indicates received
fiber signal strength.
4. The test receiver (position 9) should behave as follows:
A. Enabled LED is GREEN, a valid data format is select-
ed.
B. Data OUT LED should slowly flash amber, green, off.
This indicates that the fiber path from the unit set for
TESTMODE is reliable.
7