Digital Foci Picture Porter Advanced PPA-500 Benutzerhandbuch - Seite 2
Blättern Sie online oder laden Sie pdf Benutzerhandbuch für Digitaler Fotorahmen Digital Foci Picture Porter Advanced PPA-500 herunter. Digital Foci Picture Porter Advanced PPA-500 9 Seiten. 5" digital photo manager
Getting Started
About this User Guide
This User Guide is intended to provide a quick
reference for basic understanding and operation
of the device. It is written in a conversational
tone to help users of all levels get started with
PPA quickly and easily.
For more detailed instructions or to ask specific
questions, please visit our website, email us, or
call us using the contact information provided.
Website: www.digitalfoci.com
Email: [email protected]
Phone: +1 (310) 763-9100
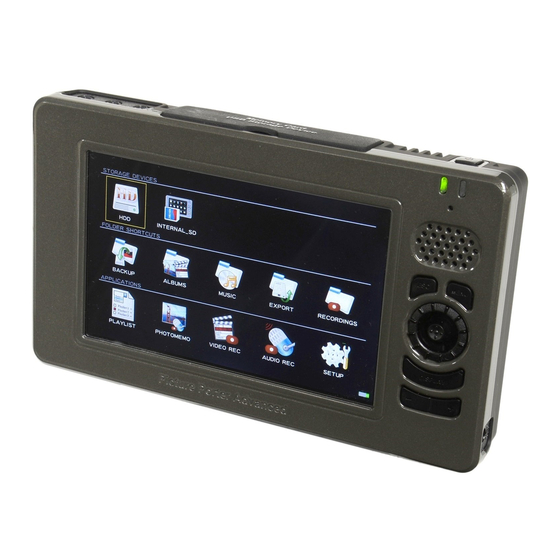
PPA Device Layout
Audio and Video Jacks
Memory Device Cover
5" LCD Display
1) Insert memory devices with label side facing front.
2) See 'Connecting External Hard Drive' section for more details.
3) CAUTION: Connect only one of SD or microSD at any time.
4) Green LED will light when PPA powered on.
Red LED will light when battery charging and dim when full.
LED will be Orange when PPA both turned on and charging.
5) Blue LED will light to indicate hard drive data being is accessed.
6) See 'Using the Control Cluster' section on the next fold.
7) LED will light Green when PPA connected to computer.
Installing the Battery
Locate the Battery Door on the back of PPA.
Pull the Battery Door Release upward until the
clips release and the Battery Door detaches by
rotating up toward the top of the device.
Position Battery with text of battery sticker upside
down and metal contacts facing battery contacts
on PPA. Angle battery into position so contacts
touch and rotate into battery bay. Replace cover.
Package Contents
Picture Porter Advanced
Neoprene Carry Case with Velcro pocket
Wrist strap
Li-Ion battery (3700mAh @ 3.7V [13.7Wh])
AC adapter with USB output (5V/2.4A, 12W max.)
USB-to-DC Jack cable (for AC adapter)
microUSB/B to USB/A cable (for computer)
microHDMI/D to HDMI/A cable (for TV/monitor)
Component video cable (RCA-x3 to 3.5mm jack)
Composite video cable (RCA-x1 to 3.5mm jack)
Audio cable (RCA-x2 to 3.5mm jack)
Earphones (3.5mm jack)
User Guide
Memory Device Connectors
Power On/Off
Power/Charge LED
5
Data Access LED
Mic
Speaker
Control
6
Cluster
Internal_SD
DC Jack HDMI Output
USB Connection LED
AC Adapter and Battery Charge Indicator
The AC Adapter has a USB jack as the output.
Connect the USB-to-DC Cable to the AC Adapter
and plug the AC Adapter into a power source. The
LED on the AC Adapter will light. Next, connect
the DC plug of the cable into the PPA DC Jack.
The PPA Power/Charge LED will light Red if the
battery is charging. Allow for 3-4 hours to charge
full. The Red LED will dim when battery full.
Page 2/8
1
CF Slot
USB Memory
Device
microSD Slot
3
SD Slot
4
7
microUSB
Battery
Door
Release
2
3
Wrist Strap Anchor
(to computer)
Version 1.0.1-3