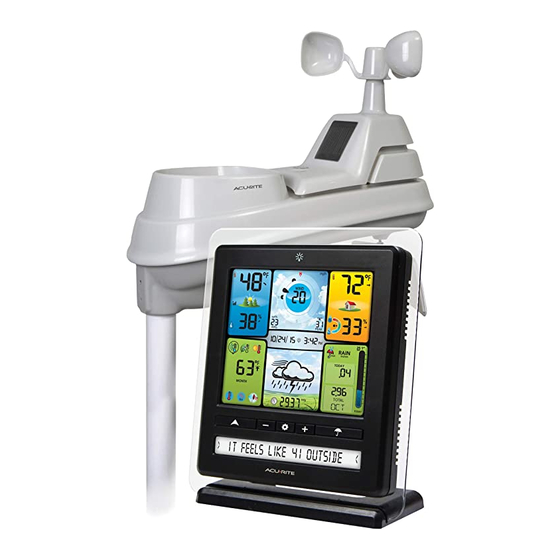
ACU-RITE 02064C Gebrauchsanweisung - Seite 11
Blättern Sie online oder laden Sie pdf Gebrauchsanweisung für Wetterstation ACU-RITE 02064C herunter. ACU-RITE 02064C 13 Seiten. Professional weather center

INDOOR TEMPERATURE
INDOOR HUMIDITY
BAROMETRIC PRESSURE (must be set to MANUAL mode to calibrate)*
*To change from AUTO to MANUAL pressure mode and vice versa, press
AND HOLD the "
" button for 5-7 seconds. The display indicates the
current pressure mode selected, "AUTO" or "MANUAL". The "
appear next to the barometric pressure to indicate that MANUAL mode has
been activated. Press and HOLD the "
to AUTO mode.
After 5-10 seconds of inactivity, the display will save the adjustments and exit
calibration mode. Note: Calibrations will be erased if the display is reset or if
batteries are removed and the power adapter is unplugged.
Calibrate the Rain Gauge
The rain gauge on the 5-in-1 sensor can be calibrated to improve accuracy.
Items Needed: 5-in-1 sensor, display unit, plastic cup, pin, screw driver
1. First, ensure 5-in-1 sensor is perfectly level using built-in bubble level.
2. Place display unit close so you can monitor it during calibration.
3. Make a pin hole in the bottom of a plastic cup. Hold the cup over the rain gauge and
fill it with exactly 1 cup (8oz) of water, allowing the water to drip into the rain gauge.
You should hear the internal buckets tip and see water drain through the rain gauge.
4. A few seconds after each bucket tip, the display unit displays rainfall in
approximately 0.01" or more increments.
5. The cup of water should take more than 20 minutes to empty; a quicker period will
result in inaccurate calibration. Try to simulate a normal steady rainfall. When cup is
empty of water, display unit should register 1.06"
Tips
• There should be nearly an equal number of water drops (about 25 water drops)
between bucket tips. If not, adjust the calibration screws on the bottom of the 5-in-1
sensor until an equal number of water drops are tipping the buckets. Then, restart the
calibration procedure.
• If you don't hear the buckets tipping and see water dripping alternately out of
each drain, there may be an issue with the rain gauge or it's adjustment. See
Troubleshooting on page 18.
Adjustment
If the rain gauge doesn't register close to 1.06", make an EQUAL adjustment to the two
calibration screws on the bottom of the 5-in-1 sensor. Turning screws clockwise increases
rainfall; counter clockwise decreases rainfall.
• To adjust the rainfall reading by 2% turn both screws 1/8 of a turn.
• To adjust the rainfall reading by 4% turn both screws 1/4 of a turn.
• To adjust the rainfall reading by 8% turn both screws 1/2 of a turn.
Watch the video at www.acurite.com/5in1
" icon will
" button for 5-7 seconds to return
20
Specifications
TEMPERATURE RANGE
Outdoor: -40ºF to 158ºF; -40ºC to 70ºC
Indoor: 32ºF to 122ºF; 0ºC to 50ºC
HUMIDITY RANGE
Outdoor: 1% to 99%
Indoor: 1% to 99%
WIND SPEED
0 to 99 mph; 0 to 159 kph
WIND DIRECTION
16 points
INDICATORS
0 to 3937 in; 0 to 99999mm
RAINFALL
WIRELESS RANGE
330ft / 100m
OPERATING FREQUENCY
433 MHz
POWER
Display: 4.5V AC, 250mA adapter
3 x AA alkaline batteries (optional)
Sensor: 4 x AA alkaline or lithium batteries
DATA REPORTING
Wind Speed: 18 second updates; Direction: 30 seconds
Outdoor temperature & humidity: 36 second updates
Indoor temperature & humidity: 60 second updates
AcuRite Connect CSV Data Logging: 12 minute intervals
AcuRite Connect to AcuRite Software/App: 18 seconds
DISPLAY UNIT MEMORY
512 kilobytes (not expandable)
ACURITE CONNECT SYSTEM
Windows 8.1 / 8 / 7; 1 GHz or faster processor; 1 GB
REQUIREMENTS
(32-bit) or 2 GB (64-bit) of RAM; available USB port
High speed internet is required for some advanced
features of AcuRite Connect, such as the
AcuRite software and app.
FCC Information
This device complies with part 15 of FCC rules. Operation is subject to the following two conditions:
1- This device may NOT cause harmful interference, and
2- This device must accept any interference received, including interference that may cause undesired operation.
This equipment has been tested and found to comply with the limits for a Class B digital device, pursuant to Part 15 of the FCC rules. These limits are designed
to provide reasonable protection against harmful interference in a residential installation. This equipment generates, uses and can radiate radio frequency
energy and, if not installed and used in accordance with the instructions, may cause harmful interference to radio communications. However, there is no
guarantee that interference will not occur in a particular installation. If this equipment does cause harmful interference to radio or television reception, which
can be determined by turning the equipment off and on, the user is encouraged to try to correct the interference by one or more of the following measures:
• Reorient or relocate the receiving antenna.
• Increase the separation between the equipment and the receiver.
• Connect the equipment into an outlet on a circuit different from that to which the receiver is connected.
• Consult the dealer or an experienced radio/TV technician for help.
NOTE: The manufacturer is not responsible for any radio or TV interference caused by unauthorized modifications to this equipment. Such modifications could
void the user authority to operate the equipment.
This device complies with Industry Canada licence-exempt RSS standard(s).
Operation is subject to the following two conditions:
(1) This device may not cause interference, and
(2) This device must accept any interference received, including interference that may cause undesired operation of the device.
depending on home construction materials
21
