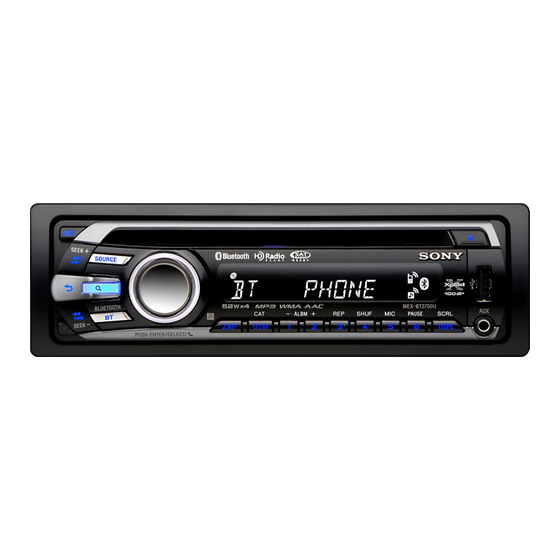
Sony MEX-BT3700U Betriebsanleitung - Seite 35
Blättern Sie online oder laden Sie pdf Betriebsanleitung für Stereo System Sony MEX-BT3700U herunter. Sony MEX-BT3700U 45 Seiten. Bluetooth audio system
Auch für Sony MEX-BT3700U: Installation/Verbindungen (2 seiten), Spezifikationen (2 seiten), Kurzanleitung (2 seiten), Installation/Verbindungen (2 seiten), Kurzanleitung (2 seiten)

Precautions
• Choos... the installation location carefully so thm the
un;t wiJlllo\ interfere with normal driving operations.
• Awid installing the unit in arcas suhjcl.'t to dust. din.
l'xccssin- vibration. or high temperatures. such as in
direct sunlight or
nC:.lT
healer ducts.
• U:-.c
{lilly
the supplied
mOLln/ing
hardware for a safe
and "C,:lIre inslall:.ltioll.
Mounting angle adjustment
AdjuSllhc mounting angle 10 less than
45°
Removing the protection collar
and the bracket
@]
Before installing the unit, remove the protection
collar
@
and the bracket
CD
from the unit.
1
Remove the protection collar
@.
Pinch both edges of the protection collar@. then
pull it out.
2
Remove the bracket
CD.
o
Insert both release keys
®
together between
the unit and the bracket
CD
until they click.
f)
Pull down the bracket
CD.
then pull up Ihe unit
to
~eparat('.
Mounting example
[§]
Installation in the dashboard
Notes
• Bend these claws outward for a tight
fit. If
necessary
(g'2)
• Malle sure that the
4
catches on the protection collar
0
are
properly engaged in the slots of Ihe unit
(g-3)
Mounting the unit in a Japanese
car
[§]
You may Iwt oe aok to inst'llllhis unit in somc makes 01
Japan..:se l'arS. In
~Ul:h
a case, consult your Sony dealer.
Note
To prevent malfunction. install only with the supplied screws
®
How to detach and attach the
front panel
II]
Before installing the unit, detach the front panel.
D-A To detach
Before detaching the front panel. he sure
((l
pre~s
(Qff).
Press~.
and pllil il
offtoward~
you.
D-B To attach
Engage part
®
of the front panel wilh part
®
of the unit.
a~ i1lu~trated
.•1Ild push Ihe lefl side illlo position until it
clicks
Warning if your car's ignition
has no ACC position
Be sure to sctlhe Auto Off funclion. For details. see Ihe
supplied Operating
Inslruction~.
The unil will shut off completely and automatically in
the sci time after the unit is tllfned off. whid) prevents
ballery drain.
If you do not set the Auto Off ftmetioll. press and hold
CQEE)
untillhe display disappears each limc you turn
the ignition off.
RESET button
When the
in~lallation
and
conneclion~
arc completed.
he sure to press the RESET buttoll with a hall-point pen.
etc .. after detadling the front panel.
L;====' J
Precauciones
• E[ija cuidadosamcnte el lugar de mOl1laje de forllla que
la unidad no interfiera con las funciones llorrnales de
condllcci6n.
• Evite instalar la unidad donde pucda quedar somelida
a polvo. sllciedad. vibraciones excesivas a
alla~
temperaturas como. por cjcmplo, a la luz solar directa
0
cerea de conduClos de ca1cfacci6n
• Para rca[ilar una instabcion segura y finne. utilice
.so[alllente e1cmentos de instalaci(lIl suminisHmlos
Ajuste del lingulo de montaje
Ajuste c1 :ingulo de montajc a mcnos de 45°.
Extraccion del marco de
proteccion y del soporte
@]
Antes de instalar la unidad, retire el marco de
protecci6n
@
y
el soporte
CD
de la misma.
1
Retire
el
marco
de
protecci6n
@.
Apricte ambos bordes del marco de protci:ci6n
@
y. a continuaci6n. tire de e[ hacia
fuera.
2
Retire el soporte
CD.
o
Inserte ambas Ilaves de liberaci6n @entre [a
unidad y c[ sopone
CD
hast a que cncajen.
e
Presionc
cl
soportt'
CD
y.
a continuation.
!cvantc la t1llidad para scparar ambos
e[emcntos.
Ejemplo de montaje
[§]
Instalaci6n en el tablero
Nofas
• 5i
es necesario. doble estos galJCl10s hacia tuera para que
encaJe firmemenle
(g·2)
•
~~~~~:~~i/~~~;O:n41::!J:~~~~sd~e:a:a;;~~%r(ji-~Fi6n
0
Montaje de la unidad en un
automovil japones
[§]
Es posible que
110
pucda instalar esta unidad en algunos
.mtomovilcsjaponeses. En ta[ caso. COllsUllC a su
distribuidor Sony.
Nota
Para evitar que se produzcan fallas de funcionamiento, rea lice la
instalaci6n solamente con los tomil/os suministrados (1).
Forma de extraer e instalar el
panel frontal
II]
Antes de instalar la unidad, extraiga el panel
frontal.
D-A Para extraerlo
Ames de eXlraer el panel frontal. asegliresc de presionar
(Qff).
Despu6 pre.sione ~ y tire
(Ie 151
hacia usted.
D-B Para instalarlo
Co[oque el oriticio
®
del panel fronwl en el eje
®
de
la unidad y. a continuaci(lIl. presiol1c ligcrilmellie ellado
i/.quierdo hacia adentro.
Advertencia: si el encendido del
automovil no dispone de una
posicion ACe
Aseguresc de ajustar la fWH:ion de des<:oncxi6n
autorn:ilica. Para obtener m:is infnrmaci<,lil. COllSUltC el
manual de inslruccitlllC<; sumini,slrado
La unidad sc apagani cornplcla y autnm:iticamcl11c en
eltiempo eSlablecido despues de que sc desconecle b
unidad. In que evita que sc de"g:lsIC 1:1 hateda
Si no h'l ajustado la lunci<.'m de dcsconexion aUlomtitica.
mantenga prcsionado
@D
cada VCl que apague
eI interruptor de Cl1l·Clldido. hasta que la palllalla
desaparezca.
Boton RESET
Una vcz linalizada b instalaci6n y las conexiones.
dcsrnontc cI panel front'll y pre<;iol1c el bollln RESET con
un hollgrafo
0
un ohjelll similar.
9=
