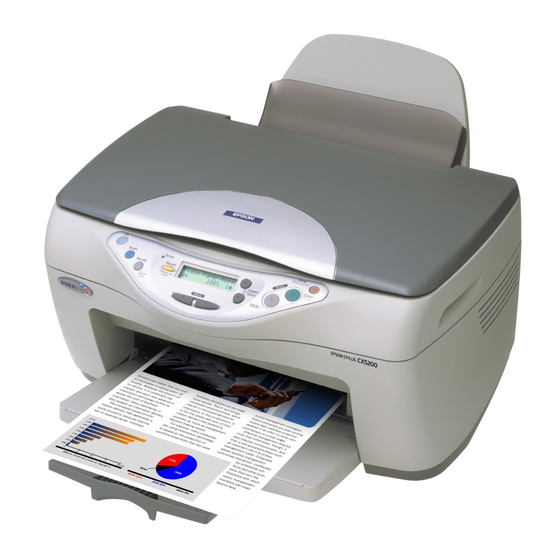
Your First Scan
Your First Scan
Your First Scan
Your First Scan
To scan using the ] Start button and EPSON Smart Panel, follow the steps below.
1. Open the integrated TPU and place your photo face down on the document table. Then close
the integrated TPU.
]
2. Press the
Start button on the scanner. After the EPSON Smart Panel software automatically
starts, click the
Scan to File icon.
Start button
Note:
If the Scan to File icon does not appear in the dialog box, you must first click the down arrow
to display the icon.
A progress bar appears on the screen and your photo is automatically scanned.
Viewing the Reference Guide
To learn more about your scanner, see the Reference Guide on the software CD.
1. Insert the software CD into the CD-ROM drive. If the CD has not been removed since you
installed the software, remove it and then insert it again.
For Windows users:
The EPSON Installer Program dialog box appears. Select your preferred language and then
click
.
For users of Mac OS 8.6 to 9.x:
Double-click the EPSON icon inside the EPSON folder.
For Mac OS X users:
Double-click the Manual folder inside the EPSON folder, and then double-click the REF_G folder
in your preferred language folder. Next, double-click INDEX.HTM.
Safety Instructions
Read all these instructions and save them for later reference. Follow all warnings and instructions marked on the scanner.
Place the scanner close enough to the computer for the interface cable to reach it easily. Do not place or store the scanner outdoors, near
excessive dirt or dust, water, heat sources, or in locations subject to shocks, vibrations, high temperature or humidity, direct sunlight, strong light
sources, or rapid changes in temperature or humidity. Do not use with wet hands.
Place the scanner near an electrical outlet where the power cord can be easily unplugged.
Power-supply cords should be placed to avoid abrasions, cuts, fraying, crimping, and kinking. Do not place objects on top of power-supply cords
and do not allow power-supply cords to be stepped on or run over. Be particularly careful to keep all power-supply cords straight at the ends and
the points where they enter and leave the transformer.
Use only the type of power source indicated on the scanner's label.
Avoid using outlets on the same circuit as photocopiers or air control systems that regularly switch on and off.
If you use an extension cord with the scanner, make sure the total ampere rating of the devices plugged into the extension cord does not exceed
the cord's ampere rating. Also, make sure the total ampere rating of all devices plugged into the electrical outlet does not exceed the electrical
outlet's ampere rating. Do not place multiple loads on the electrical outlet.
Never disassemble, modify, or attempt to repair power cord, scanner, and option by yourself except as specifically explained in the scanner's
guides.
Do not insert objects into any openings as they may touch dangerous voltage points or short out parts. Beware of electrical shock hazards.
Allow spaces behind the scanner for the cables, and space above the scanner so that you can raise the integrated TPU fully.
Unplug the scanner and refer servicing to qualified service personnel under the following conditions:
The power cord or plug is damaged; liquid has entered the scanner; the scanner has been dropped or the case damaged; the scanner does not
operate normally or exhibits a distinct change in performance. (Do not adjust controls that are not covered by the operating instructions.)
If you plan to use the scanner in Germany, the building installation must be protected by a 10 or 16 amp circuit breaker to provide adequate
short-circuit protection and over-current protection for this scanner.
For German-speaking users:
Bei Anschluss des Scanners an die Stromversorgung muss sichergestellt werden, dass die Gebäudeinstallation mit einer 10 A- oder 16
A-Sicherung abgesichert ist.
All rights reserved. No part of this publication may be reproduced, stored in a retrieval system, or transmitted in any form or by any means, electronic, mechanical, photocopying, recording, or otherwise, without the prior written permission of SEIKO EPSON CORPORATION. The information contained herein is designed only
for use with this EPSON scanner. EPSON is not responsible for any use of this information as applied to other scanners. Neither SEIKO EPSON CORPORATION nor its affiliates shall be liable to the purchaser of this product or third parties for damages, losses, costs, or expenses incurred by the purchaser or third parties as a result
of: accident, misuse, or abuse of this product or unauthorized modifications, repairs, or alterations to this product, or (excluding the U.S.) failure to strictly comply with SEIKO EPSON CORPORATION's operating and maintenance instructions.
SEIKO EPSON CORPORATION shall not be liable for any damages or problems arising from the use of any options or any consumable products other than those designated as Original EPSON Products or EPSON Approved Products by SEIKO EPSON CORPORATION. SEIKO EPSON CORPORATION shall not be held liable for any
damage resulting from electromagnetic interference that occurs from the use of any interface cables other than those designated as EPSON Approved Products by SEIKO EPSON CORPORATION. EPSON is a registered trademark of SEIKO EPSON CORPORATION. Microsoft and Windows are registered trademarks of Microsoft
Corporation. Macintosh is a registered trademark of Apple Computer, Inc. Adobe and Photoshop are registered trademarks of Adobe Systems Incorporated.
General Notice: Other product names used herein are for identification purposes only and may be trademarks of their respective owners. EPSON disclaims any and all rights in those marks.
Copyright© 2002 by SEIKO EPSON CORPORATION, Nagano, Japan
Click this arrow if the
Scan to File icon does
not appear.
3. The Scan to File dialog box opens. If you want to scan another photo, place it on the document
table, close the integrated TPU, and then click Scan More. Otherwise, click Finish.
Scanned images
appear here.
Click a file name
to change it.
Note:
For help on EPSON Smart Panel, click the question mark at the lower right corner of the screen.
4. When the following dialog box appears, click Browse and specify a folder to use to save your
images. Then select a file format from the File Format list. Click Save to save your images.
Specify a folder in which
your images will be
saved.
Specify a file format.
If you choose JPEG as the
file format, you can specify
quality.
The image files are saved in the designated folder. You can now use the software of your
choice to view, edit, or print the images.
Note:
For users of Windows and Mac OS 8.6 to 9.x, you can use the a Start button as the shortcut to
common scanning functions. Pressing the a Start button starts EPSON Smart Panel software by
default. EPSON Smart Panel allows you to scan and send data directly to a specific application.
For more information, see the Reference Guide included on the software CD and the online help.
2. Select User Guides and then click
3. To view the Reference Guide, click View Reference
Guide. To copy the Reference Guide to your computer,
click Install Reference Guide.
For United Kingdom users:
w
Warning:
This appliance must be earthed. Refer to the rating plate for the voltage and check that the appliance voltage corresponds to the supply
voltage.
Important: The wires in the mains lead fitted to this appliance are coloured in accordance with the following code:
Green and yellow - Earth
Blue - Neutral
Brown - Live
If you have to fit a plug:
As the colours of the mains lead of this appliance may not match the coloured markings used to identify the terminals in a plug, please observe
the following:
The green and yellow wire must be connected to the terminal in the plug which is marked with the letter E or with the earth symbol (G).
The blue wire must be connected to the terminal in the plug marked with the letter N.
The brown wire must be connected to the terminal in the plug marked with the letter L.
For United Kingdom, Singapore and Hong Kong users:
If damage occurs to the plug, replace the cord set or consult a qualified electrician.
Replace fuses only with fuses of the correct size and rating.
Instructions for using the
Smart Panel application.
Click Scan More to scan
another photo.
Click Finish when you
have finished scanning.
Click Save to save your
images.
.
Printed in XXX