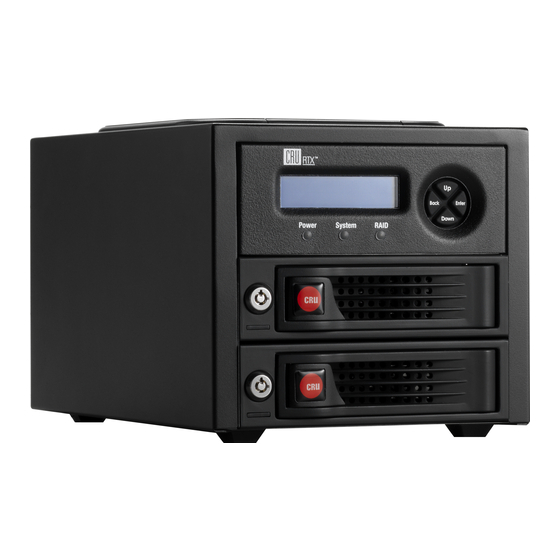
CRU RTX Secure 222-3QR Benutzerhandbuch - Seite 4
Blättern Sie online oder laden Sie pdf Benutzerhandbuch für Gehege CRU RTX Secure 222-3QR herunter. CRU RTX Secure 222-3QR 9 Seiten. Rtx 2-bay -3qr series
Auch für CRU RTX Secure 222-3QR: Schnellstart-Handbuch (2 seiten)

3 Installation Steps
3.1 TrayFree Bay Drive Installation
Note: This section refers only to RTX220-3QR.
a)
Pull on the ejection handle to open the door.
b)
Slide in your SATA hard drive, connector-end first
with the label facing up.
c)
Shut the door by pushing on the handle.
3.2 Drive Installation for RTX with Removable Carriers
This section refers only to RTX221-3QR and RTX Secure
222-3QR models.
a)
Slide the drive carrier out of the RTX-3QR unit.
b)
The carrier's cover is held in place by a screw on
the rear of the unit. Remove the screw and then
remove the cover.
c)
Slide the drive in from the front of the carrier.
d)
Mate the connection on the drive with the
connection on the drive carrier circuit board.
e)
Flip the drive/carrier assembly over and secure the
drive in place with the provided screws.
f)
Attach the Temperature Control Cooling Sensor to
the top of the drive with a piece of tape.
g)
Replace the carrier cover and secure the screw on
the rear of the carrier.
h)
Slide the carrier into the RTX-3QR unit.
3.3 Host Connections
RTX-3QR units connect to your computer in one of four
ways; USB 3.0, USB 2.0, Firewire 800, or eSATA. Choose
one of the four cable types to use and plug it into the unit.
Each bay requires its own data connection.
4 Operating Your RTX 3QR unit
Connect the data cables to the RTX-3QR unit and your
computer. Plug in the power cord to a grounded electrical
outlet. Insert hard drives into the unit and turn on the
power.
• For RTX220-3QR, the drives will begin to spin up
automatically
• For RTX221-3QR and RTX Secure 222-3QR, use the
included set of keys to turn the key lock 90 degrees
clockwise to power on each hard drive.
Note: When any hard drives are first used with a RTX 3QR
unit they will show up as blank, unallocated drives and
you'll need to create a RAID inside the unit before you can
use it. Note that creating a RAID will erase all data on the
drive, so be sure to back up your data before beginning this
operation.
Page 4
See Section 7 for instructions on how to create a RAID and
Section 8 for instructions to format the drive with Mac or
Windows operating systems.
Your RTX-3QR unit is now ready to use! If the hard drive
is already formatted, it can be used right away. If the hard
drives are brand new, or their file systems are not compatible
with your operating system, the drive will need to be
formatted before being used.
If any of the drives are inaccessible after powering on the
unit, try the following steps:
1.
Turn off the power.
2.
Remove the drive(s) in question.
3.
Reinsert the drive(s).
4.
Turn on the power.
5 LED Behavior
5.1 RTX220-3QR
LED
Unit Power
Glows green when the power switch is in the "on" posi-
tion.
System
• Glows green when system is performing as expected.
• Glows amber when a drive or the enclosure interior
reaches the preset warning temperature.
• Glows red when a drive or the enclosure interior ex-
ceeds the preset warning temperature.
RAID
• Glows green when system is performing as expected.
• Glows amber when the RAID is degraded or is being
rebuilt.
• Glows red when the RAID has failed or is invalid.
Drive
Glows green when the drive is in the unit and receiving
Power
power.
5.2 RTX221-3QR and RTX222 Secure-3QR
LED
Unit Power
• Glows green when the power switch is in the "on"
postion
• Flashes green inthe event of a bay fan failure. Contact
Technical Support
System
• Glows green when system is performing as expected.
• Glows amber when a drive or the enclosure interior
reaches the preset warning temperature.
• Glows red when a drive or the enclosure interior ex-
ceeds the preset warning temperature.
• Glows green when system is performing as expected.
RAID
• Glows amber when the RAID is degraded or is being
rebuilt.
• Glows red when the RAID has failed or is invalid.
Drive
Glows green when the drive is in the unit and receiving
Power
power.
(continued)
Behavior
Behavior
CRU Mark
10.25.12
PMS 711
2 cyan
