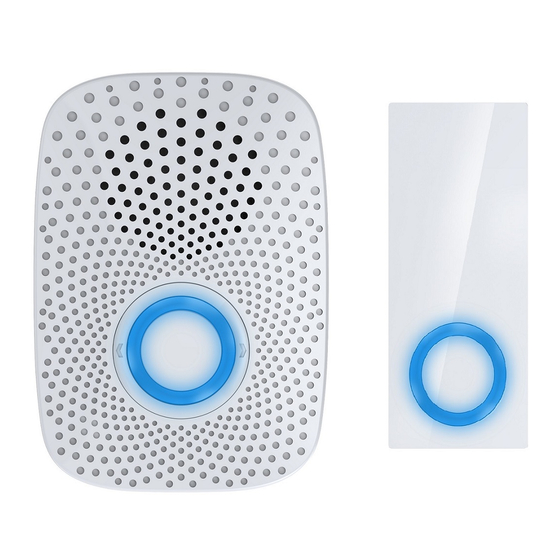
Aeotec Doorbell Gen5 Benutzerhandbuch
Blättern Sie online oder laden Sie pdf Benutzerhandbuch für Zubehör Aeotec Doorbell Gen5 herunter. Aeotec Doorbell Gen5 2 Seiten. Z-wave plus doorbell

Aeotec by Aeon Labs Doorbell.
Your Aeon Labs Doorbell supports playing MP3 music files with a press of the action button on it.
There is a 128MB flash memory that can store up to 100 ringtones. You can adjust the volume
manually via short press on the Volume Button, and switch the doorbell sound to the next via long
press on the Volume Button. You may change/update your doorbell ringtone at any point in time
you want by connecting your Doorbell to your PC to update the sound track on your Doorbell's flash
memory.
Your Doorbell is a Z-Wave wireless control product. There is a small Wireless Button, which can
trigger the Doorbell on the other side of the wall to play the selected Doorbell music when pressed.
This Wireless Button has waterproof housing so it can be used in many weather conditions. The
distance of wireless control is about 100 metres outdoors, and has a 2 year battery life that allows at
least 10 Doorbell presses every day.
DOORBELL
After the Doorbell is paired into your Z-wave network, you can use your controller/gateway/phone
GEN5
application to control its ringing, or configure its advanced functions.
Familiarize yourself with your Doorbell.
• Action Button
View the expanded manual:
• 80dB Speaker System
http://aeotec.com/support
• Volume Button
• Network LED
• Red LED
• Wireless Button
• USB connection port
Quick start.
Installation for the Wireless Button.
1. Open the Battery cover and put the CR2450 battery into Wireless Button.
®
Unlock
2. Lock the Battery cover.
3. Affix the mount plate to the wall.
You can affix the mounting plate using two 20mm screws or double-sided tape.
4. Lock your Wireless Button on the mount plate.
Lock
Put the battery in
5. Your installation is complete.
CR2450 Battery
Battery cover
Add/include your Doorbell to a Z-Wave network.
Installation direction
Installation direction
should face upward
should face upward
Getting your Doorbell up and running is as simple as plugging it into a wall socket and adding it to
Double-sided tape
your existing Z-Wave network. The following instructions tell you how to add your Doorbell to your
Z-Wave network using Aeon Labs' Z-Stick or Minimote controller. If you are using other products as
Or
your main Z-Wave controller, such as a Z-Wave gateway, please refer to their respective manual that
tells you how to add new devices to your network.
If you're using a Z-Stick:
Lock
1. Decide where you want your Doorbell to be placed and plug it into a wall outlet. Its Network LED will
begin to blink.
2. If your Z-Stick is plugged into a gateway or a computer, unplug it.
3. Take your Z-Stick to your Doorbell.
4. Press the Action Button on your Z-Stick. The LED on your Z-Stick should begin to blink slowly.
5. Press the Action Button on your Doorbell.
6. If your Doorbell has been successfully added to your Z-Wave network, its Network LED will no
longer blink. If the adding was unsuccessful and the Network LED continues to blink, repeat the
steps above.
7. Press the Action Button on the Z-Stick to take it out of inclusion mode.
If you're using a Minimote:
1. Decide on where you want your Doorbell to be placed and plug it into a wall socket. Its Network LED
will begin to blink.
2. Take your Minimote to your Doorbell.h
3. Press the Include button on your Minimote.
4. Press the Action Button on your Doorbell.
5. If your Doorbell has been successfully added to your Z-Wave network, its Network LED will no longer
blink. If the adding was unsuccessful and the Network LED continues to blink, repeat the steps above.
6. Press any button on your Minimote to take it out of inclusion mode.
With your Doorbell now working as a part of your smart home, you'll be able to configure it from your
home control software. Please refer to your software's user guide for precise instructions on configuring
your Doorbell to your needs.
