Ashcroft a4a Handbuch für Installation und Wartung - Seite 7
Blättern Sie online oder laden Sie pdf Handbuch für Installation und Wartung für Messgeräte Ashcroft a4a herunter. Ashcroft a4a 20 Seiten. Precision pressure gauge

Tip Piece Adjustment
The unique quadrant and slide design of the Ashcroft A4A
adjustable tip piece permits simple and accurate adjustment
of the angular relationship between the connecting link and
sector slide. This adjustment controls linearity; coupled with
the range adjustment it may be used to readily recalibrate
the gauge (see figure 5.2).
Thermal Compensator (optional)
Holds the gauge in calibration to the ±0.1% accuracy rating
through ambient temperature ranges from -25ºF to +125ºF.
2.3.4
DIAL AND POINTER
Concentric Dial Mounting
The dial is supported at the center by a dial pivot which
passes through the solid front gauge case and extends into
an aligning recess in the base casting of the movement.
This provides concentricity of the dial and pointer shaft of
the movement, assuring maximum accuracy.
Dial
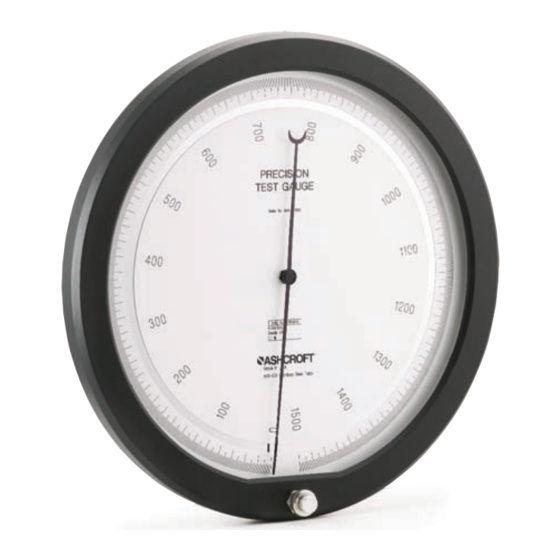
Black dial graduations on a white background are clearly
defined and highly legible assuring the resolution necessary
to obtain accurate measurements. All dials are generated
on a state of the art computer based design system. All
Ashcroft gauges include a mirror band which allows for the
elimination of parallax reading errors.
Each gauge carries an individual serial number on the dial
to facilitate identification.
For standard dial graduations see Graduation Tables
(Appendix A).
Pointer
The reading end of the knife-edge pointer provides a plane
which is perpendicular to the mirror band on the dial face
aiding in the elimination of parallax errors.
External Dial Zero Adjustment
A zero adjustment knob on the front of the gauge case
allows for easy zeroing of the gauge. This same adjustment
system allows an operator to set the gauge to display baro-
metric pressure, when setting up an absolute A4A gauge or
to set the dial to some other predetermined pressure pre-
load. One knob rotates the dial, not the pointer, through
approximately 30 degrees of arc; the other knob locks the
bezel. A friction brake, acting on the dial, prevents acciden-
tal rotation.
Where a constant value is to be carried through a series of
readings, such as a tare*, this adjustment eliminates the
need for computing values at each reading.
*A tare value is a pressure pre-load which may not need to
be reflected in the measured value. For example, in weigh-
ing operations the pressure generated by the weighing plat-
form is often tared or zeroed out prior to beginning the mea-
surement process.
2.3.5
OPTIONAL FEATURES
Special Scales
The Ashcroft A4A gauge may be ordered with special
scales to indicate pressure or pressure equivalent units in
any scale desired. Commonly used scales include standard
English (psi, inches of water, etc), metric (kg/cm2, bar, mm
Hg, etc) or SI (Pascal) units, feet of water (fresh-sea), force
on ram, absolute, vacuum, compound (vacuum-pressure) or
dual scale.
Special Ranges
The Ashcroft A4A precision pressure gauge is available in a
wide variety of standard pressure ranges from 15 through
100,000 psi. A list of the standard ranges is provided in
Appendix B. Most any non-standard pressure range
between 15 and 100,000 psi or metric equivalent can be
provided on a custom basis.
Thermal Compensator (Patented)
The thermal compensator is comprised of a bimetallic bar
which forms part of the linkage between the tip of the Bour-
don tube and the gear segment slide of the gauge move-
ment. Deflection of the bimetallic bar, resulting from a
change in ambient temperature, causes the point at which
motion is imparted to the gear segment slide, to move in an
arc. This results in a change in both the angular position
and effective length of the slide. The length of the bimetallic
bar is trimmed specifically to offset the thermal characteris-
tics of the Bourdon tube with which it is used.
Correction for ambient temperature change is completely
automatic and requires no adjustment of the compensator,
pointer or dial for any temperature variation from -25ºF to
+125ºF.
Important Note: The bimetallic bar is matched to the spe-
cific Bourdon tube for which it has been configured. The
bimetallic link cannot be removed for use in another gauge.
In addition, any damage to a temperature compensated
gauge that results in the need to replace the Bourdon tube
will also necessitate the replacement of the thermal compen-
sation option. This can only be accomplished at the factory.
Slotted Link
The slotted link option is designed to protect gauges from
movement damage which could result in applications that
produce sudden, violent release of system pressure. When
gauges are used for burst or tensile testing, comprehensive
strength testing or similar applications, a sudden release of
pressure is the norm. In these types of applications a slot-
ted link prevents violent flutter of the pointer and possible
damage to the gauge movement.
Peak Load Indicator
It is often necessary to retain the highest or lowest mea-
sured value during a pressure cycle or test. The peak load
indicator is available to simplify the recording of this infor-
mation. The peak load indicator is a red tracking pointer,
often referred to as a lazy hand. Movement of the pointer
actuates the peak load indicator in either a positive or nega-
tive direction. The red pointer will remain at the highest or
lowest measured value during the pressure cycle. An exteri-
or knob permits convenient resetting for subsequent pres-
sure cycles. The peak load indicator has been carefully
engineered so that it will not diminish the ±0.1% accuracy of
the A4A gauge.
Carrying Case
Sturdy, impact resistant, black grain finish carrying cases,
with protective insert, for carrying any size Ashcroft A4A
bottom connected gauge are available.
3.0
INCOMING INSPECTION
3.1
UNPACKING GAUGE
Every Ashcroft A4A gauge is carefully packaged to prevent
shipping damage.
After unpacking, visually inspect the gauge for any damage
that may have occurred during shipment.
7
