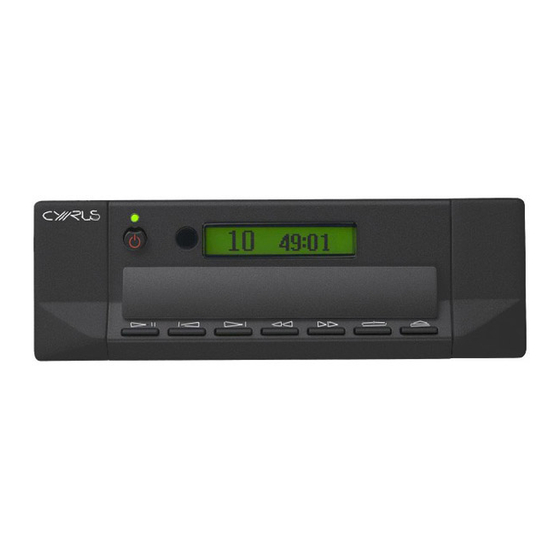
Cyrus CD8x Gebrauchsanweisung - Seite 4
Blättern Sie online oder laden Sie pdf Gebrauchsanweisung für Stereo System Cyrus CD8x herunter. Cyrus CD8x 7 Seiten. Hi-fi products

Cyrus CD8x & CD6s
Welcome to the world of Cyrus!
Congratulations on your choice of Cyrus Hi-fi products. Our state-of-the-art
design technology and outstanding quality of manufacture has won countless
awards around the world. We are confident that you will derive great pleasure
from owning a product from one of the most recognised and respected
manufacturers of hi-fi equipment.
Please read these instructions carefully before commencing installation. They
provide full guidance to help you install your Cyrus CD8x safely and correctly.
Cyrus CD8x & CD6s model differences
These user instructions refer to both the Cyrus CD8x and Cyrus CD6s CD
players. Model differences are indicated in the text where they occur.
Preparations for Installation
Before installing the CD8x check that the following items are included in the
accessory box.
•
Warranty Card (back cover of this instruction manual)
•
AC Mains Cable
•
Remote Control Handset
•
2 x Phono leads for MC-BUS connection
After removing these items, please retain the packaging.
Install the CD8x in a well ventilated location away from sources of high
temperature, dust or humidity. Never stand the CD8x under another unit or on
any surface likely to hamper its cooling or ventilation.
INSTALLATION
(Refer to Fig.1
Key to the rear panel drawing:
1. Audio Outputs
2. Optical Output
3. Digital Output*
Connecting to the System Amplifier
Connect a suitable stereo RCA phono interconnect to the audio output
sockets a of the CD8x and the corresponding input of the amplifier or
receiver. Amplifier inputs suitable for this purpose are CD or AUX inputs.
Dual outputs are provided for convenient connection to multiroom units or for
direct connection to tape/disc recorders etc.
DO NOT connect the CD8x to the PHONO input of the amplifier, as this could
damage your amplifier or speakers.
Connecting an External D/A Converter
The CD8x provides a digital output to drive an external D/A converter. Using a
digital interconnect, connect the socket marked DIGITAL OPTICAL b or
DIGITAL COAXIAL c (CD8x only) to the input of a suitable D/A converter and
connect the converter's audio outputs to a suitable input of the amplifier.
Refer to the D/A converter handbook for guidance.
The DIGITAL COAXIAL connection is recommended where this connection is
available.
Connecting a Cyrus PSX-R (CD8x only)
The Cyrus PSX-R is a high quality regulated power supply, the use of which
will elevate your CD8x into a true world-class state-of-the-art product.
The connector fitted to the umbilical cable from the PSX-R must be securely
connected to the PSX-R socket e on the rear of the CD8x. When correctly
fitted, the connector will latch into the socket.
Note: The PSX-R power supply and the CD8x will both require connection to
the mains supply.
MC-Bus System Connection (Optional)
By using the MC-BUS connection on your CD8x, a highly functional integrated
system with full remote control may be set up. This feature is usable if you
own a Cyrus amplifier. Refer to the relevant product handbook for MC-BUS
wiring instructions.
2
)
4. MC-Bus System
5. PSX-R Connection*
6. Power Inlet
* CD8x only
OPERATION
(Refer to Fig.2)
Key to the front panel drawing:
7. CD Loading Door
8. Standby Key
9. Standby Light
10. Remote Eye
11. Display Window
12. Stop/Open
Switching On
The mains power to the CD8x should normally be left on unless left
unattended for a long period when the mains power at the wall socket should
be switched off or the product disconnected from the AC supply.
When power is applied, the STANDBY key h is used for power control. The
Standby light i shows red when the CD8x is in Standby and green when
operational.
Loading a Disc
Press the STOP/OPEN key 1@ to open the CD tray. Place a CD in the tray
with the label side upward. Press the STOP/OPEN key 1@ again. The CD tray
will load into the player. The CD8x display will show 'Reading' while checking
the contents of the disc.
Playing a Disc
Press the PLAY/PAUSE key 1* on the front panel. Playback will commence
from track 1 unless otherwise selected.
Pausing
Press the PLAY/PAUSE key 1* to pause the current track. The disc will be
held at the precise point of interruption and the PAUSE symbol will show on
the display. Press the PLAY/PAUSE key 1* again to resume playing the disc.
Fast Forward/Reverse
The SEARCH FORWARD 1$ and SEARCH REVERSE 1% keys may be used
to locate a specific point within a track. The search will commence initially at a
slow speed increasing after a few seconds if the key is held down.
The Search keys will also search through next or previous tracks if held down
long enough.
Previous/Next Track Selection
Pressing the NEXT 1^ or PREVIOUS 1& keys allow you to change forward or
backward through the tracks on the CD. Track indications appear on the
display.
Repeat
The REPEAT key 1# can be used to replay the entire disc or programmed
tracks.
When REPEAT is selected, its symbol shows on the display. Press the key a
second time to clear Repeat.
If a program selection has been stored, the REPEAT key 1# will allow
continuous play of this program sequence.
Stop/Open Key
When a disc is playing, press the STOP/OPEN Key 1@ to stop the disc
immediately.
If the disc is already stationary, one touch of the STOP/OPEN key 1@ will open
the tray.
User Instructions
13.
Repeat
14.
Search Forward
15.
Search Reverse
16.
Next Track
17.
Previous Track
18.
Play/Pause
GB
GB
