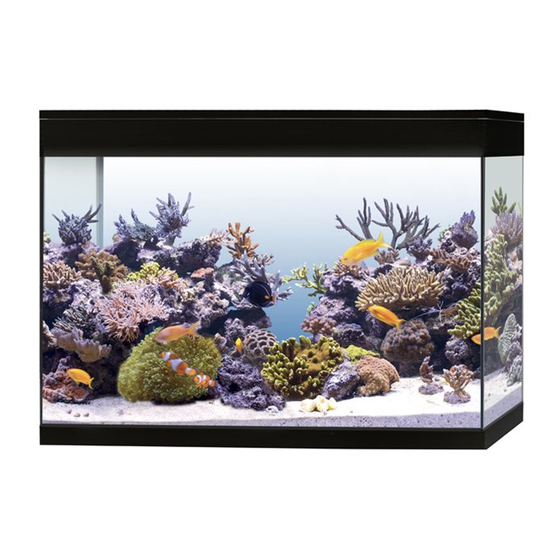
Askoll PURE XL HC LED Manual de instrucciones - Página 7
Navegue en línea o descargue pdf Manual de instrucciones para Acuarios Askoll PURE XL HC LED. Askoll PURE XL HC LED 14 páginas. Marine aquarium kit
También para Askoll PURE XL HC LED: Manual de instrucciones (14 páginas)

PURE Aquarium KIT
4.3. Assembly
CAUTION
To prevent the risk of scratching the product: clean
it exclusively using a soft cloth moistened with water.
Do not use abrasive products, toxic substances or de-
tergents.
1) Clean the tank with a cloth moistened with water (fig. 6).
2) Install the thermal heater with its provided bracket (fig. 7). IM-
PORTANT: For proper installation, make sure the adjustment
knob is below the bottom edge of the decorative trim. Place
the thermal heater in the aquarium and press its suction caps
against the wall so that they adhere. Set the desired water tem-
perature using the adjustment knob referred to the graduated
scale in °C (fig. 8).
3) Restore the frame to the tank.
4) Unwind the thermal heater cable and route it out of the tank via
the pump compartment (fig. 9).
5) Restore the pump in its compartment, tidy away the thermal
heater power cable (fig. 10).
6) Pick the baskets for the mechanical filtration sponges. Take out
the sponges, rinse them under running water and replace them
in the baskets (fig. 11).
7) Pick the biological baskets with their cover (fig. 12).
8) Take the ceramic cylinders, one CARBON cartridge and one
ZEO cartridge.
9) On a washbasin, open the bags containing the ceramic cylin-
ders, then pour them into the biological baskets and rinse them
under running water; rinse also the CARBON and ZEO cartridg-
es after having extracted them from the bag (fig. 13).
10) Reposition the biological baskets, the basket for the mechanical
filtration sponges, and the CARBON and ZEO cartridges in the
proper frame spaces (fig. 14).
11) Dispose of the plastic bags in observance of local regulations.
12) Restore the light cover to the frame after removing the sticker
securing its power cable (fig. 15).
13) Route the power cables for the three electrical devices (lighting
unit, pump unit and thermal heater) out of the tank through the
fairlead seat (fig. 16).
14) Restore the filter cover to the frame and hook up the lighting unit
to the led driver with its connector (fig. 17).
15) Gather all cables into the provided cable guide (fig. 18).
4.4. Installation
WARNING
Do not connect the electric devices of the product to
the mains before having completed the installation. Do
not use the thermal heater and the pump dry.
After installation, do not move the product.
If necessary, move it only if the tank is completely
empty.
8
CAUTION
When choosing the suitable setup for your aquarium, follow the
advice of a qualified retailer.
Make sure that the equipment material or any other
objects present in the tank do not obstruct the inlet
grids placed at the lower end of the intake tube.
Do not lean any heavy objects on the intake tube.
After installation, check the correct water level.
1) Open the light cover and slowly fill the tank with water until it
reaches a level included between the min. and max. levels, as
shown on the label inside the tank (fig. 19).
2) Close the light cover and check the tank for leaks.
5. STARTING UP THE SYSTEM
5.1. Routine operation
WARNING
To avoid electric risk, each power cable of the electric
devices has to show a drip loop positioned lower than
the plug-outlet connection point in order to prevent any
drop from reaching such point.
1) Read the warnings in Chap. 1.
2) After having connected the plug of each electric device verify the
(in case of malfunction refer to chap. 7
operation of the same (in case of malfunction refer to
• Water should flow out of the delivery.
• The warning light of the thermal heater should turn on if the
water temperature is lower than the setpoint.
• The programming timer should be on, with its two first digits
flashing.
5.1.1. Programming the timer and lighting system
PURE XL HC
MARINE aquariums are equipped with an integrat-
LED
ed digital electronic timer that controls the switching-on sequence of
the white, red and blue LEDs that make up the lighting unit. Thanks
to a simple interface (fig. 20), the timer allows performing several
functions:
•
Light on / off in manual mode.
•
Light on / off in automatic mode, at set times.
•
Managing the Rolling Filtration Timer (RFT), the system that
every 15 days reminds the user to replace the CARBON and
ZEO cartridges to keep the aquarium under ideal conditions.
The timer has three touch sensitive buttons, 4 status icons and 4
digital digits. If you set automatic light on/off times, the unit runs a
daily cycle with the following steps:
1) Switching-on of the blue actinic light 2 hours before the switch-
ing-ON time set by the user, with a progressive raising of the
light intensity for about 30 minutes (only the blue LEDs are on).
chap. 7): ):
